Hon Hon Hon - Call me Nab, Atelier was my father

Hello there.

I was dusting my website, and listing what’s missing on it, quite a lot, and I thought, hey, I could show some stuff here.

For the start, I’ll probably double ou triple post to make stuff a bit more clear, don’t hate me for this :upside_down_face:

How I arrived there

So, a recap, I studied architecture, bachelor in France, then master in Germany, part of an international group of student travelling in various countries for 6-weeks workshop.
After my thesis, I came home in France, knowing already I didn’t want to practice.
And I switched to graphic designer.
Long story short, I worked with startups, sold craftbeers for a while, all while designing flyers (uggh) and business cards (double ugghhh)
Late 2016, a friend got me a gig at teaching Sketchup to unemployed people looking to get a job in architectural design. And in 2020, due to some stuff, it kinda became my main job.

The problem when you teach SU is that you’ll spend days and weeks on it and design nothing. I like to design stuff, I don’t really care about renderings, designing is my jam. but after a long day of teaching how to make a cylinder and place a couch, I’m done.

In addition, I do small 3d jobs for architects and other companies, and they come with strict NDAs. I can’t show stuff until they greenlight it, after it’s complete.

So I ended up at a point where I was spending A LOT of time on SU with NOTHING to show to any prospect. And I started taking time to design stuff for the sake of modelling.


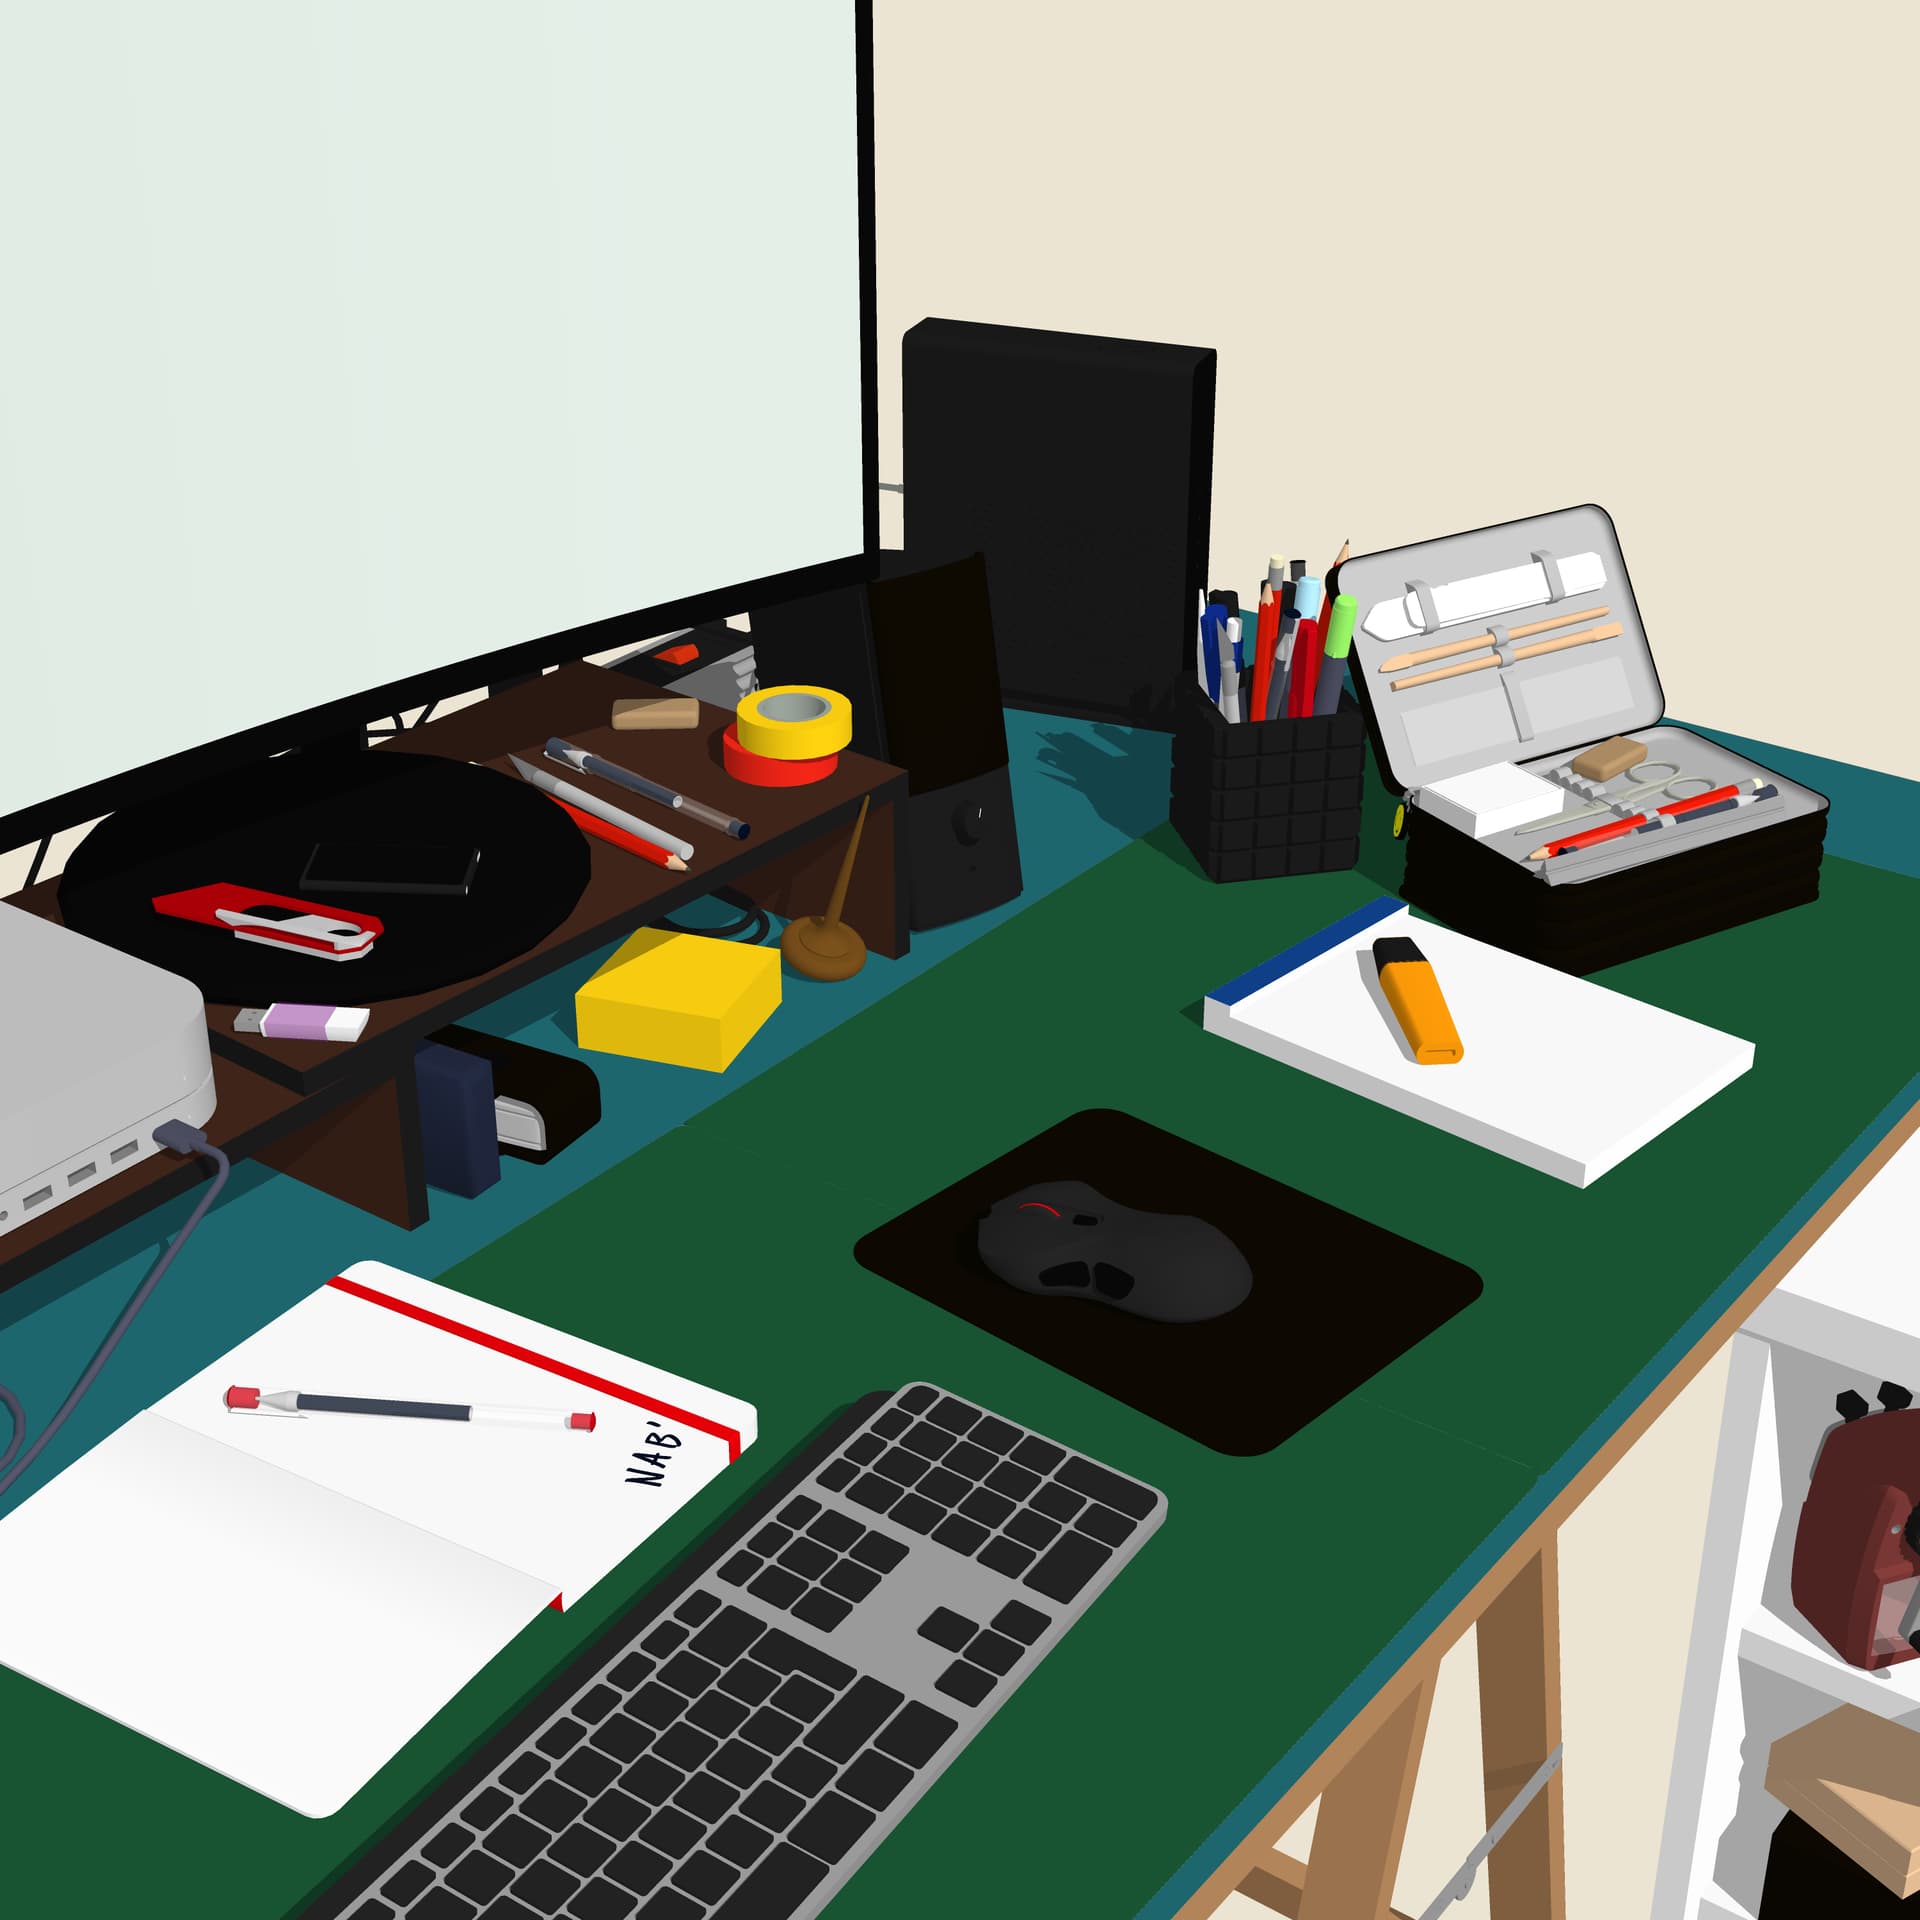
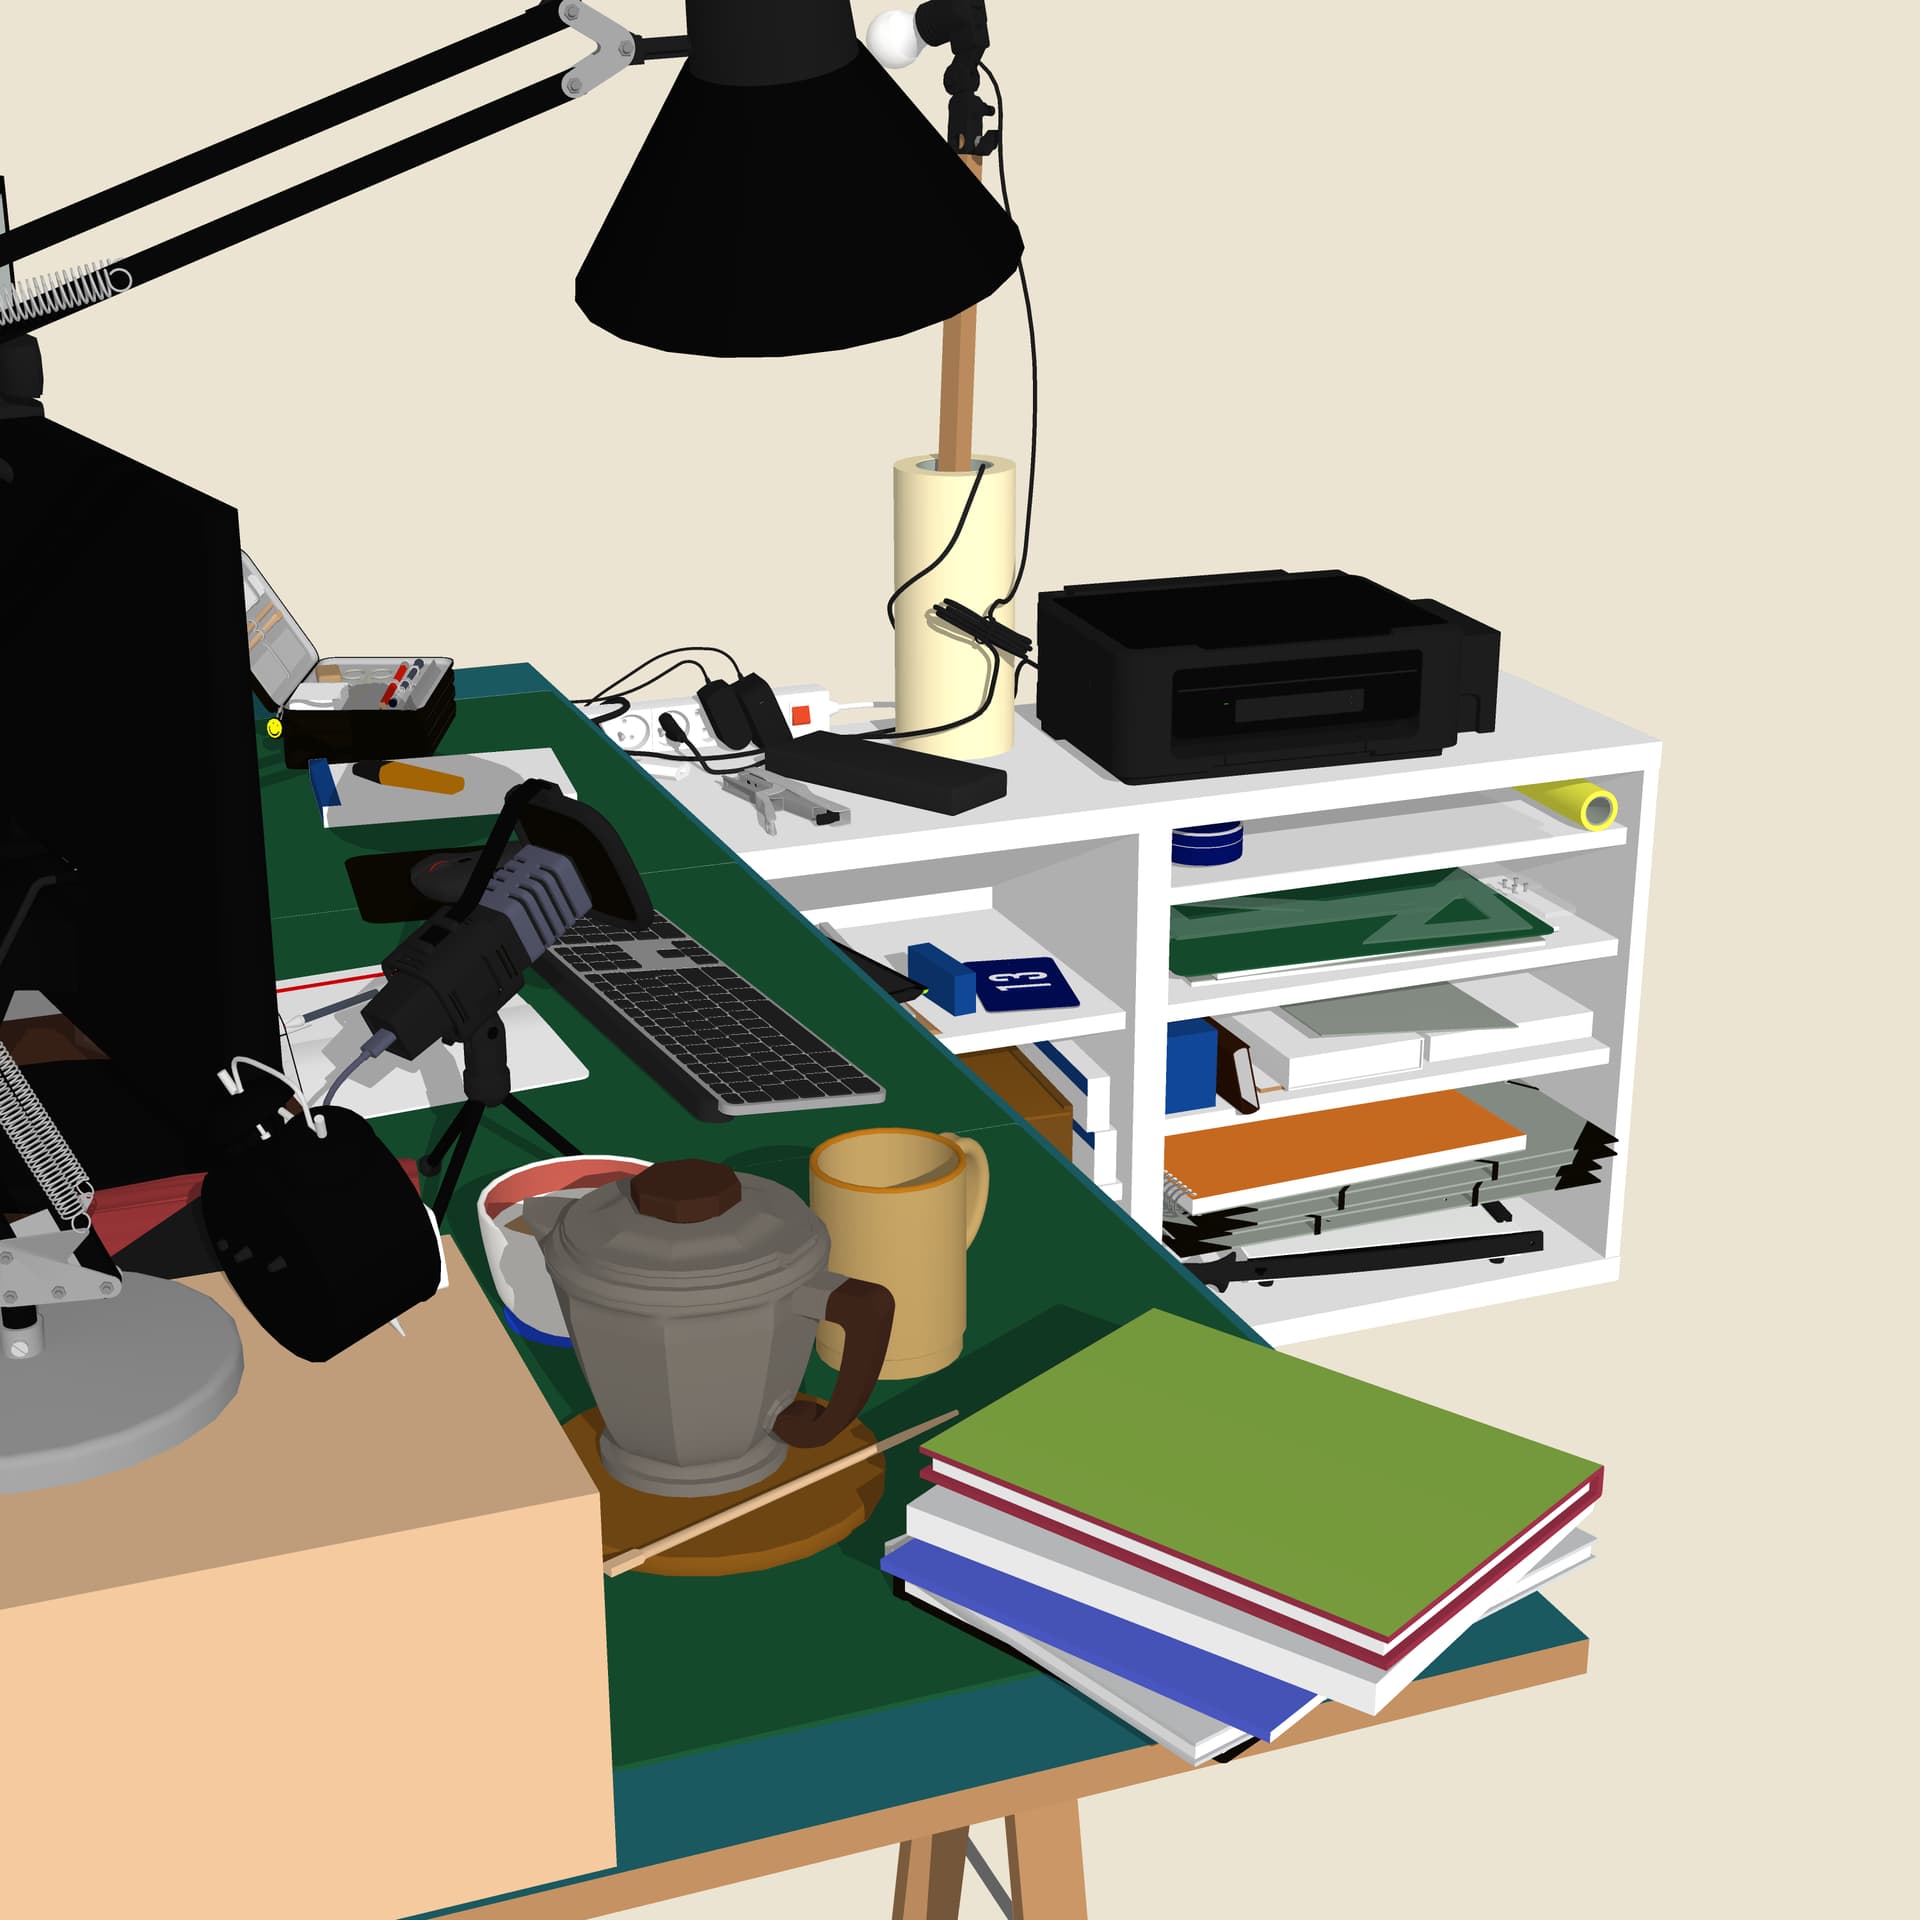
Summer of 2020, I started modelling my desk. It was a self-imposed challenge, model stuff close to reality, nothing from the warehouse.
Again, I don’t really care for renderings, I like a clean 3d, flat colours, shadows. It’s often hard to get the right colour for wood, but still, it’s a style I really like to work with.

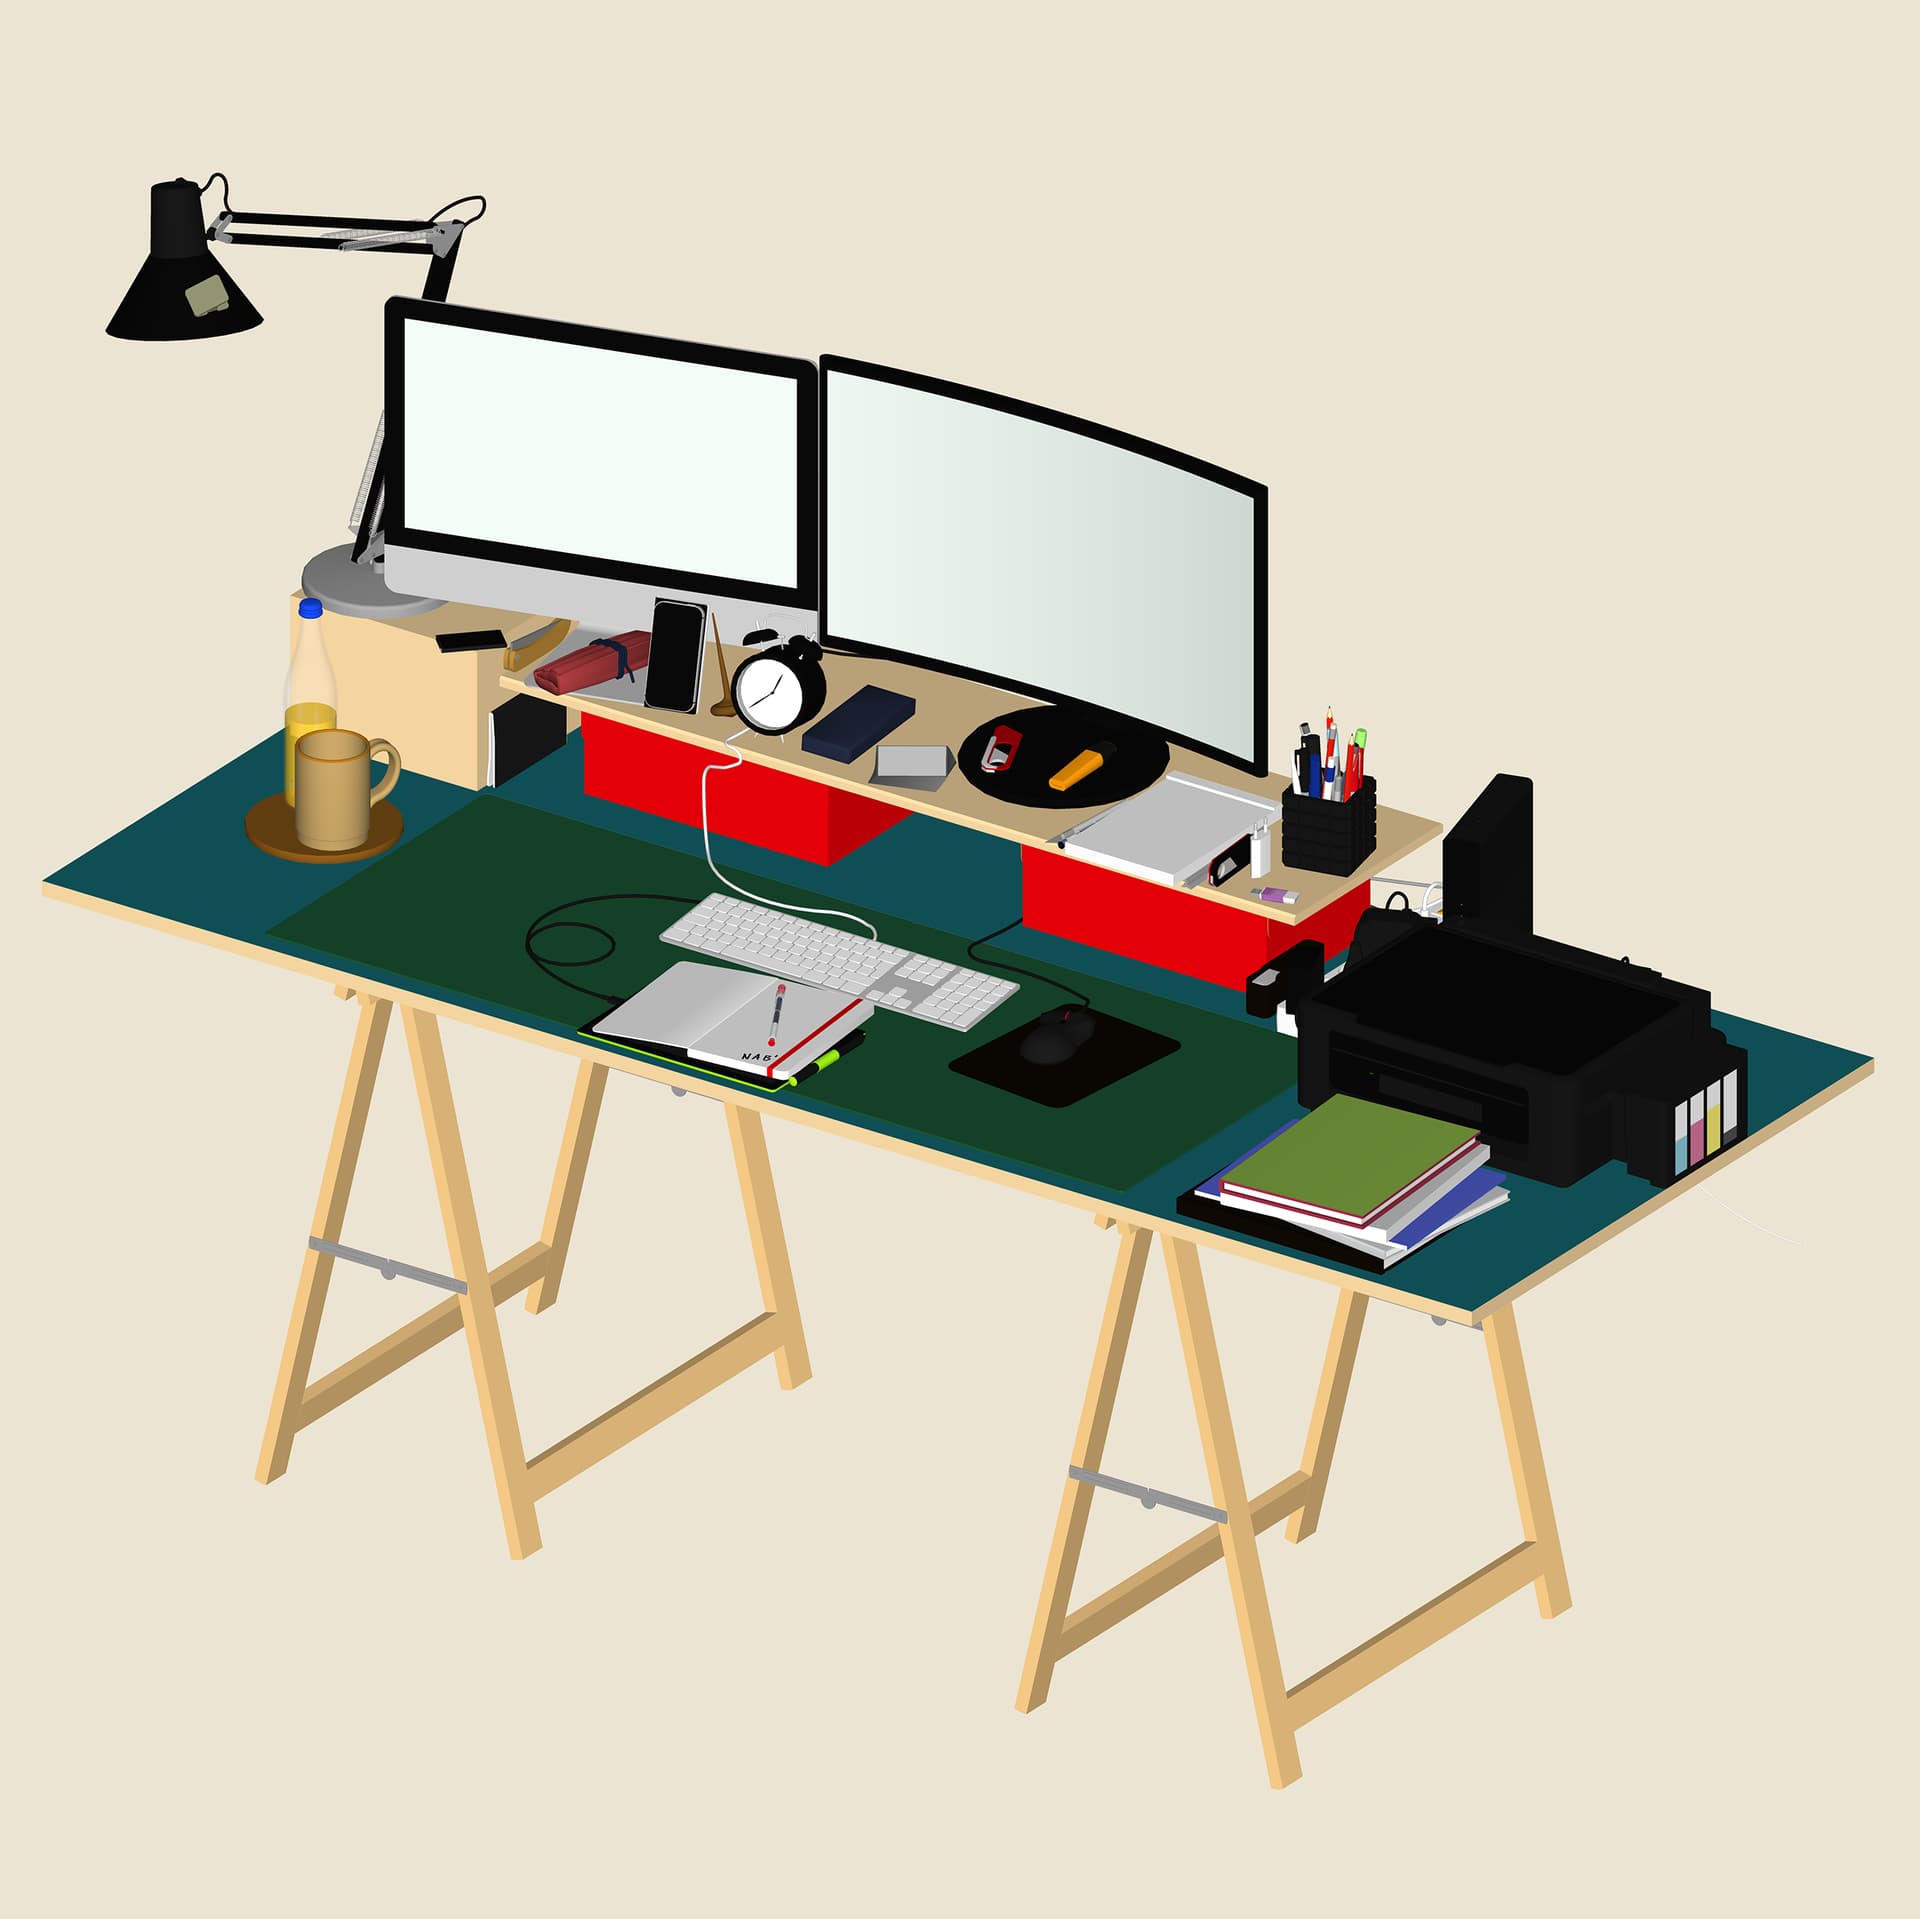
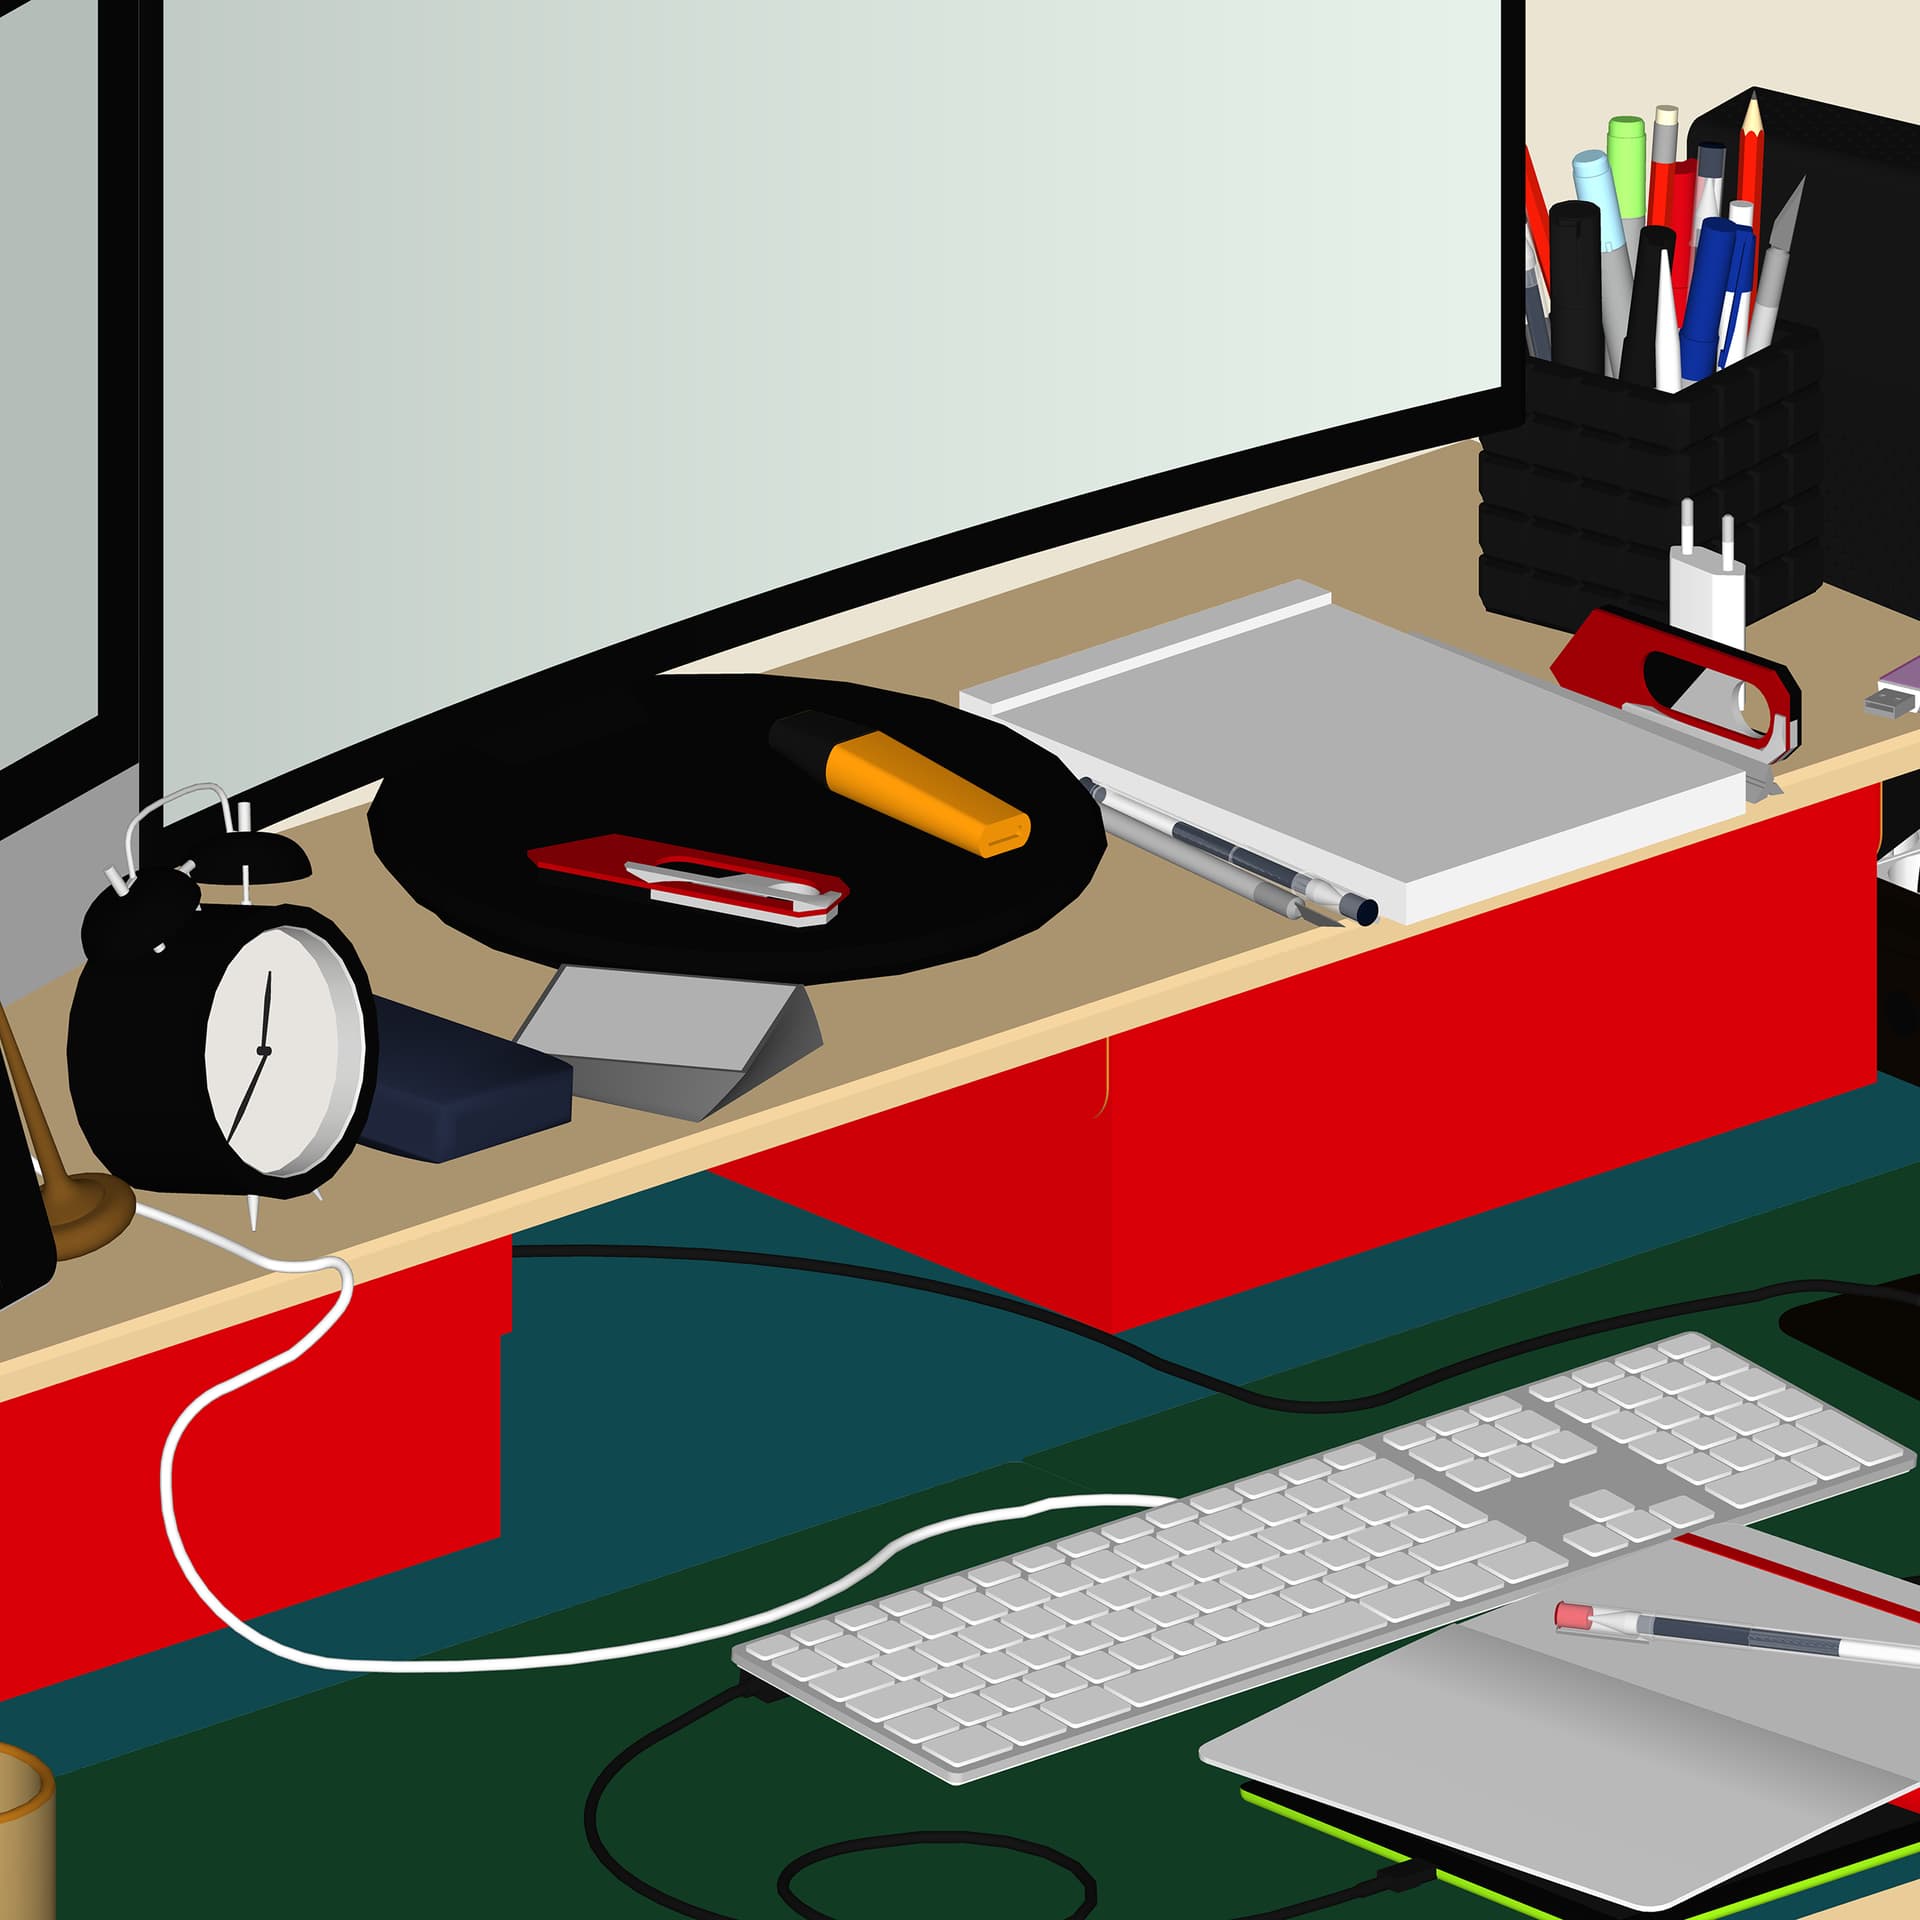
At this point, I had been using a vanilla SU for 4 years, when you teach beginners, you need to who the basic tools before the funky extensions. Doing this allowed me to get back in the game, and design fun stuff like springs, cables and a mouse that I hand stitched myself at 4 in the morning (plus some shameful sandboxing)

In class, I’ve been using this file a lot, to illustrate that you can often use a colour instead of a super heavy photo, to illustrate the idea of decomposing a complex object into simple parts (the pen is mostly… tubes), and the fact that you don’t have to be super detailed when working small scale, the spring is actually based on a square.

And so the mouse it made… with native tools. no curviloft, no tools on surface, nothing. it’s a mix of drawing over a photo, follow me, hand stitching hand made curves.

and I made a 360 video at the end.

You can check the file on the 3d warehouse. Components will have french names, sometimes misspelled, not always logical, same goes for the colours. Again, I didn’t make it for others, just for me. I only shared it recently.

14 Likes

that was 2020.

in 2021 I bought a flat and moved there. just before that, I sold the imac for a mac mini, stuff changed on my desk. late 2021 I thought “hey, I should maybe update this”

This time, due to life, work and other things, I took me a lot more time. 2 hours there, one here. If you check the SU file on the warehouse, you’ll see differences of detail level between object. some cables are 6 sided, some are 12. I don’t really care :slight_smile:

As you can see, changes on the desk, the club mate left for a vintage art deco teapot , the mac mini arrived with its load of extra gear, and since I extended my desk with a secondary cupboard well… I had to add all the boxes and stuff inside.

Also, I changed my default style. I find working in light blue more relaxing :slight_smile:

Since then stuff changed again. I now have a sitting / standing desk, my old iPhone died, and I’ll admit, I spent SO MUCH TIME on the first mouse that when I upgraded to a MX Master 2 I didn’t have the courage to remodel it.

Here again, a video

And you can find the file on the warehouse. I also uploaded some of the cool components, at first as a demo (in class) of the “good practice of sharing your work”, then I scrapped it all and redid it clean :slight_smile:

10 Likes

After the first iteration of the desk, I did a quick job for some friends.

Back then, I was living on the 5th floor of a building, and on the 2nd floor was a coworking / coliving (a coworking with bedrooms for medium term stay)

Someone had gotten a (poor) scan of the plans and re-made them in illustrator for the fire-escape plans, and asked if I could make a quick 3d perspective plan for the website.

Turns out the dxf I took and scaled was a nightmare, nothing is parallel, the guy botched his tracing.

Capture d’écran 2023-03-25 à 00.43.03

I took many things from the 3d warehouse, and handmade others. Same treatment here, colours not materials, although I later did a shorter version (cut in half) with materials for my classes. I use it to teach Layout, it fits at 1:50 on an A3.

Fun thing is, the guy in charge of the website left before it was finished, and the new team didn’t care. But hey, it got me a couple month of free coworking.

I never actually finished it. no decorations, no computers, the project was supposed to be a plan, when it was scrapped, I said à quoi bon

Here again, a video. as you can say, I’m not Kubrik.

So this started as a favour, got scrapped, became teaching material. When teaching Layout, in theory, the students have some files at hand they’ve been working on. In reallity, one won’t have saved their scenes the day prior, another didn’t bother using materials, or putting a section, or a funky style. It’s always good to have a backup file at hand.

5 Likes

Last thing for tonight is… furniture.

Couple of years ago, I tried to work with a furniture designer and ébéniste - french for “woodworker that makes good looking furnitures”

As a proof of level, I quickly did some 3d from photos. I wanted him to understand that no matter how bad his sketches were gonna be, I could still extrapolate stuff to work with.

Most of them are from photos on reddit or boredpanda.

Capture d’écran 2023-03-25 à 00.52.43

He showed the 3ds to his girlfriend who said “hey, this is sketchup, I did some as a student, I think I could go back to that and do it for free for you” (I wasn’t there, but hey)

And he ended up not working with me. when life gives you lemons, eat them. don’t try to capitalise on them, just eat them.

I have a dozen other photos I could model, I should get back to it, make one from time to time, as a way to “stretch” my brain :slight_smile: . plus it’s quite quick, not a month long project. Also, even though I like my flat colour style, that’s a lot of wood, I need to add materials.


Finally, this one. a friend wanted to make a small table/shelf/thing for her record player. She did some sketches, I made a really nice 3d. then she realised she had no tools and no experience, and the finger-jointed angle was gonna be a nightmare. and we made simpler plans. based on glue + screws.

Parts of the record player and the marshall amp are from the warehouse. And yes, there is a video. why ?


Next (tomorrow) will be more on the artistic side of things. I work with paper, and use SU to do so.

13 Likes

Great stuff!

That’s truly remarkable!

I also taught SketchUp for about 6 years to high school students (age 14-18) until COVID put an end to it. Yes, strictly native tools with beginners, and although I’ve used a Wacom tablet instead of a mouse for 30 years, I bought a mouse for teaching because that’s what the students were working with.

1 Like

thanks :slight_smile: it’s the result of a long evening of stubbornness and club mate. I like maths puzzles, and in a way, a complex model is nothing more than a 3d math puzzle.

yeah, that’s something you don’t necessary think about when you start teaching, these days, I mostly teach on my PC - and use the mac only when remote with more advanced users, that’s where my extensions are.
on the PC, I pretty much revert to a clean install every time, I teach 3-5 days courses to adults, either to get more skills or apply to a new job, and we mostly start from scratch.
In fact, I also pretty much stopped using shortcuts because of that. people NEED to see me click on tools, this is a regular problem in youtube tutorials where the modeler will abuse shortcuts and the viewers won’t understand what happened.

By the time we arrive at the extensions and a more advanced level, I have to let them fly from the nest.

3 Likes

Ok, this one is for fun.

In the previous messages, you may have noticed I like to do 360 videos. but how ?
now I’m sure someone will come forth with an extension. but I did it in a cave, with a box of scraps with vanilla tools.

what is a 360 ?
either the object rotating, and a fixed camera
or a fixed object, and a rotating camera.

So I planned a set of scenes. I drew a circle on the ground, and placed each camera / scene on one of the extremities. but first try was woobly, camera moved up and down a little.

so I drew a cross in 3d right in the middle of the circle. Then, I put the modelling space full screen (since I’m on a mac it’s easy), and taped two threads on my screen to find the middle. It was then just a matter of aligning the camera on every scene to the cross matched the thread. yeah yeah, it’s ghetto, again, someone will say there is a tool for that, it was 2020, during a heatwave, late a night, get off my back :slight_smile:

it ain’t stupid if it works.
also, I set up shadows incrementally, it goes from 10:10 to 18:10 and back to 10:10, so it moves, and moves back. I first tried to go with a fixed hour and move 2 weeks between scenes, but the shadows were going from vertical to pretty flat. At least here it goes from diagonal to vertical to diagonal again. feel free to experiment.

If you want to try it, it’s simple :

  • open the file, and import your project
  • rotate / scale it so it fits around the cross. check its size and rotation on the different scenes for optimal presentation
  • edit animation style as needed
  • set your animation parameters (model info)
  • export.
    When I export I like to do 60fps 1080 videos, the longer the delay between scenes, the longer the video. And it loops perfectly, including shadows.

animation.skp (422,0 Ko)

1 Like

so, a couple of days ago, I was bored, so I did a thing.

and then, I thought "hey, I haven’t touched Twinmotion in a while, I should work a bit on it, so I don’t loose my footing. finally, a bit of photoshop, contrast and stuff. althoug the actual icon is slightly more blueish when you look closely… but I like mine a bit more neutral

so, there it is. and yes, I had to tweak the altitude and depth of things to get the shadows as right as possible .
(for those wondering, it’s the preference app icon on macos, ios and ipados.)

The same thing on instagram

8 Likes

Ok, @Cotty 's last post made me realise I still haven’t shown the other thing I do using SU.

tl;dr

when I’m not OK, I find that making stuff with my hands helps a lot. few years ago I lost 3 people in a short time, and I started making animal heads in paper. later moved to geometrical art, because I like geometry. Considering the last 3 years and what has been going on, I’ve never really stopped. I’ve sold a few, given other to friends and family, and I have kept some around the flat. but it’s not a business (yet at least). it’s art therapy of sorts.

So it starts in sketch, in my sketchbook, doodles, ideas, stuff I’ve seen, and It stays here for some time. Then, slowly, it becomes like an itch on my brain, and I know I need to start working on it.

from there I make a 3d model in SU. At times, I used various methods to unfold, an extension (unfolder), a software (pepakura), and it’s good for complex models. But at some point, unfolding by hand is good too. I don’t care about efficiency, it’s a hobby, a therapeutical one, spending an hour unfolding stuff is part of the game. (in a related matted, I enjoy detouring stuff in photoshop. turn off the brain, and just… clean stuff)

I try simple geometry, “almost flat but not completely” stuff, Hitomezashi diagrams, and recently I’ve finally tried curves… Thing with paper is, it’s supple. you can bend it from a flat surface to a complex curve.

a quick detour to illustrator to join lines and give some colours, and then off to the cameo silhouette. At some point I had a laser cutter on hand, and I did a few by hand, but I’m done

And voilà.
Here are a few examples, the most recent ones, I’ll add the links to the instagram posts with extra photos and older stuff.


inspired by Olaffur Eliasson’s work - without knowing. I used a bucket of dices to set the randomness of it


a Hitomezashi diptych, google “hitomezashi numberphile” to learn how to, it’s really simple and quite enjoyable. plus you can colour it afterward.


White studies , trying curved stuff and delicate patterns, white on white wasn’t very readable, so I did these using a bit of linoprint ink ink


I like hexagons , and the way this one creates a slight curve.


Previous had people say “it looks like the JWST”. so I added one row, did some mistakes, and ended up with this one. I’ll remake a cleaner one, with gold paper


Curves in SU aren’t real curves, and at times, it’s a pain in the seat, but in this case, it allows me to decompose the curve and place tabs. I’ll retry with smaller tabs to make the curve smoother, my sister say it looks like small bread.

Want to see more / older stuff ?
On instagram, you’ll find older stuff from my laser era, A giant 110x70cm pattern I did during lockdown, the simpler prototype, monochromatic penrose tiles and the very first one, Losanges. still one of my favourite

10 Likes

Very nice work.

Personally, I love seeing process, not just the end product. Those kinds of scribbles are sometimes just as interesting.

3 Likes

Reminds me of the Giant’s Causeway.

1 Like

yeah, a bit. hexagons are fun to play with, because just like squares, you can pave a plan with them, but they give you more flexibility. and it interlocks way better.

Originally It’s based on a photo I’ve had for the past 15 years (probably first year, art class, in 2007) or Soil quasi Bricks. I really liked how it looks like the hexagons are tilted, yet their bases are still hexagon.

sure, here are some, I doodle a lot on post-its and random paper when I’m on the phone or in class, and I don’t keep these. It’s more about grasping the shape and idea firmly in your mind, so that when you start, you’re quite familiar with it.

The last one, with the red curves, that look like brötchen

take this one. it started from this illustration
Capture d’écran 2023-04-22 à 11.53.02
it became this doodle, with the question of how to get the middle part flat, and it wasn’t very… I didn’t like it.

it remained that way for almost a year, coming back from time to time, until I recently adding curves everywhere, and it was time to bring it back.
reunion - 15
and from there… you have a preview of the SU file in the previous message, I started from a square, then a 2 point vertical arc that I rotated, re-made, and I hand-stitched the curves with the line tool. I know, curviloft, but curviloft isn’t the one that will later unfold and glue stuff, I am, therefore I need to do it. Then simply unfold stuff, cut, fold, glue, and it give you the last image, with the red curves.

or this one, the black and gold, inspired by Eliasson

here again, it starts from an old photo from my studies (original project on top of this message). This one I’ve carried around my head for a few years, but I only have my last sketchbook with me right now. Again, I like hexagons, and I’ll easily doodle some when I’m bored teaching remote. I give exercices, they design stuff, I watch. and doodle
Here I found this, it’s already advanced, at first I tried to keep the “top” face as hexagon as possible, on this one I has already decided to simply squish it - turns out so did Eliasson, it’s quite comforting to end up at the same solution.
reunion - 1

from there, sketchup, at first most of the faces were flat, but it wasn’t completely visually pleasing, so I tweaked stuff here and there, and ended with these volumes. Faces are almost flat but not completely, on a hard material is would have been an issue, but paper is very supple and forgiving, and the dashed lines don’t actually become fold lines, the paper will just bend.

as for the disposition, it was random. how random ? bucket of dices random, since it’s a 6 sided shape, it works. I rolled to pick where the smaller height would be, and yes, on 2-3 occasions I changed it, to avoid patterns.

finally, the "white studies", with blue ink.

Here it’s simply a pyramid. but as I said, paper is supple and accepts bending around curved fold lines. so I made a simple pyramid template, and in illustrator, replaced two opposite fold lines by arcs. If the arcs are supposed to have glue flaps, I prefer to do them in SU (the segment count gives me the flap count), if it’s just a fold line, I want a proper arc.

then it’s a matter of playing with patterns, on paper or directly with the pyramids.

reunion - 16

3 Likes

Nature is copying your work:

4 Likes

They also look a bit like my bathroom tiles. But those were supposed to be flat ;^)

1 Like

it’s like the earth. if you zoom out, it’s a round potato.

but if you zoom in really rally close, let’s say, human scale, it looks flat.
maybe it’s not your tiles that aren’t flat, maybe you’re just supposed to look at them closer :clown_face:

Like many catastrophes, this one began with me not reading the label on a bag of levelling compound closely enough :^0. I’m pretty good at transitioning pavers on uneven surfaces… but those bathroom tiles can be unforgiving. There is less shadow if I only turn on one light :^).

Even less with none!

2 Likes

Working on some old stuff.

Just a WIP, because now I’ll have to advance it from time to time and show you. Until now this was a Schrödinger’s project, both existing and not :wink:

Click here if you want to understand what you're looking at, and you like reading stuff. Man, I write a lot. and I'm limiting myself right now. :)

Back in 2013, I did my master thesis (German diploma) in Tallinn, Estonia. Transformation of the prefabricated Soviet districts of Tallinn.

prefab concrete buildings were my jam, I spent 7 month total working on them, not much on the technical aspect, it was already super well documented, but on the social aspect too.


long story short, a few month ago, a former teacher here at home gave my email to a student working on post WW2 prefab housing, so I went and dug everything I could.
At the time, I had modelled several generic units in Archicad, and exported schematic 2d plans. Alas, my Archicad file got corrupted at some point (moving from drive to drive)

And I thought "hey, I don’t have a 3D model hobby right now, what if I redid my file in SU ? and what if I then made a scene from a district I worked on, with a simple clay / monochromatic render? "
(yeah, I need better hobbies.)


So in the area I worked on, there were mainly 1-464 units, both thin and large. But I never quite liked the large ones, it’s basically the thin ones with a corridor in the middle pushing the pieces.

So I’m working on the thin one. every panel / slab is a component, that’s the way it was designed, I’m not going deep into constructive stuff, I gave my archive to the univ when I left, they needed it more than I did, just trying to keep it logical.

Right now it’s just elements of a standard floor + additional elements for the ground floor, in front you’ve got an entrance, in the back a mix of 1st and 2+ floor.
Once I’ve got most of it, I’ll assemble a full building on the side, but keep working on this group of panels for ease.
I’m not gonna do the inside, not now, I simply modelled (cubes and cylinders) the kitchen / bath since they were part of a standardised set too. I’ll probably turn them off in the final “rendering” version.

5 Likes

No update on the Plattenbau side, but I managed to remake the paper hexagon thing. Making 3d models is fun, but making them out of paper is also really cool.

One with some cute paper I got on sale JUST before the first lockdown (I was making pointier octagons back then), then fresh from the press, a version using a map. These two were about mastering the concept, what to fold where and how, and making the pattern almost continuous.

But off course, making 3 of these, I’m now thinking about small changes here and there. some of the “almost but not completely flat” faces can become a pain when assembling the final volumes.

Also, a friend (navy captain turned fireman) told me he had access to piles of old naval maps of the area around here. Lots of possibilities popping up.

9 Likes

Ok, finally a quick update, the basic plattenbau structure is basically done, off course, there were thousands of units built, many variation, it’s quite a smart system (I mean, they bought it from the french :smirk: :smirk: :fr:), you have the space for a 50m building ? fine. now you have 60m ? add 3-4 panels.

So I picked a small sample of one of the places I studied during my thesis, in Tallinn (Siili neighbourhood), I’ll build a small diorama of sorts, and render a few images.


I’m gonna make that bit. 3 buildings, 2 shorts, one long, forming an U with a park in the middle, a handful of trees, a few cars.


Basically all of the panels I need. Off course, that’s what I thought, and in the end I had to make a few extra things.

The inner walls are according to ONE specific plan I had, but as I plan to make external views, they don’t matter (only ceilings and walls will be seen)


That’s one of the small buildings, assembled.

Fun fact, during my thesis, I worked on the whole neighbourhood, plus the structural aspect, not a specific building. These buildings are not always symmetrical. The two facades can have different rhythms, and in the case of the ones I picked, they do :

B 2 2 B 2 3 2 2 B 2 2 B 2 2 3 2 B 2 2 B
3 2 E 2 B B 2 E 2 B B 2 E 2 B B 2 E 2 3

2 are small panels (2,6m), 3 are wide (3,2m), B are wide panels with a balcony, E are entrance / stairs small panels
the structure is quite simple, the two halves are actually quite independent, as long as the panel count ends up the same on both sides :slight_smile:

Finally, I spent 10 min tweaking a bit in Trimble Connect Visualizer, my default faces are blue so the model looks blueish. and really, it’s a cool tool, not as deep as vray or twinmotion (I use the latter), But I don’t think I would have made something as quick, as clean on a budget hardware in twinmotion.

4 Likes