I’m finding trying to learn the ins and outs of Sketchup Pro for my more complex projects a little frustrating.
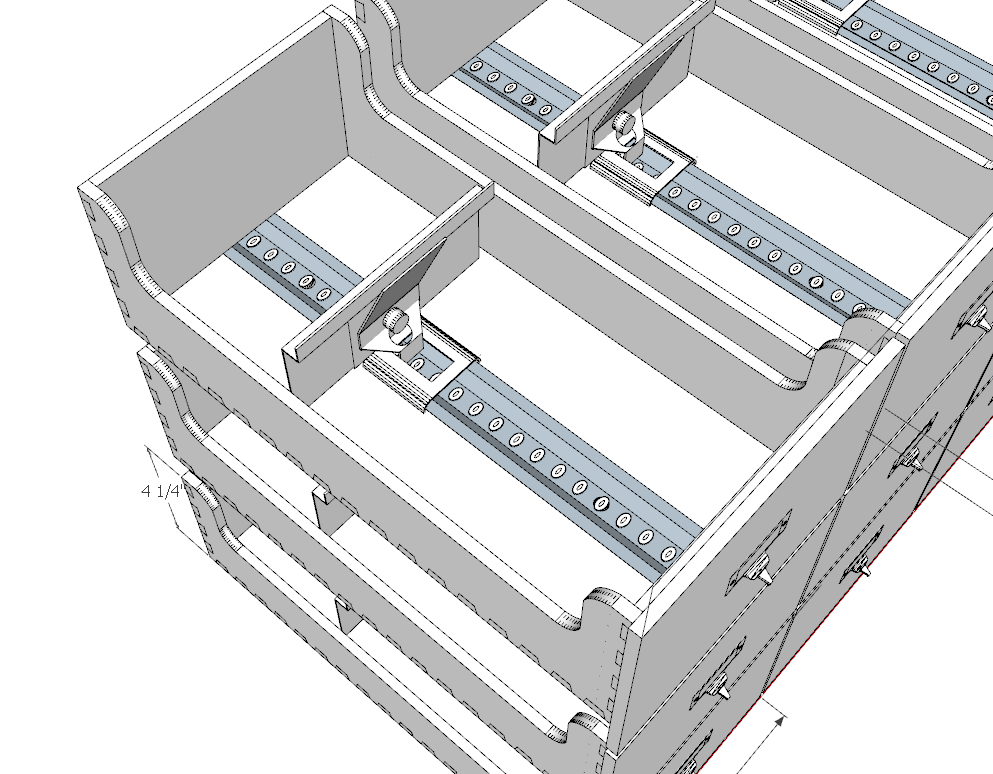
After two days, I managed to build this. It’s not perfect. (I’d really like to learn how to make the shapes I need for the card holder on the front of the box to look better. It should be more rounded on the pull. Similarly, the index card follower parts aren’t exact, as I don’t know enough about making shapes yet, and I couldn’t figure out the best way to make the “catches” on the rail in the bed. Recommendations on courses? Books?)
Anyway, I noticed when I grouped everything into one component (Zettelkasten Drawer) that there is extra space on one side of it. I don’t know why. This component is made up of other groups and components. Would it be because there’s something invisible in one of the subgroups/subcomponents?
Most likely you’ve included some hidden geometry in the group with the visible stuff. As @slbaumgartner suggests, we can help you identify the exact cause if you upload the .skp file.
Tiny little edge at the bottom front left corner of the component. Turn on Hidden geometry, open the component for editing and drag a left to right selection window around the corner of the bounding box. Then press Delete.
A few other observations about your model.
The track for the divider thingy has exposed back faces. That should be corrected.
Thank you! Any recommendations on courses/books/videos for learning? I have other questions, but don’t want to start putting up dozens of posts and maybe irritating people.
Ok. I did the purge. And that is great! Thank you.
I do not know how to find the things that are tagged which you said should not be tagged. I thought I was only tagging components. I didn’t know I even tagged groups, let alone faces or edges.
And I also cannot see the open backs you mentioned.
Can you tell me how to find/fix those things?
I’ve watched a lot of videos, but can’t seem to find something more “systematic” to teach the use of the program for woodworking generally. I watched one training course I found, but it was pretty basic, and didn’t include some of the more complex things I’m trying to do. I bought Taking Sketchup Pro to the Next Level, by Aaron Dietzen, and am part-way through that, but it also doesn’t seem to explain how to do some of what I want (like how to make that pull, for example, or any of the other hardware).
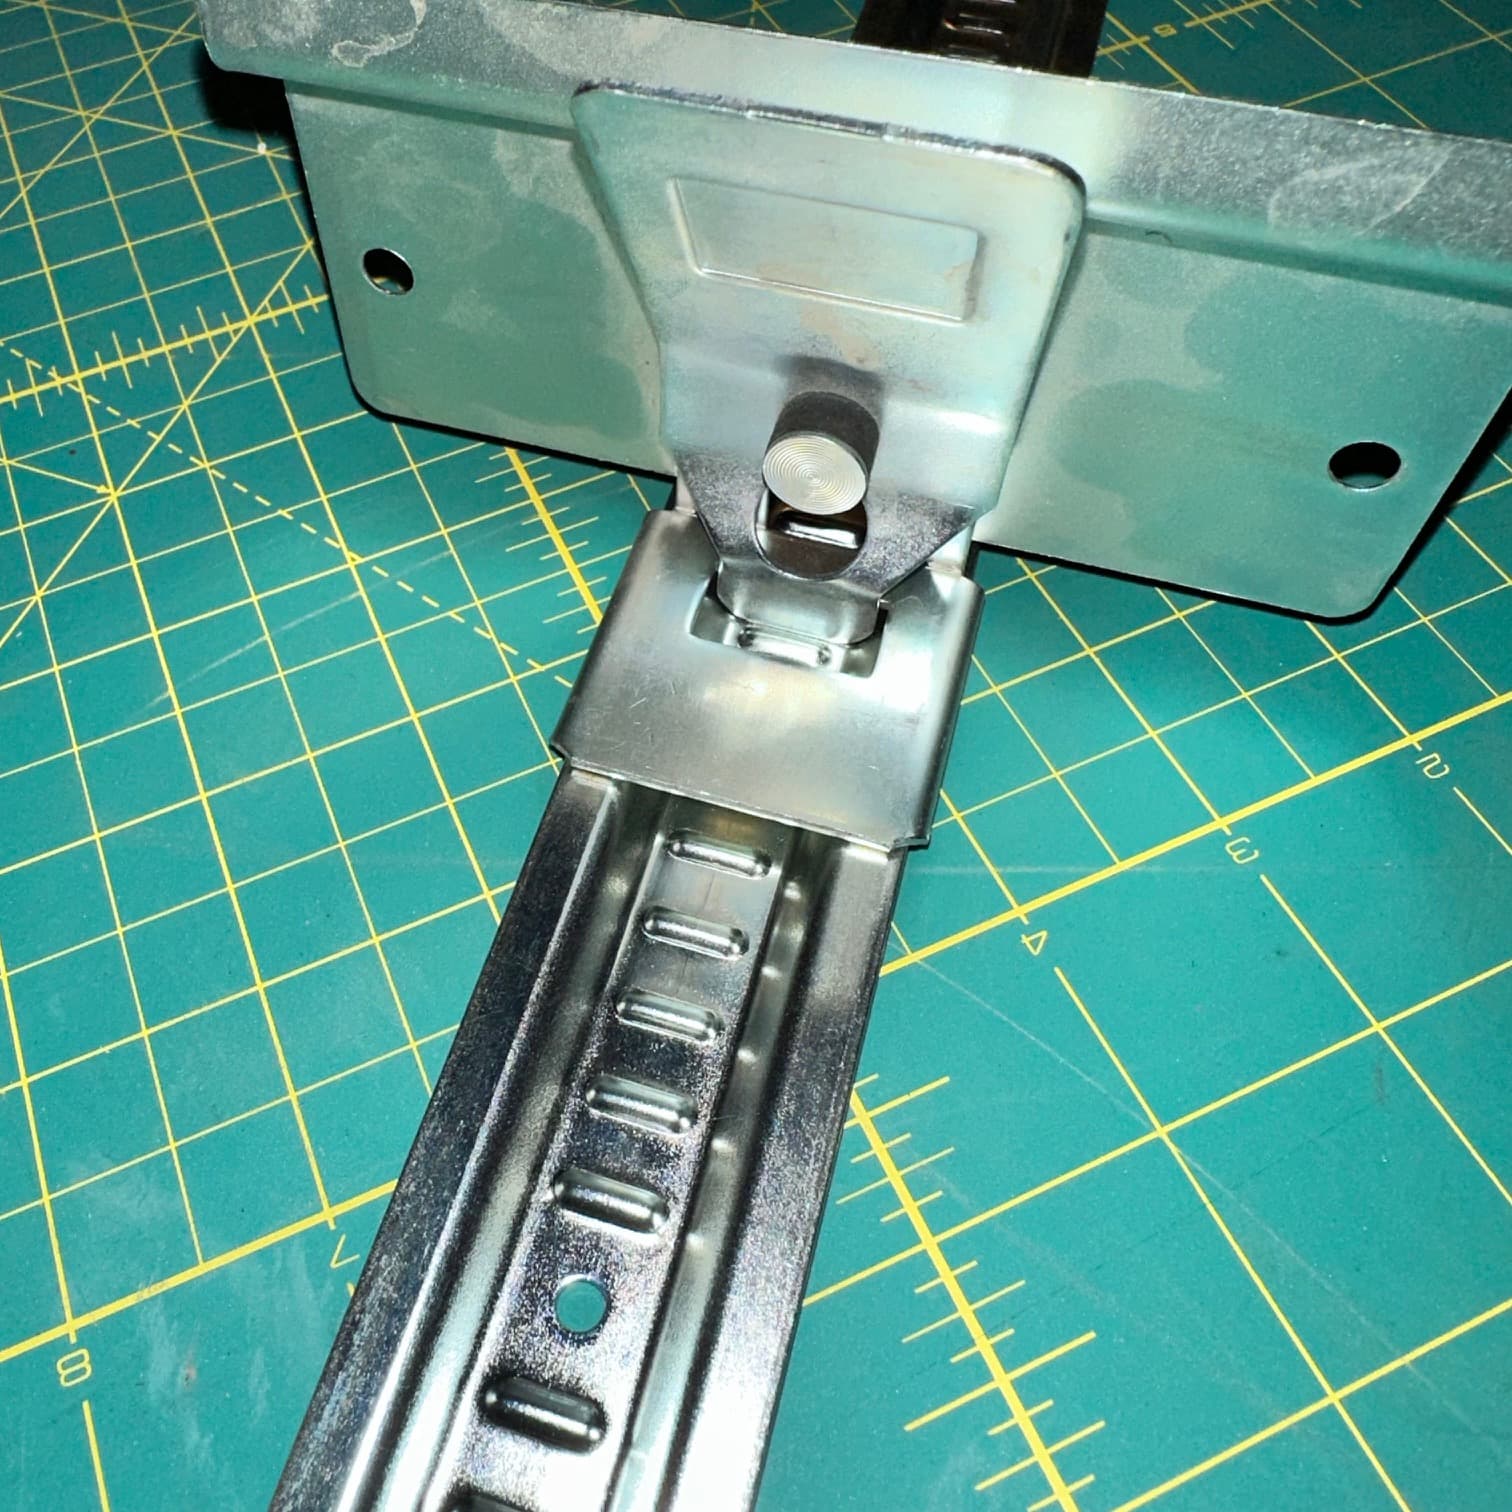
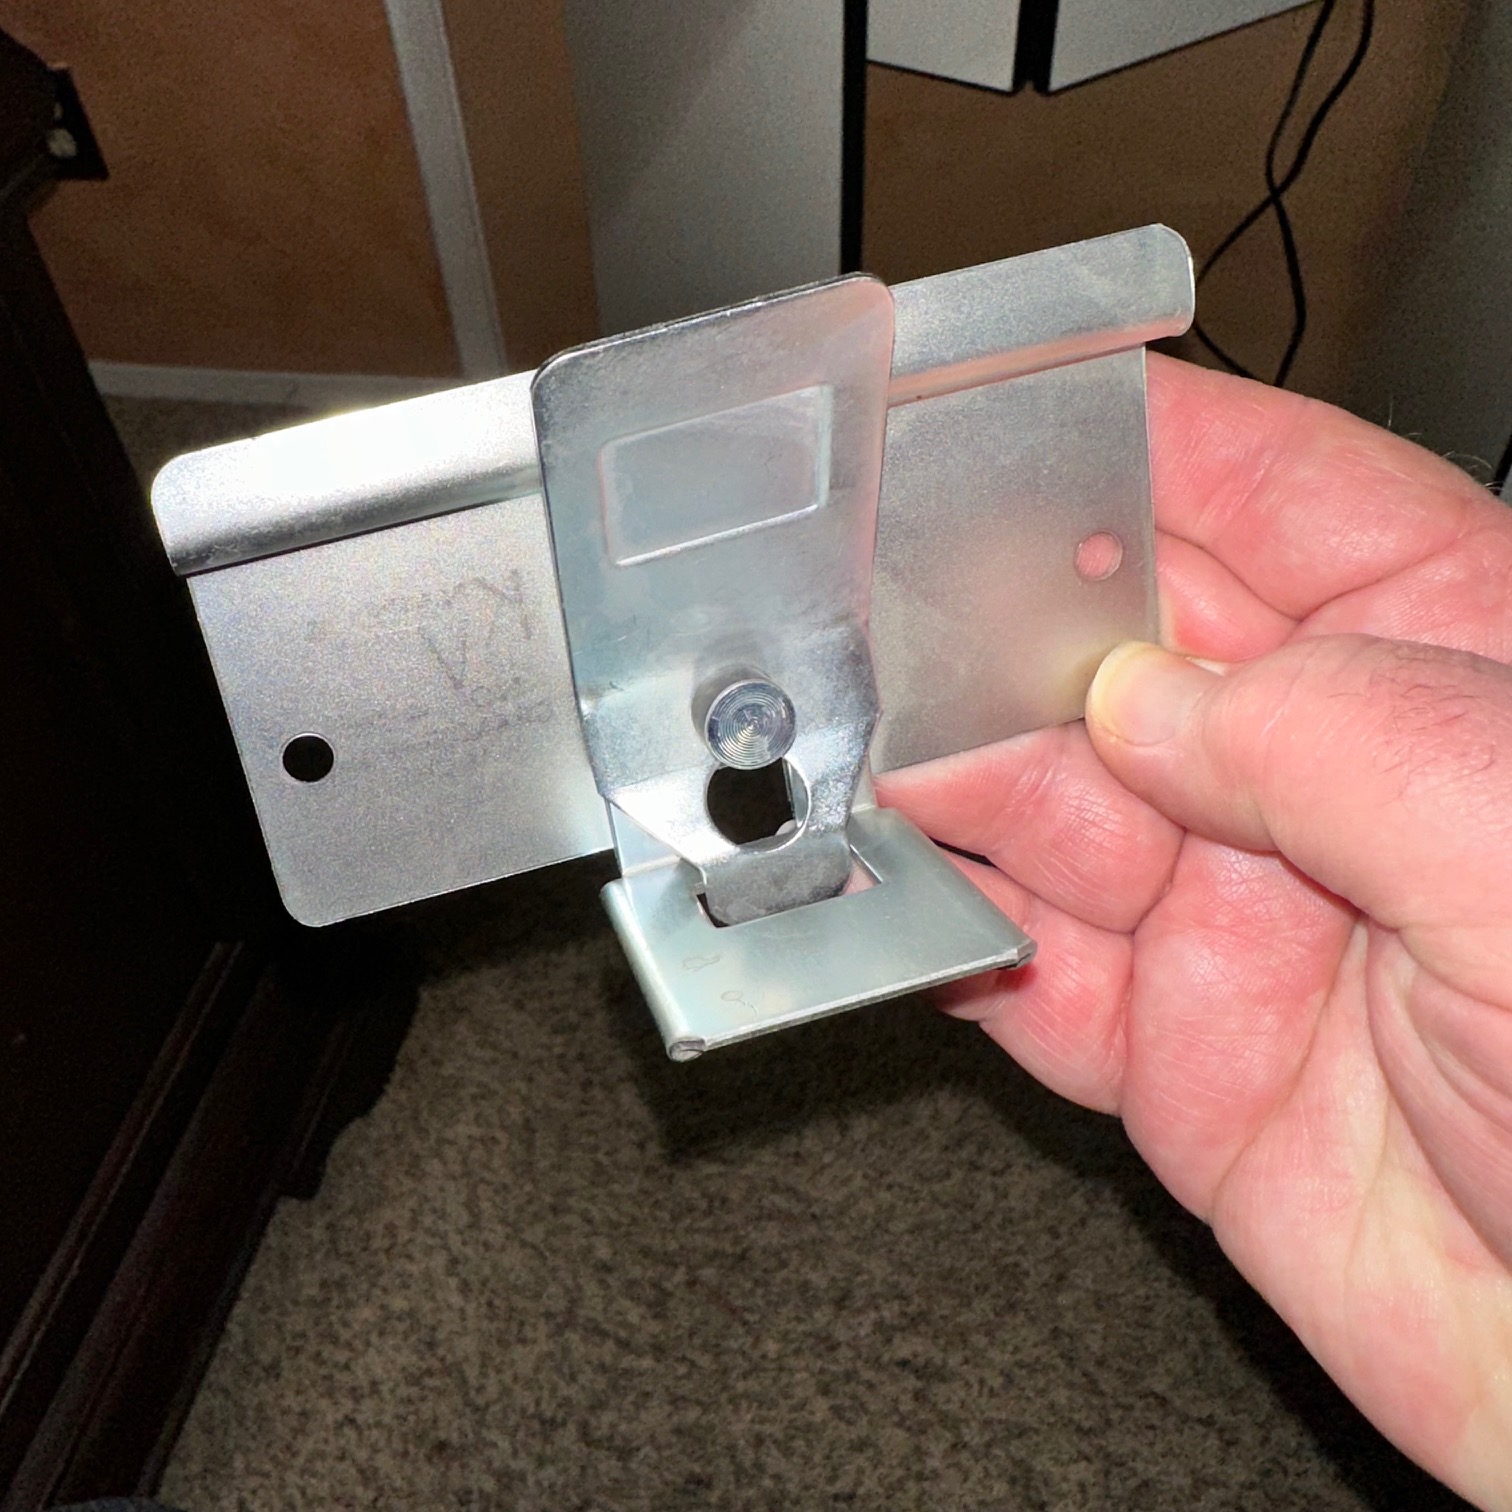
I could not figure out the right way to make the “dimples” on the track, so I fudged it. I figured it didn’t have to be perfect for me to know how to build it. But I did want the model to be as complete and accurate as possible.
I don’t know if this is the right place to put this, but I’m very confused about the axes. I’m trying to draw boards for the various sides. So I thought I should hold the right arrow key while using the rectangle to constrain to the green axis. But it appears to me that it’s drawing it underneath the box, instead of beside it. Then I thought, “well, maybe it has to be the blue, since it goes up the side,” but that puts the rectangle underneath my box.
So…this is why I’m wanting to find a comprehensive course.
Thank you for your help so far! I very much appreciate it!
How will you be using these in your model? Are you planning to build the drawers to include the hardware you have? Unless you are planning to create drawings for manufacturing the hardware I would suggest you only detail important elements like mounting holes and skip the details that won’t impact the construction. That said, you can improve the appearance of things. For example the tab on the drawer pull might be done as shown here.
In this case I drew the finger tab sticking out flat from the back plate. Then I use Radial Bending from an extension called FredoScale to bend it down.
That’s beautiful. I wish I could have done that. I’ll look for the extension you used and try to figure that out.
I’m just building this for myself, basically, I might share it with some people in the zettelkasten community who want to build their own.
But I’m just trying to learn to make things look as realistic as possible for my plans. Maybe I’m a little OCD, I don’t know. (I do know I’m ADHD, and do tend to dig very deeply into things that interest me.)
How hard was it to make that pull? I’m going to get on that right away!
I get that. I have done models that are excessively detailed although I tend to save that for models in which the detailed model is the end product. I don’t get crazy with excess detail for things like furniture plans. If you look at the link in my profile you’ll see both.
The pull isn’t really that difficult to do but it does require being reasonably knowledgeable about the tools. FredoScale is available from Sketchucation. There are other extensions that could be used with the right setup. Examples would be Shape Bender and True Bend. It might also be a good idea to use The Dave Method and work at a larger scale for the hardware although I didn’t do that here.
Still not finding those open faces, or the tagged things that shouldn’t be tagged. I guess that right now that’s above my knowledge level on how to find them.
No open faces. Reversed faces. Set the Face Style to Monochrome so you can see the faces without the materials.
I fixed the incorrectly tag edges and faces before I purged the model of unused stuff. IT may be the oncorrect tagging is actually in some unused components.
I used a plugin called Default Layer Geometry to correct the tagging. This is available from Sketchucation. I used TIG’s Purge All to purge the unused stuff from the model because it gives the report I showed. You can do the same purging without the report via Model Info>Statistics>Purge Unused.
Oh, rats. I’ll have to look at your model and see if that helps me figure things out, or maybe try to follow the procedure after obtaining the things you said you used.
I was working on my model while you and I were talking and I’ve already added some things. I went ahead and did the purge myself, and, as you said, it did come all the way down by about 90%!
EDIT: I probably need to learn more about faces. I don’t know what a reversed face is.
I bet that reversed face thingy must be because of how I built it. I drew a line in the shape of the side profile. But I couldn’t figure out how to extrude a line. So I made a copy 1mm away, and then drew lines to connect them at top and bottom, and then extruded that to the width of the object I needed.