The problems you are experiencing in placing guides are a symptom of a bigger problem with this model in general. The walls are not square, or of a uniform thickness and there are many tiny errors and random measurements in this model. This is most likely a problem that started at the very beginning of your process when laying out the shape of the walls. If the initial plan view of the walls is crooked or imprecise from the start and corners are not 90˚ then the rest of the modeling process will suffer compound errors. Typing in absolute measurements as you go and paying close attention the inferencing engine cues (red, green, intersect, etc) on screen while laying out the wall is the way to start with a square model.
When extruding into 3D one must understand how and when to use the Push/pull tool and when to use the move tool, and to use careful selecting with the move tool to avoid inadvertently moving something connected and distorting the model. This is a common cause of the kind of warping we see here, moving something connects to other raw geometry. Understanding when and how to group and make components can help compartmentalize your model and mitigate that risk.
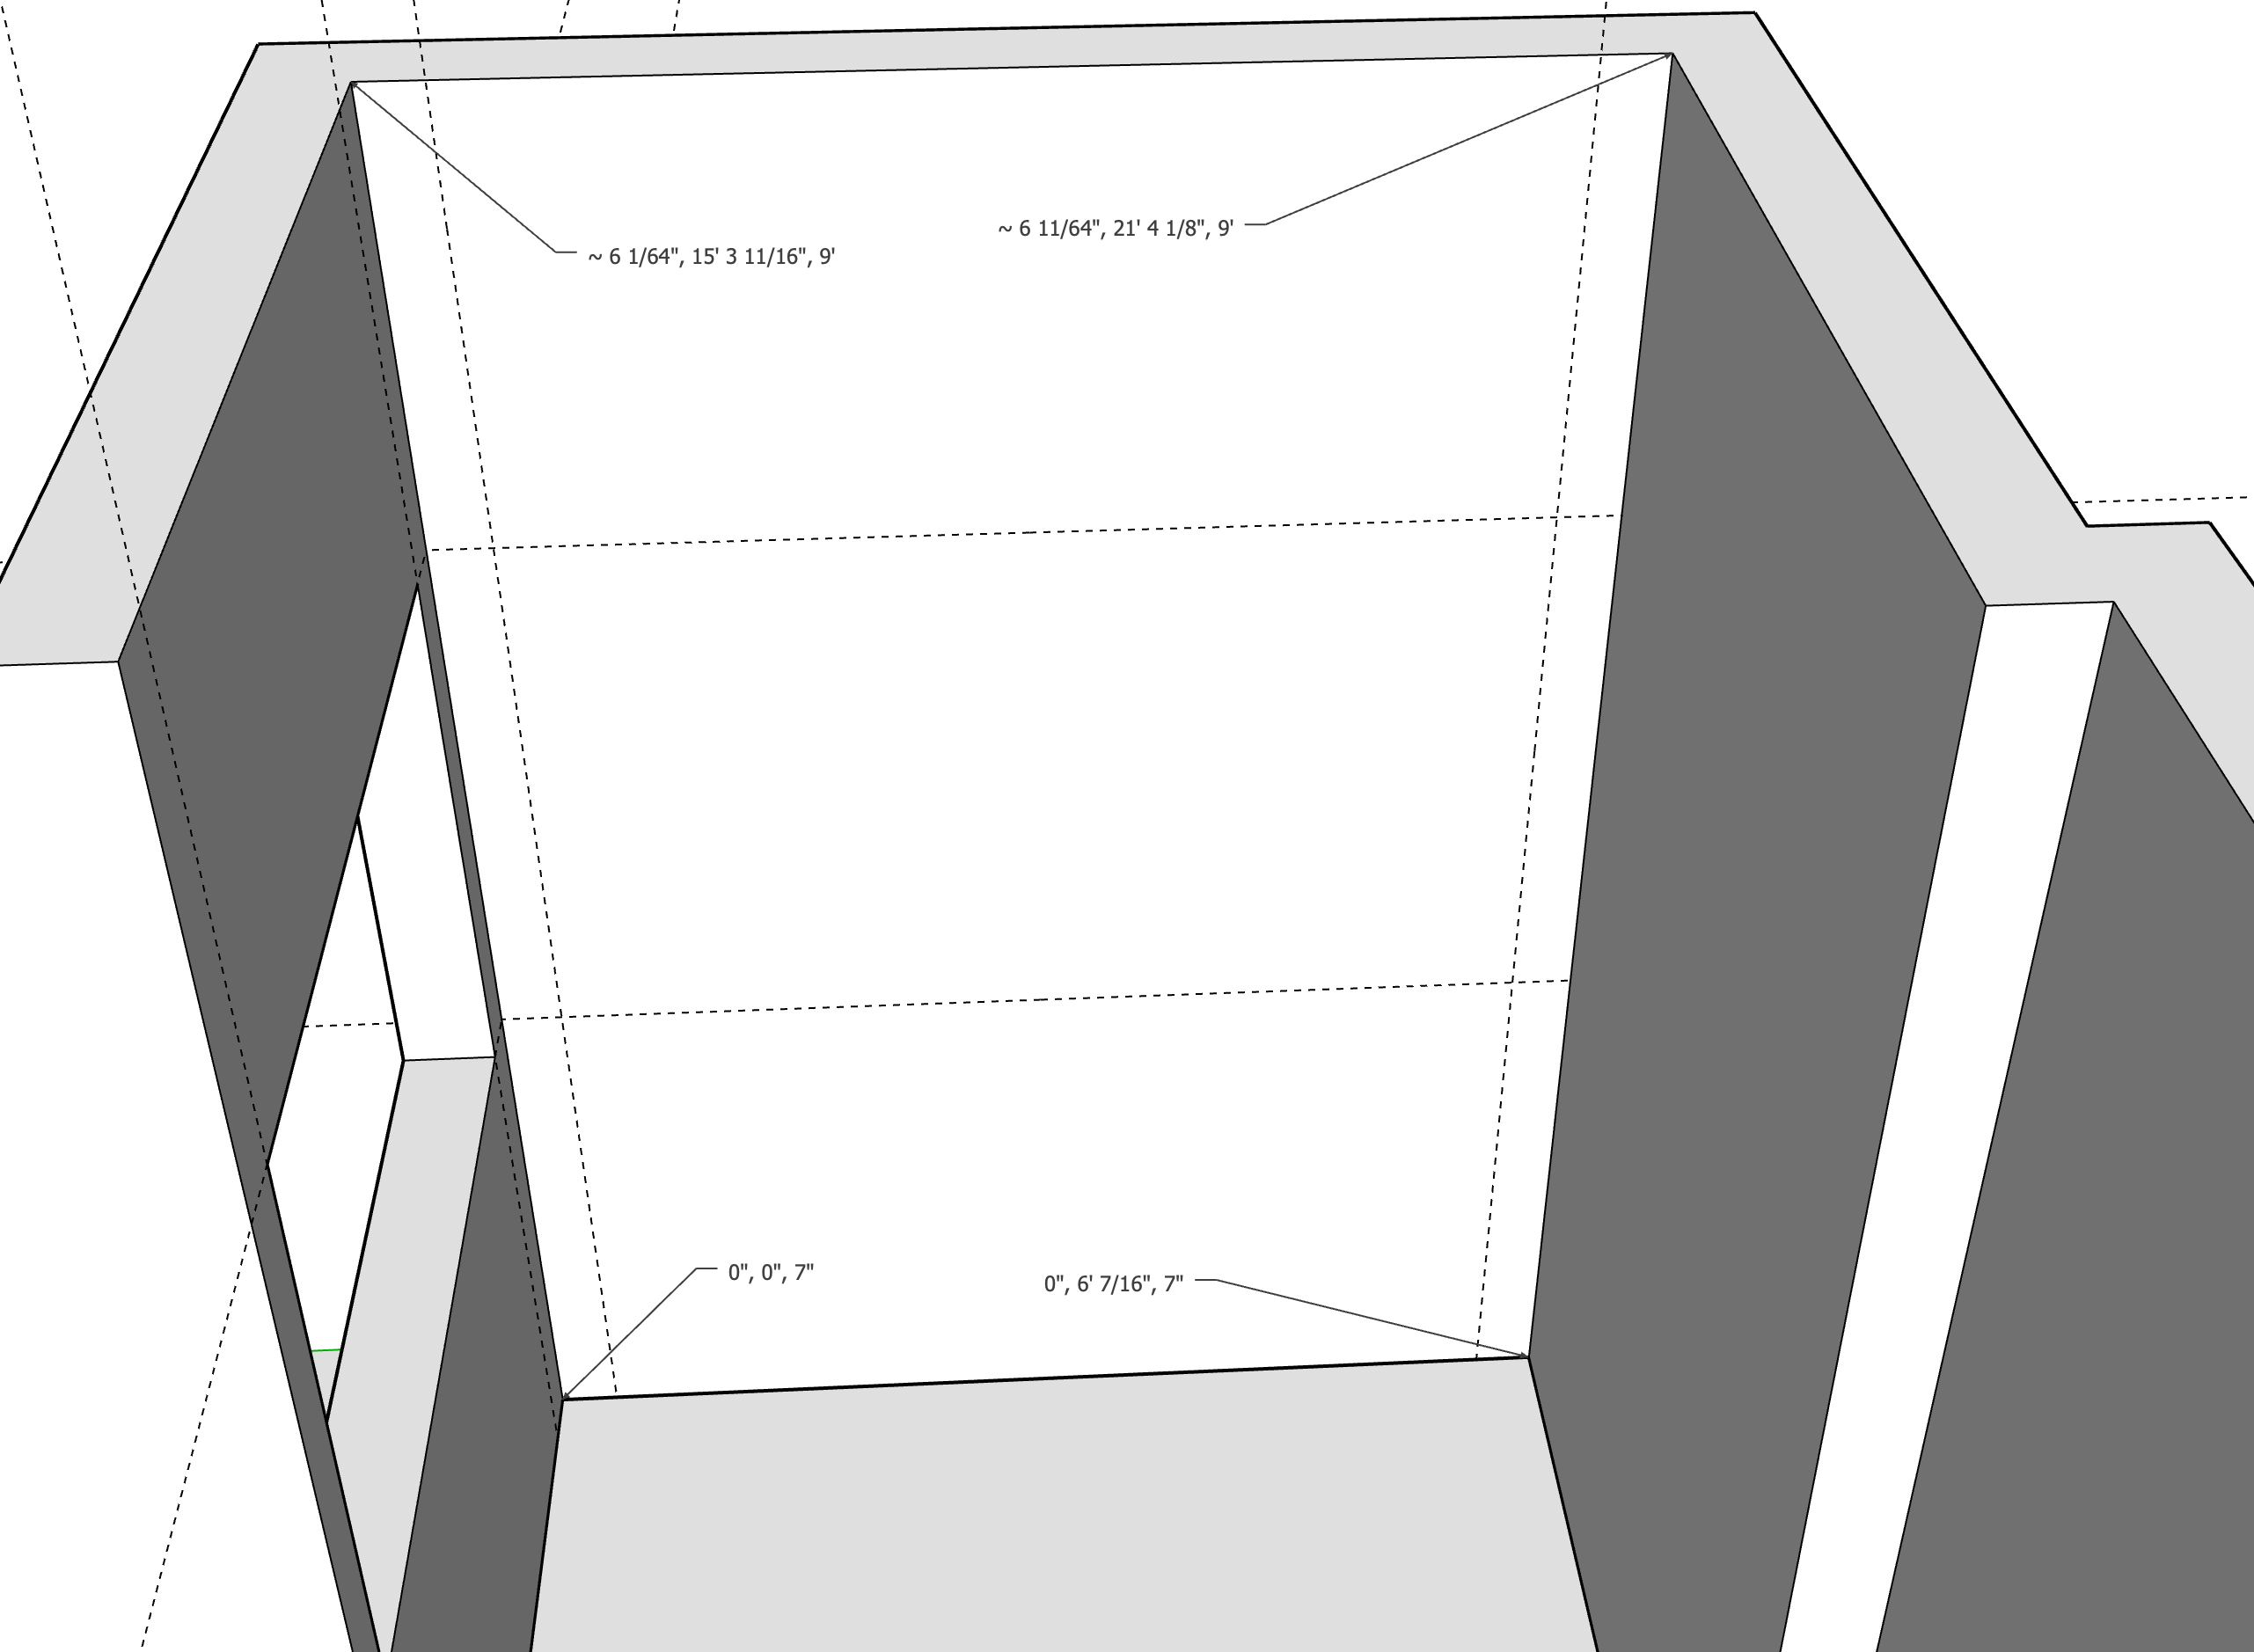
Take a look at the screen shot I included, look at the absolute positions of the 4 corners of this interior wall surface (relative to 0,0,0 which is the origin), they all have slightly different values indicating that this surface is not square with the drawings axis. Some of the dimensions have a tilde in front which indicates they are rounded or not precise at the current precision level, which in this case means less than 1/64th of an inch. That’s why a guide started at the bottom of the wall and preceding vertically is not touching the wall at the top, because the wall is not plumb.
With this particular model I would be inclined to start over. Go to Window>model info>units and turn up the display precision to 1/64th if you are using imperial units. This will help you to see errors as you model. This display precision setting does not affect the precision of your model, it just allows you to see smaller errors. You have enable length snapping off, which is good, keep it off.
You also have many of your guides on the outside of the group. You will need to open the wall group to be able to cut windows in the geometry, which will grey out your guides as they are included int eh “rest of the model” which is dimmed while editing. You can still sort of see them and you can still inference them but it might be easier to put the guides on the inside of the group.
This is all a lot of info I know, but the basic premise is that starting with proper technique is MUCH easier than fixing compound errors of sloppy modeling.
Here I start the process of fixing by erasing the walls vertical elements and top to get back to foundation, and then turning on line coloring by axis to see whats going on. Color by axis is NOT PERFECT and can allow for some error so be careful relying on it, but it’s a place to start looking for big errors. By holding the tape measure on a given edge I can read the length in the VCB at the bottom right. Then I use inferencing locking via the arrow keys to redraw a straight line, and have to move one outside edge to line up with the rest of the model. The errors are pretty pervasive and small, It can be fixed but I think I might just start over redrawing the base while entering dimensions by keyboard to be sure they are correct and whole numbers.