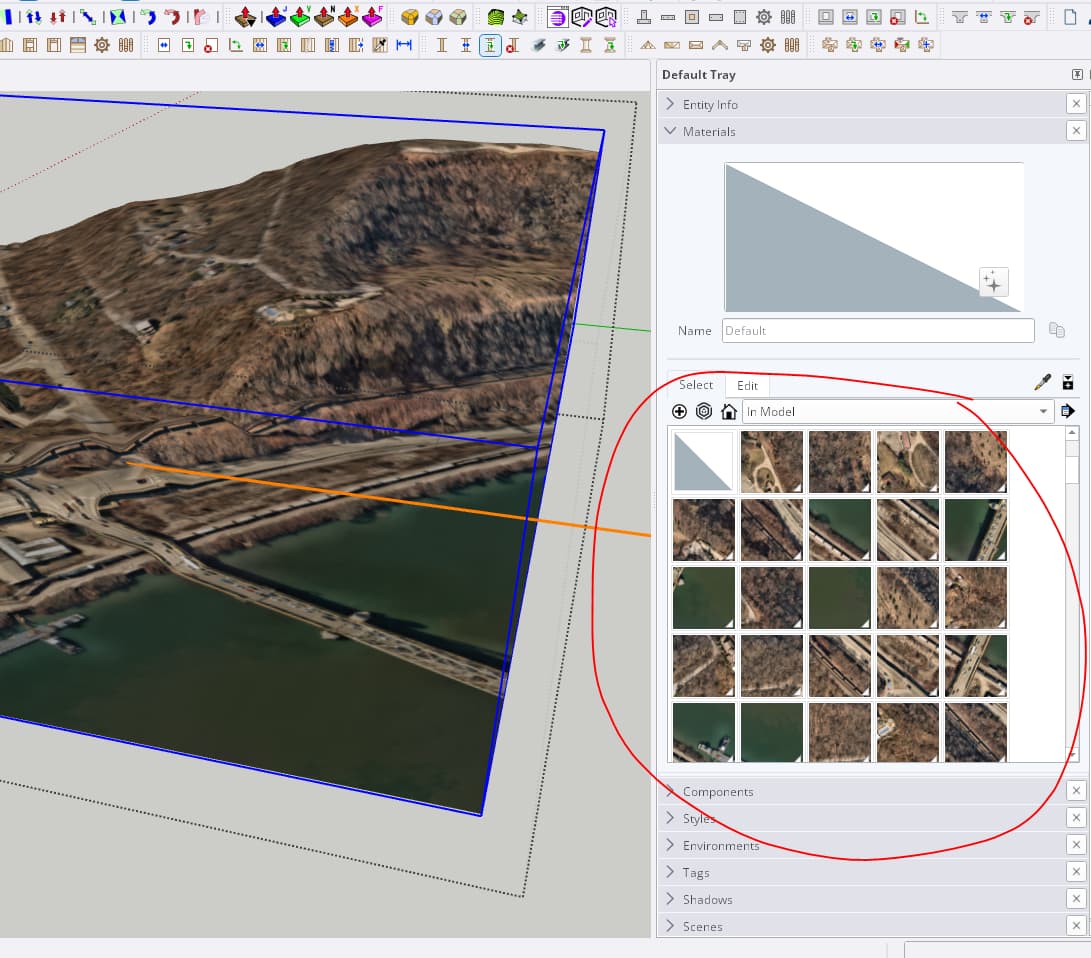
I have a very high quality tiled aerial image that was purchased from Nearmap through the PlaceMaker plugin for SketchUp Pro. Below the tiled aerial image I have a surface that was created from contours. I need to apply the tiled aerial image to the surface, however there are too many tiles to do this efficiently, and I would like to find a better way. When selecting the tiled aerial image with the Sample Paint (eye dropper) tool, then selecting the tiled aerial image and right clicking, there used to be a ‘TEXTURE’ option, that allowed you to ‘project’ the tiled aerial onto a surface. Although that option does not appear to exist in SketchUp Pro 2023 anymore… does anyone know where to find that option again? or have any suggestions on how best to add this tiled aerial imagery to a surface?
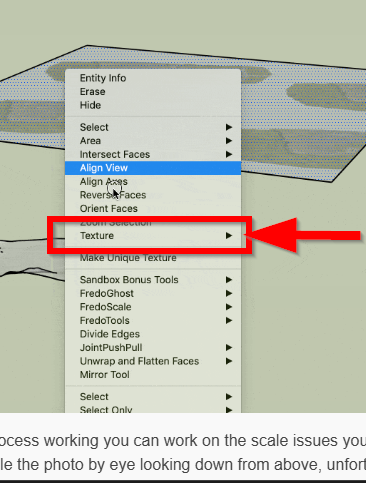
This is what the ‘Texture’ -‘projected’ option used to look like:
It’s there, but it only works if you select a single face, just like in other versions of SketchUp.
That makes sense and thank you for the response! My issue is that the tiled aerial image from nearmap is very large with around 100x100 tiles and this is only part of a larger project broken down into a grid system, each grid will have another 100x100 (or larger) tiled image. All in this project has over 60 grid squares we need to manipulate. I am looking for the most efficient way to apply the nearmap tiled aerial image onto the terrain surface below without having to copy and paste each individual square one by one. Instead, is there not a method that allows me to sample all of the tiled imagery and paste it onto the surface below? copying and pasting each individual tile grid will take days and this model will need to be updated frequently. Below is an image of one of the 60 tiled aerials we need to apply to terrain…

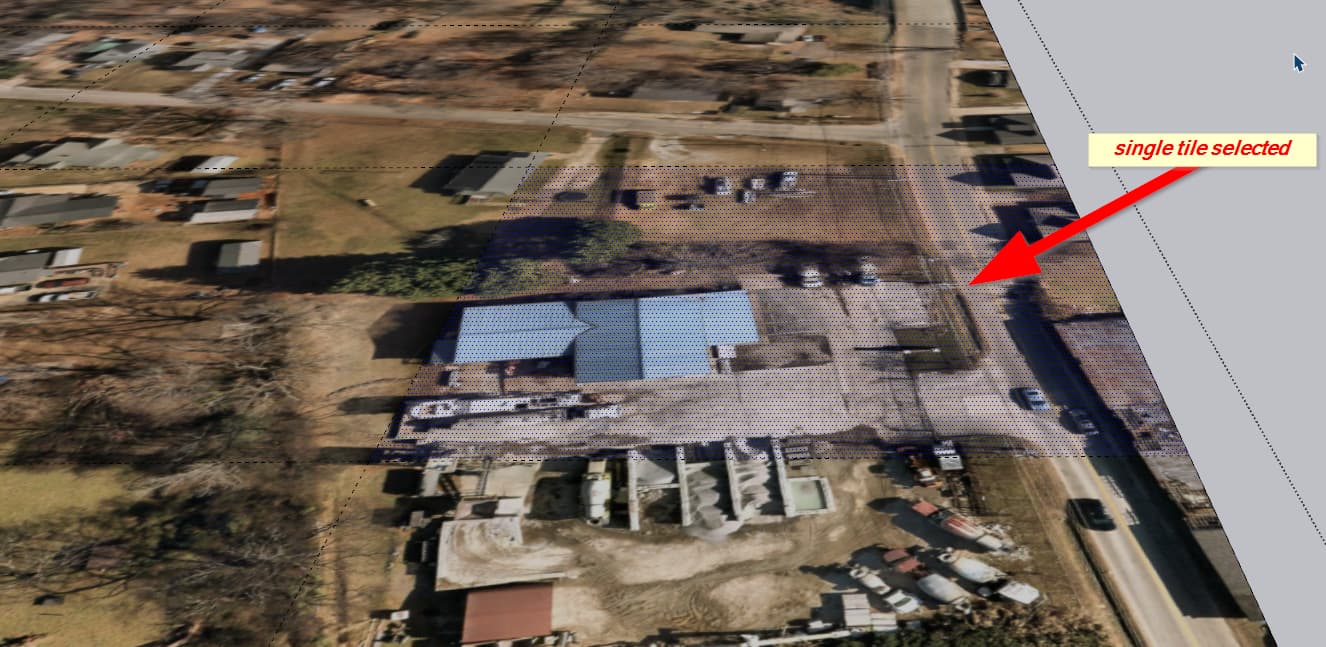
When I go into the nearmap tiled aerial image group, turn on the hidden grids to show the tiles, then i am able to click on one of the tiles, and the ‘TEXTURE’ option appears, that allows me to then paint that tile on to the surface below, but I want to sample all of the image tiles at once and paste it as a whole onto the surface below:

This is what happens when I sample the tile image and try to paint it onto the surface below:

I realize there is a ‘combine textures’ option, that would convert the tiles into a single image, but I do not want to loose image quality. Any thoughts on how to efficiently copy all of the image tiles and paste them onto a surface? Or am I stuck with the tedious process of pasting each tile individually…

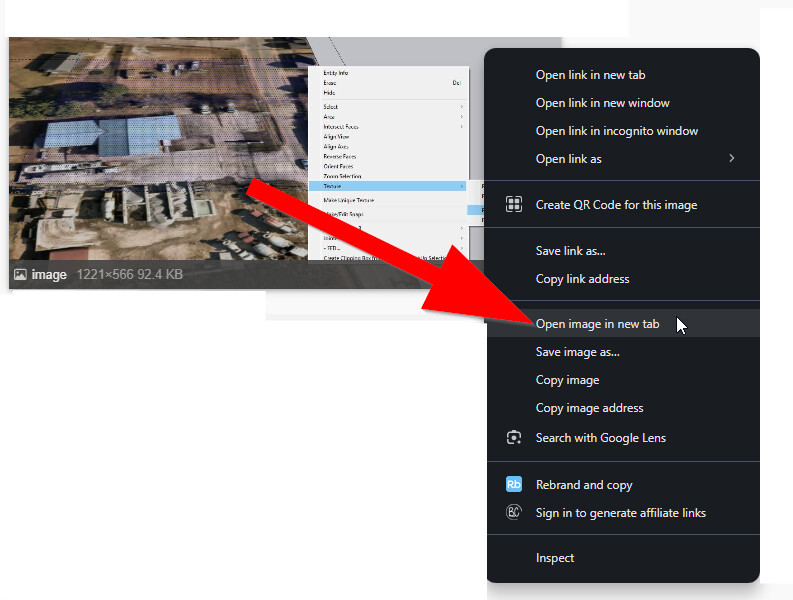
Just stumbled on this article which, i think, explains the same issue and how to solve it (from 2022)
Not sure about the quality loss after combining images ![]()
Thank you for the response, I read that article earlier as well and was hoping for more clarification around combining textures if that results in a loss of image quality or not as we paid several thousand dollars for this nearmap aerial image, in order to retain the highest quality aerial that sketchup will allow. From what it sounds like, that is also the purpose of having tiled imagery to begin with is to retain higher resolution, I could be wrong on that though. I hope one of the experts on this channel may have a alternative solution to applying the tiled aerial image to the surface, or be able to explain if there is no loss in image quality if we combine the textures. I will test this on my end in the meantime by performing a SAVE-AS of my current file, then combine the tiled aerial image using the ‘combine textures’ feature, and see if there is a visual loss in quality or if the file size of the newer model differs from the previous model. If anyone has any other suggestions please let me know, thank you again for all the help!
Yeah, that’s what I was wondering. I’ve done the tile by tile thing, but only 9 or 12 or something, not dozens. Tile by tile is a drag, and I would like a better way as well.
Well using the ‘Combine Texture’ feature in SketchUp is not the way to go. It has SIGNIFICANTLY reduced the image quality as I assumed it would, almost to the point of being un-useable. I need to find a better solution to this problem and am open to any suggestions. Not only did the Combine Texture feature significantly reduce the image quality, but the file size is also slightly larger now… so it is a loss on 2 fronts.

here is the before tiled image:

here is the tiled image after combine texture command:

SketchUp 2023 has an internal OpenGL limitation that limits texture sizes. The default maximum value ia 1024 x 1024 pixels. By setting the “Use maximum texture size” in Preferences>OpenGL dialog this can be grown to 2048 x 2048 or 4096 x 4096 pixels, depending on your graphics card. But any pixel image larger than the limit will be automatically reduced to fit. So to keep the image precision requires you to keep the tiling.
I don’t know if the new Qt graphics engine has changed how SketchUp deals with texture size.


In current versions there is an internal limit of 4096x4096, even if use max texture size is on. You ought to be able to combine the near map tiles into sets of 4096x4096, without the quality changing.
Here is a GIF showing the overall project limits, broken down into a grid, so that I can try to resolve this one piece at a time. This is going to take a very long time, I think my time could be better spent by purchasing the aerial again from the PlaceMaker application and have it apply the tiled aerial to my topo surface, even if it costs another few thousand dollars, my time is also worth money, I could spend 1 day setting up and purchasing a the aerial again through placemaker, or I could spend 3-4 days working through this manual process of applying textures. I was hoping there would be an application, plugin or other method somewhere out there to quickly solve this issue, but that may not be the case.
This gif shows the steps needed to apply the tiled aerial image to a surface.
- I had to create a new grid that matched the hidden ‘grid’ geometry of the tiled aerial.
- I then ‘draped’ that grid onto the surface,
- From there I had to go into the tiled aerial grid, turn on the ‘hidden geometry’
- Select the tile
- Right click the tile, select ‘texture’ then ‘projected’
- Then sample the tile (eye dropper)
- Turn off hidden geometry
- On the corresponding grid on the surface, use the paint bucket to apply the corresponding tile image to the surface.
- Repeat this process as many times as it takes to completion (in my case… countless times)
Overall project grid, I am only working on square D-1 for this example…
Here is the GIF…


Further explanation of this method with images:
Tiled Image as imported from placemaker:

Turn on hidden geometry to reveal the ‘tiles’ (VIEW - hidden geometry)…

1.From here, manually create a new grid structure that matches this hidden tile geometry…

2. I then ‘draped’ that grid onto the surface…

3. From there I had to go into the tiled aerial grid, turn on the ‘hidden geometry’

4. Select the tile you want to start with…
5. Right click the tile, select ‘texture’ then ‘projected’

6. Then sample the tile (eye dropper)

7. Turn off hidden geometry again… because your surface has hidden geometry…

vs hidden geometry off…

8. On the corresponding grid on the surface, use the paint bucket to apply the corresponding tile image to the surface.

9. Repeat this process as many times as it takes to completion
I assume I’m missing something like you got the surface afterwards or something but isn’t there a drape imagery to surface checkbox in Placemaker ? Not at my computer right now so can’t check but I seem to remember doing this in the past. I’ve also draped the images on the grid before just the way you did, bit of a pain .
I’m all ears if you manage to find that.
Alright so I’m back at my computer, interested if you have a perpetual license or subscription of Placemaker (wonder if there is a difference) cause sure enough there is a “merge” with surface check box, in this little test, 80 tiles were draped over my surface. Yes this was a geolocation surface but have used this with OOB Terrain surfaces and surveyed CAD surfaces.