When I position a texture on some face I can not hold on any rule regarding how much it moves using arrows… I know that with [Shift] it moves more. But sometimes it moves too much, sometimes it doesn’t move at all (or so little that I can not notice). I just noticed that angle on which I am to the face seems to influence that… but it is rather the angle to the green axis… main model axis…
And why arrows always follow main axis and not group/component internal axis…?
I know I can always use mouse to drag the texture but I like the arrows… Just asking if my notices are correct and if there are some other ways to make arrows work when it seems not to or adjust the amount it moves… If it followed the distance from the face it would be grate… the closer You go the more accurate You could get…
TEXTURE NOT POSISIONING 4.skp (288.9 KB)
Like in this file
Sorry but I don’t understand your problem regarding repositioning the texture.
IMO:
Right click textured face > Texture > Position > gives you two main options
-
- hovering over face tells you: > ‘Drage to move texture’
- 2a) hovering over red pin tells you: > Drag pin to move texture. Click to lift pin
- 2b) hovering over green pin tells you: > Drag pin to scale/rotate texture. Click to lift pin
- 2c) hovering over yellow pin tells you: > Drag pin to distort texture. Click to lift pin
- 2d) hovering over blue pin tells you: > Drag pin to scale/shear texture. Click to lift pin
Follow the second option 2a (red pin) > Click to lift pin > carefully reposition the pin to meaningful location in the texture > then in the next step > drag the red pin to meaningful geometry position.
Last steps: Right click > Done.

This video shows how to use the pins to mark the extents of a texture and then move it into place. Note the order of the pins: Use Red, then Green, then Blue, and finally Yellow.

well then,use the mouse.
I get that you prefer the arrow method, but this method has found a deadend in your case. so use the mouse.
Arrow-moving, in any software that allows it, will always be an increment move.
Some softwares, here illustrator, will allow you to choose the increment (this is 1/72", or a pt, weirdly translated in mm)

So off course, moving stuff with arrow will only be precise in a specific case, if I know the increment. in my case, if I tap 10 times in illustrator, I’ll move 3,528mm
If instead I need to move something from a certain point to another point, I’ll use the mouse.
Ye that was my concern writing this post… there is no problem that I can not solve… thanks You for Your explanation … maybe somebody else will find it useful… as well when You press [Shift] the pins change to free transform…
My point wasn’t really about not knowing what to do with the texture or how to do it… simply the arrows seem not to work consistently. On one face it moves a lot on the other not much or none… And as it changes in different cases I was wondering if there is some way to utilise this for my advantage. Something that I missed perhaps. For example Fredo Thrue Paint moves texture in smaller increments as You get closer to it…
So simple curiousity , No real problem. Unless You consider something in the program working not consistently and in some way unpredictably, but causing no harm, a problem… I would say it is a very low priority issue… with 2023 seems it will go even more down the list…
that’s actually it.
I don’t know the increment of default SU, but there are two types of increments :
- fixed length (like in my illustrator example)
- percentage. Say, 10%. it’ll move 10% of its actual dimension.
I did a test. turns out that the arrow movement in SU looks percentage based. I imported a texture, 1x2 ratio, and moved it by pressing the arrow 10 times, to get an average :
on a 1x0,5m texture, increment of 1,36cm
on a 0,37x0,18m texture (the same, smaller), the increment is 6,6mm
I don’t know if the increment is calculated based on the length or the width, I’ll say length (arbitrary, longest dimension), so then I did a quick napkin math and it give me an increment of about 1,36-1,78% (it’s hard to mesure the increment since pixels are a bit blurry)
so here you go, using the arrows moves the texture about 1,5% of the biggest dimension.
And so yeah, take 5 textures with 5 dimensions, the arrows will move with 5 increments. My guess is that Fredo’s tool does the same, but as % on screen (mesures the screen not the model, like text & such), therefore being able to move even more precisely when you zoom in. Smart move.
I just opened a new file. Made a cube… textured sides and everything seems… NO… everything works. Even the side which normal is exactly in direction of a Y axis… but I tried other of my projects with many groups many different axis set… I can not move texture with arrows if the face’s normal is in global (original not edited) ‘Y’ direction… I have no idea when it starts to brake… or what is braking it… Not sure if it is a sKetchup issue… never had a chance to develop project as big with plain sKetchup installed.
TNP-2.skp (2.4 MB)
here is part of another project … cleaned but still this behaviour persist.
Doesn’t depend on texture… only (as far as I notice) on orientation of the face, when You are quite close to it…
Sorry it is just stacked in my head… I know it is not that big issue… ![]()
Maybe you applied the material to a group or component, try to apply it inside the group/component.
I’m guessing You didn’t download and tried the file Yourself… did anybody… I’m really curious if it is general issue or only my PC with my set of plugins freaks out…
yup. and it works like you say, or in fact, it doesn’t .
(and no, don’t expect many answers between 2am-7am on a monday morning in europe / late night in the US. we also need time to sleep ![]() )
)
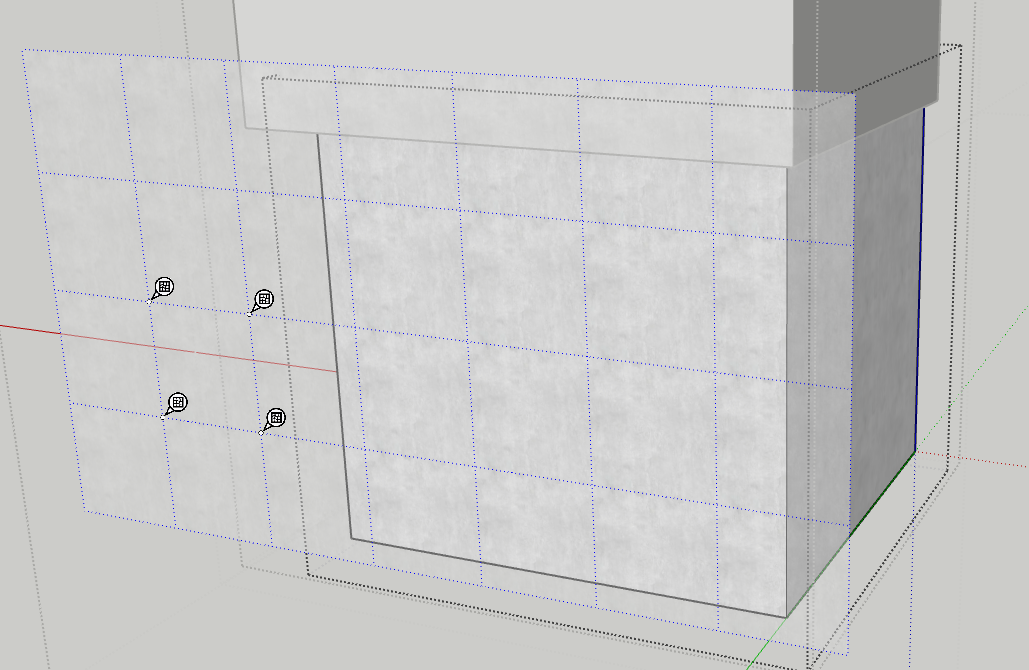
On the “standalone” building on the left, it’s fine. on the one on the right, it doesn’t move with arrows.
can’t say why though. To be honest, I didn’t even know you could move texture with arrows until you posted these messages. It’s always been by mouse clicking for me.
SketchUp 2022

SketchUp 2022 (the other geometry)
Works for me (although Sketchup web free) in all 4 directions.
See the shifted result, applying all 4 arrow keys:
I had to multiple click to open 4 or 5 grouped levels deep and it still works for me.
I retried, on some random faces, some of the building on the left, some circled in red or near it, in both SU22 and SU23 and…
inconclusive.
some that work in 22 don’t in 23, but the opposite too. Like, the building on the left (the “tower”), it works on 23 but not on all textures in 22. I checked for reversed faces, I tried changing the texture beforehand, nada. some faces work with arrows, some don’t, at least on my mac (but since OP is using a PC, I don’t think it’s the issue)
That’s weird. Again, I never used that method, only mouse, and with the mouse it’s ok everywhere. but now my curiosity is piqued.
I knew what I had to test, and after moving the geometry to the +X 0 +Y area, using the arrows works.
Try this:
solved !
the faces were so deep in the structure of the file that I didn’t even notice that we were flying and in the - area.
Hope it’ll do the trick for @tjdrgas as well !
How did You know it… ? I noticed in the past that file size is bigger if the geometry is on the ‘-’ quarters but had no idea it effects anything except for the file size. This is a bit contr-intuitive cos you would expect that placing it in the middle would be best,… I am guessing bit size of minus floating numbers has to do something with that…Don’t know what is going on down deep in the sKetchup’s guts but probably something to do with Cos and Sin being plus only in the first quarter?
So for future when starting modeling best is to have everything in the ‘+x,+y’ part. Actually I tested a bit (of course I had to mess around with that) and it doesn’t stop moving when a bit of geometry goes into ‘-’ parts… I moved it 10mm into ‘-’ dark area : still working. Then 1m : still working. It stopped moving after being 10m deep into ‘-’… I would say at this point most of geometry was out of ‘+,+’ part. So You have some margin of safety.
here is a cube like I made before but I moved it this time to ‘-,-’ part of model space. face with normal in +x direction, looked at close at ‘x’ direction… groups are not problem.
TNP-3.skp (328.6 KB)
anyways looks like solved… in the sense that I know how to avoid the problem and when to expect it. But it still is there… Down deep in the darkestest side of sK guts lurking in hiding and waiting for an opportunity to strike…
HH Come on… 5 levels is not that bad… And there is a site to it… no worries… It sure will work for future. For now I am not moving the 20 set up scenes with model…(though I had swh a script for that). Moving axes doesn’t work, it remembers original model axes. In the past I had this habit (still till now) of placing geometry close to the center because of the view clipping problem. Now it is not a problem any more, so time to change the habit to having everything in the bright site. Everything on Plus. ![]() lets be positive.
lets be positive.
haha off course not, I’m a fan of nesting dolls models myself, you start designing, group, then regroup, then regroup… it’s a bit messy to navigate but it works.
but when it’s not your model, you end up wondering how deep that thing is ![]()
I have people in my office who do not group at all unless they have to make some repeatable component… that can get so much more messy…