Hey guys! I need your help ![]()
I’m still very new to rendering and my current problem is the fact my renders tend to look to smooth to me. I don’t know how to explain it better but they are unrealisticly smooth, decreasing the noise level doesn’t seem to help. I also think it would be better if the edges weren’t that sharp and perfect. Do you have any tips to improve my renders and make them look a bit more realistic? Cheers!


There are 2 things you can do to help this specific thing.
-
Generate a noise texture as the bump texture to add some orange peel effect on your paint
-
Apply the edges texture to a 2nd bump channel to smooth the edges.

for #1, it might be simpler to use one of the built in wall paint options
Also, have a look at your post processing - the highlights are a little blown out, so you will be losing details to that - making it smoother.
Have a look at turning on the filmic tone mapping in the post processing area of the frame buffer - that will probably solve that for you
I actually used one of Vray’s wallpaint material ![]() But I’lol def try out things you mentioned! Thanks
But I’lol def try out things you mentioned! Thanks ![]()
I’m seeing the same highlight burn issue as your Ball Lamp scene. That can help reduce the contrast of the lighting. Also when you said you’ve ‘decreased the noise level’ what do you mean? It might actually help you to bring some noise back into the scene - all physical cameras should have some noise. In the VFB under the right side section where the Exposure layer is, there is a setting for Denoiser. Try sliding that down and see what that looks like.
Another thing that might help is adding a very small chamfer to your wall edges. Right now it looks as if they come together at a perfect 90 degrees. In reality there would be a very small bevel or round corner that will reflect light more realistically. It may be a lot of work so perhaps try it with just a few corners and see if you can tell the difference. FredoCorner would be the ideal extension to use.
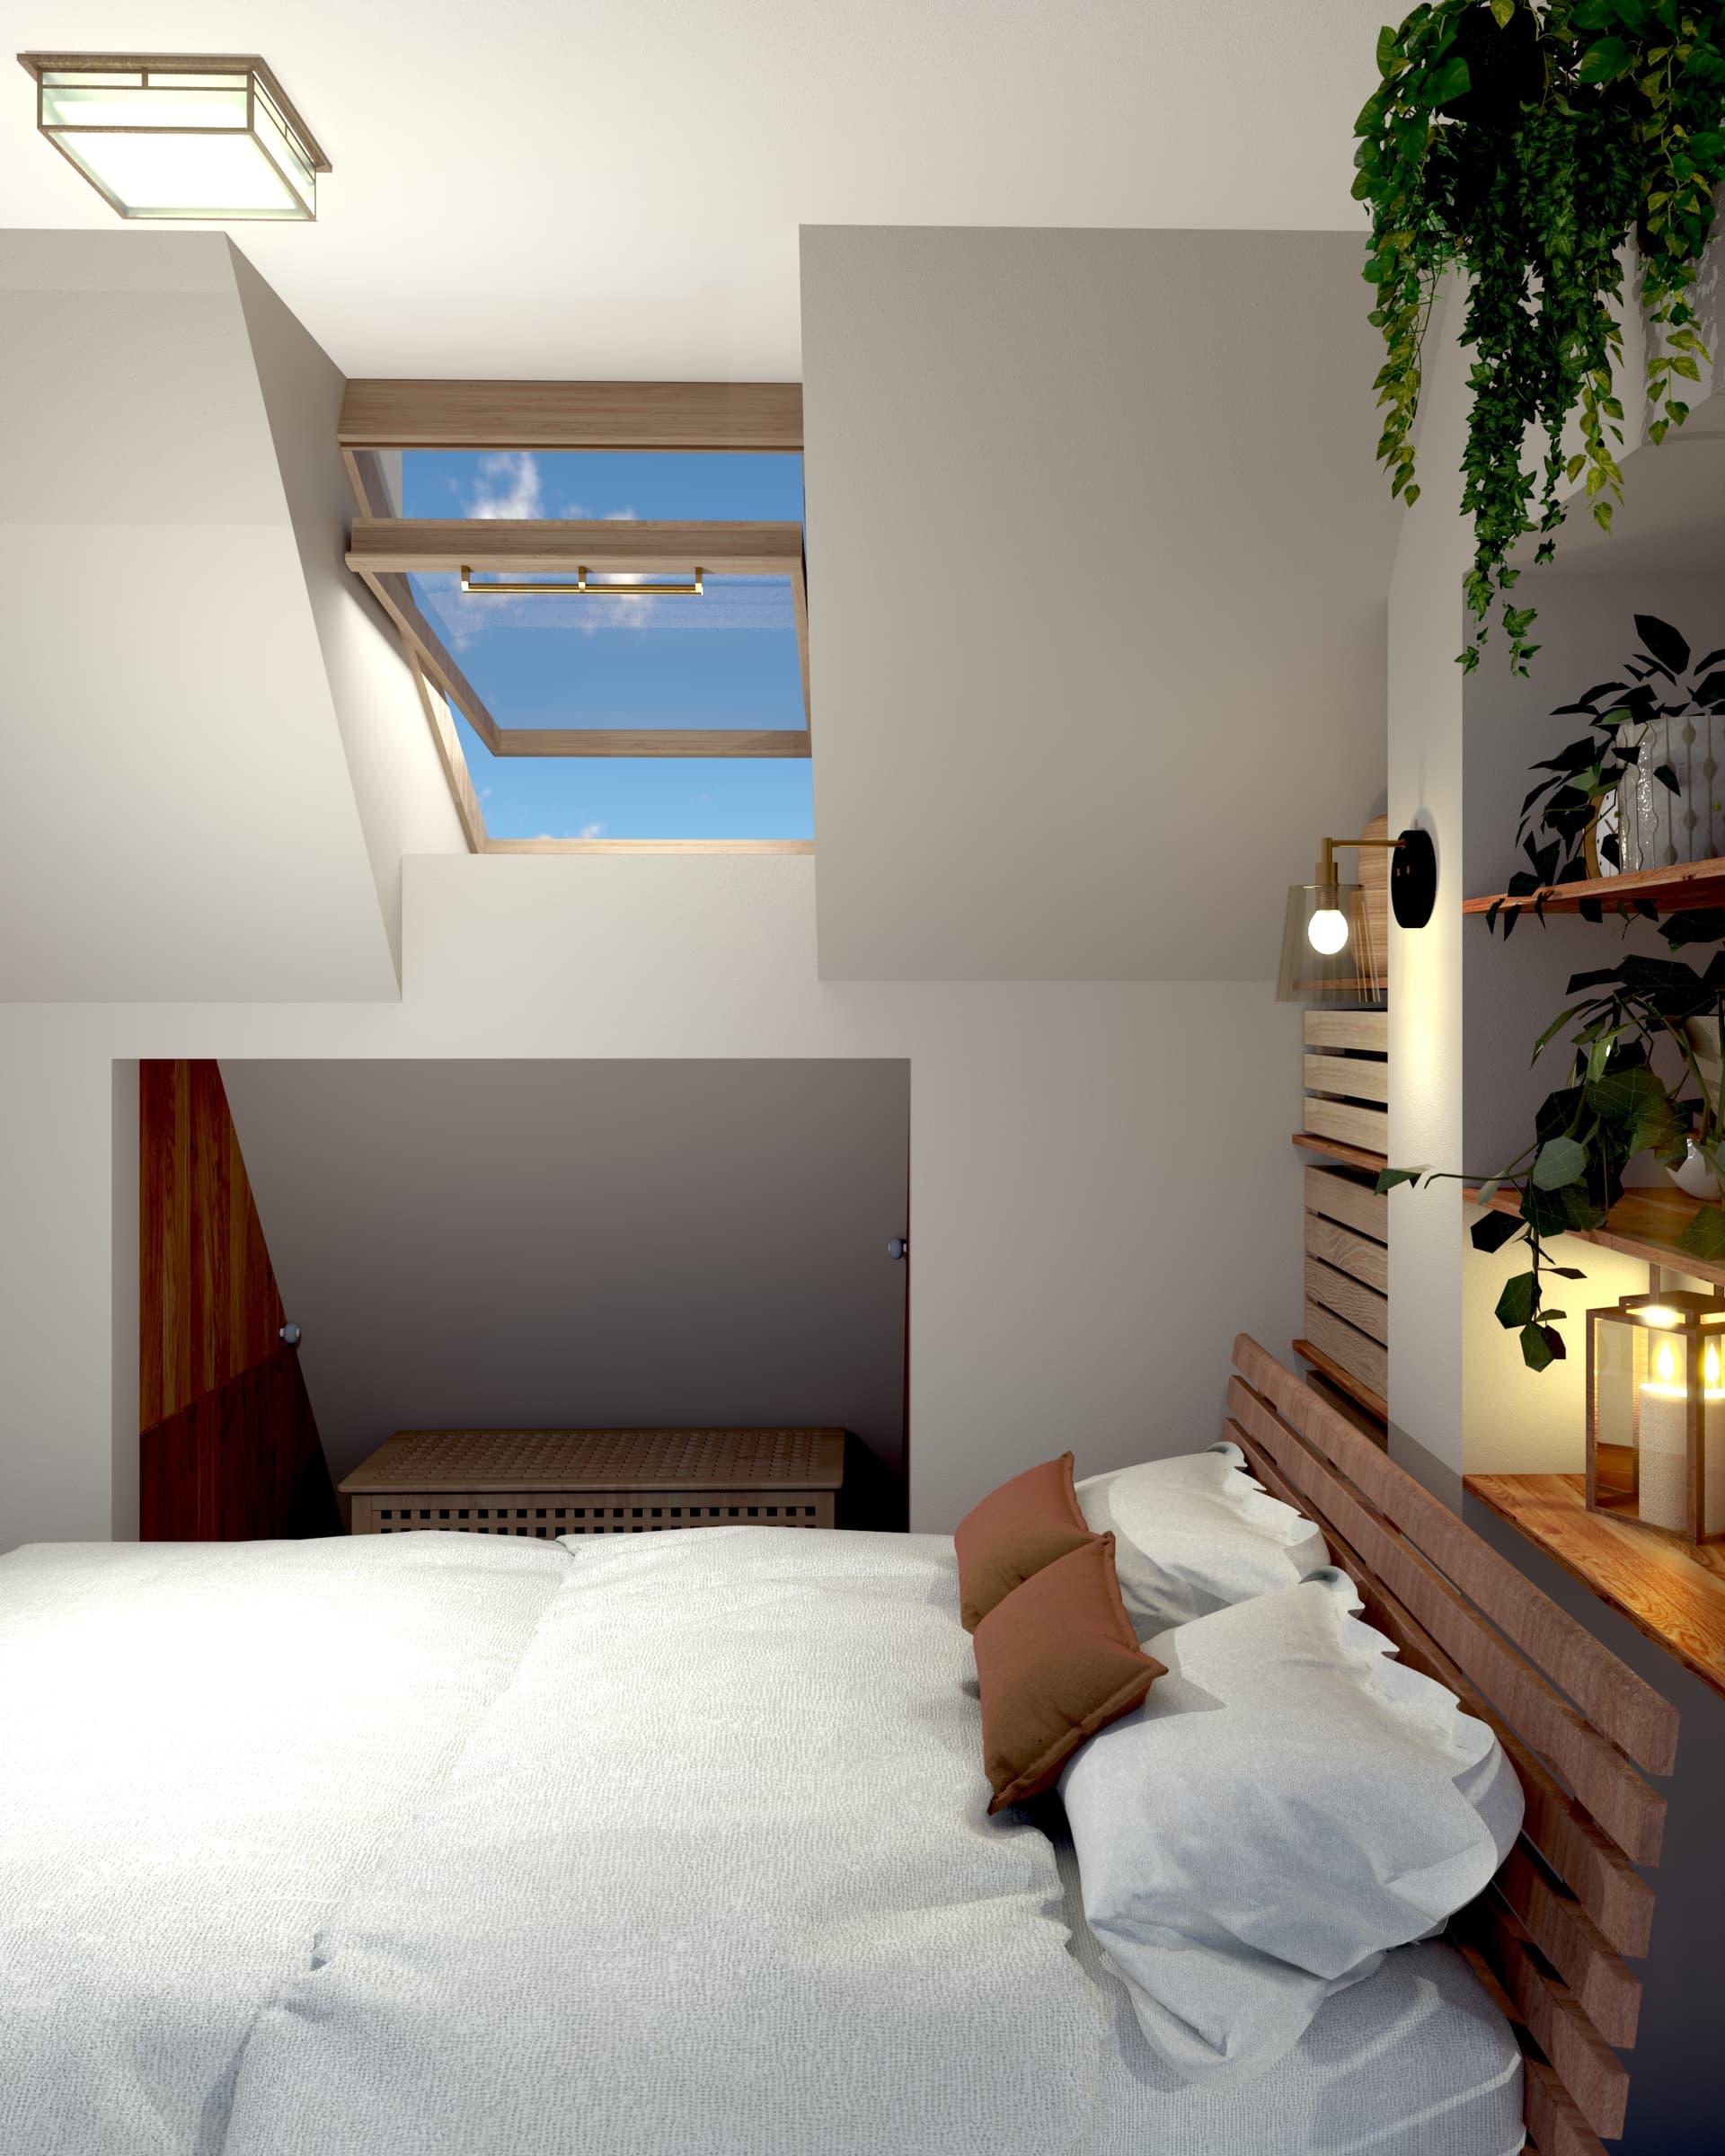
So I’ve been trying to make my renders look better. I’ve been experimenting with different noise levels etc. I think I improved the lighting situation although I had problems with installing that corner rounding extension (I’ll try to get it). This is my current situation. I made a screenshot at the very beginning of rendering cause the funny thing is I actually find that extra grainy picture looking more realistic than the finished product ![]() I’m wondering whether I used that “edge” bump what wrong (I didn’t change any setting in it) cause I can’t see any changes in my edges.
I’m wondering whether I used that “edge” bump what wrong (I didn’t change any setting in it) cause I can’t see any changes in my edges.


@Elmtec-Adam and @eric-s help please ![]()
Can you share the model again? Feel free to use private link if you dont want to share publicly.
The file is too big to upload it it here so I’ll give you the link to google drive if that’s okay ![]()
Will take a look.
I really appreciate it! ![]()
I wish I could be of more help but there are a lot of custom V-Ray and light settings and it would take a big effort to go through each and adjust.
Generally I would recommend thinking more about what this view needs to communicate to the viewer. The eye goes to the brightest objects - the candle and bulb sconce - whereas if it were my project, I might want to call attention to the great skylight. When you first set you your scene, before getting too far, establish the lighting/mood by enabling ‘Material Override’ - that way the materials won’t be distracting and you can focus on one issue at a time.
Here is your model with looking at just the lighting only:

See test where I wiped all of the V-Ray settings so that I was starting from scratch. Then I positioned the default SketchUp sun so that it shines through the skylight and into the room. No other lights so far. I also adjusted the exposure up and the highlight burn down in the VFB. Just this one change makes the space feel less ‘cave-like’ and more soft comfortable to be in.

From here you can also run two render passes to get the right amount of noise. The opacity slider should work but right now, for me it isn’t so that’s why I tried with and without denoiser.
Without Denoiser - too noisy:

With Denoiser - too smooth:

And Denoiser with 50% transparency = just right.

From here I would look closer at the amount of detail in your model and assets. Round those corners as I suggested earlier and make sure to use V-Ray materials for everything unless you feel comfortable adding your own bump, reflections, etc to custom materials. Hope this helps some.
Eric, you are extremely helpful, every single time. Thank you a lot! I’ll try everything late this day, I finally managed to install that Fredocorner and can’t wait to test it. My only issue is that ‘transparency’ you mentioned when talking about denoiser. I can’t really think of where that option would be. I know you can enable denoiser in your vray settings so you can adjust it in VFB. There’s that opacity slide option you mentioned didn’t work for you and then you suggested setting transparency to 50%. Where can I find it? Or you actually meant the opacity slide in denoiser layer in VFB?
Cheers!

Thats my progress. I was trying to use Fredocorner but it messed up with my geometry (you can see some weird line on the wall) and in other edges it didn’t really give me that big changes. But I’ll def try to learn to use it properly cause I most likely keep doing sth wrong ![]() I’m quite happy with the lighting tho
I’m quite happy with the lighting tho ![]()
Why don’t you follow Eric’s advice and use Vray to round the edges. Use Bump Map and select Edge as the map
Jumping back into this thread. If you haven’t yet tried or successfully rounded the corners using V-Ray, as opposed to rounding corners in the model. The advantage of this method is that it won’t add geometry to your model and will make it easier to edit since it preserves the 90 degree connections. Here’s how to do it:
Start by adding a new material from scratch. Choose ‘Bump’ from the options

Then switch your mode to ‘Bump Texture Channel’

Under the texture slot…choose ‘Edges’:

Adjust radius of edges here:

Add your wall texture/material to the new bump material under the ‘base’ section:

Lastly, be sure to apply (or reapply) your new ‘round edges’ material to your surface(s). Be sure to copy or duplicate the material and change the ‘base’ material/texture for different surfaces in your model. That way you only have to set this material up once.

Let me know if this helps.
Hey guys! I managed to use fredocorner in a right way but I’ll definitely try that edge/bump method ![]() Thanks!
Thanks!

That’s looking a lot better!
Nice, much better! Practice Makes perfect.
The shadows at the back of the shelf, are those from the sun light or is there another lightsource that is generating those?
I think you could do something to soften those up a bit