
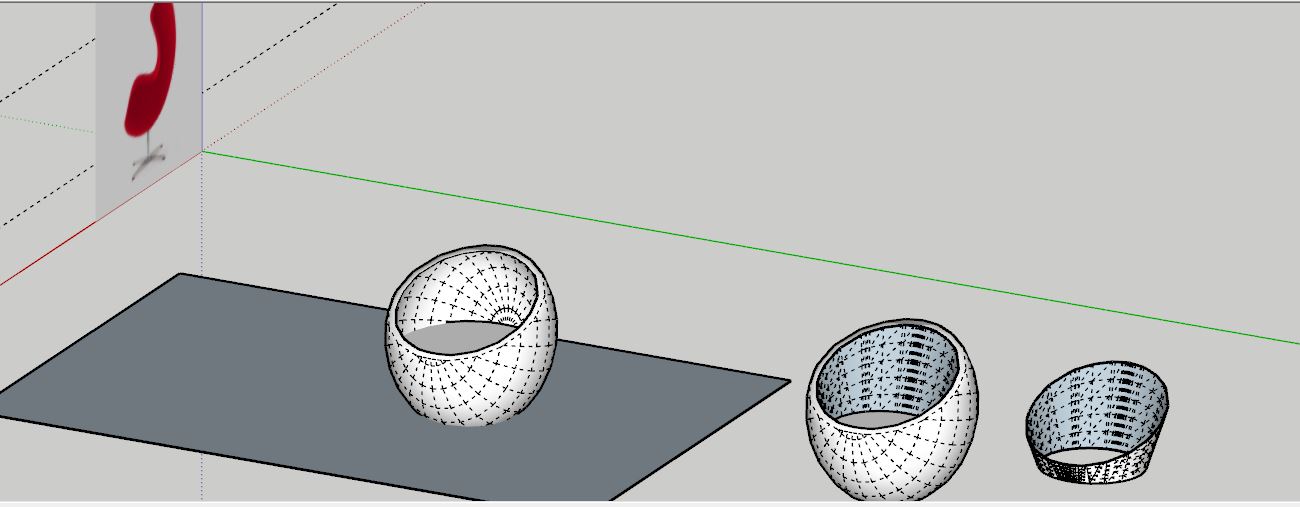
Compound-curve shapes like the ones in this chair are always a challenge.Here’s what I’d do. First, scour the Internet for good front, side, and back views of the chair. You’ll need them for reference, to gauge when you have the curves right. Second, since the chair is symmetrical, only model half. Third, begin with an egg shaped component (or half an egg) and use the Intersect Faces command to remove parts of the egg, leaving you withe the wings and arms. This will leave you with the outer shell of the chair. Fourth, Offset the outer shell shape and scale it down to create the inner surfaces. Explode both shapes and stitch them together by drawing lines from one to the other until faces fill in; this will be unbelievably tedious. Once you have all the geometry connected to form a solid half-chair. Use Fredo’s Round Corner plug-in to soften the edges. If you get that far, modeling the metal base will be a walk in the park.
Good luck, and post more messages to keep us up to date on your progress.
Thanks alot , i am trying doing it , i will post the update.
Look at this:
Sorry if I wasn’t clear. Let me try to explain. The chair’s shape is like an egg, but with parts cut away to form the wings and arms. In real life, you might make the egg out of some kind of foam, then carve away parts with knives and grinders to get the shape you want. The SketchUp equivalent of knives and grinders is the Intersect Faces command. Here’s how it would work. Create the egg and make it a component. Orient it for a straight-on side view. Draw a shape that will cut through the egg, removing part of it to reveal the shape of the arms. Use Push/Pull to extrude this shape and position it so it overlaps the egg. Copy this shape, open the egg component, and use Edit>Paste in place to position the shape within the egg component. Select all the geometry and go to Edit>Intersect Faces>With Selection. Then erase all the waste. You may need to do this two or three times, with different intersecting shapes, to create the correct chair shape. This will give you one surface of the chair, probably the outer surface. To create the inner surface, I’d suggest copying the shape you created, moving the copy away from the original, then scaling it down to make the inner surface. You’ll need to stitch the two surfaces together manually, drawing lines that connect endpoints of the curves on the two surfaces.
When it comes time to do the Intersect Faces command, use the Dave Method: Copy the component, scale up the copy 100x or 1000x, and run the Intersect command on the copy. When you’ve erased all the waste, delete the big copy.
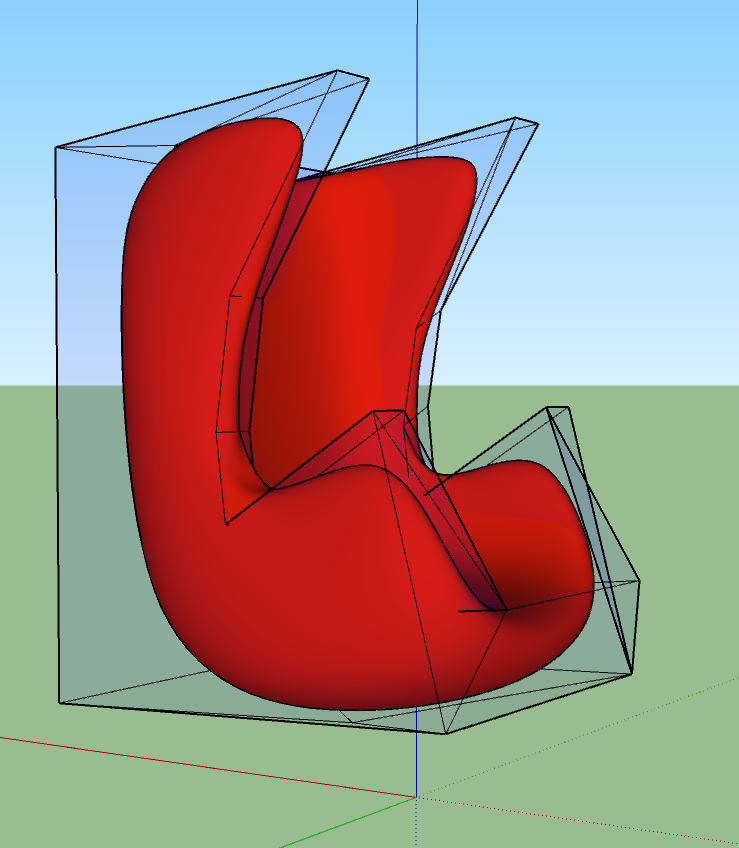
Two final thoughts: As I said in an earlier post, look on the Internet for good side and front views of this chair, so you can use them to get the overall shape of the egg and as a starting point for the intersecting shapes. Lastly, try modeling only half the chair. It’s symmetrical from left to right as you look at it from the front. So just model the left half (or the right half). Copy your model, do a Flip Along command, and connect the two halves to make one whole chair.
Good luck.
Thanks for you all ,when i finished i will post the modeling of the chair.
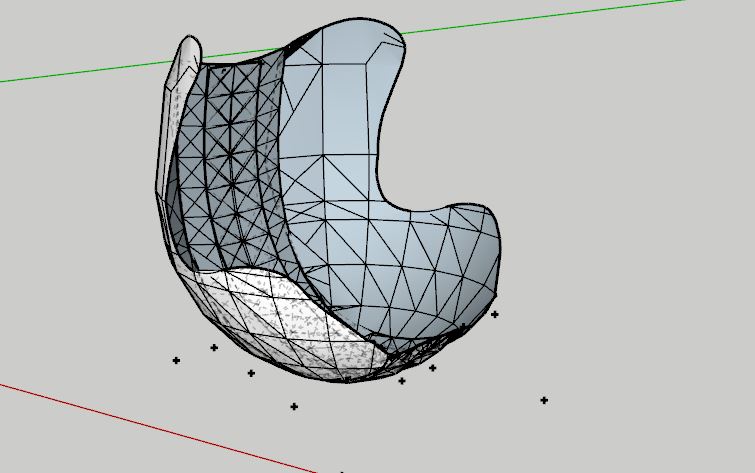

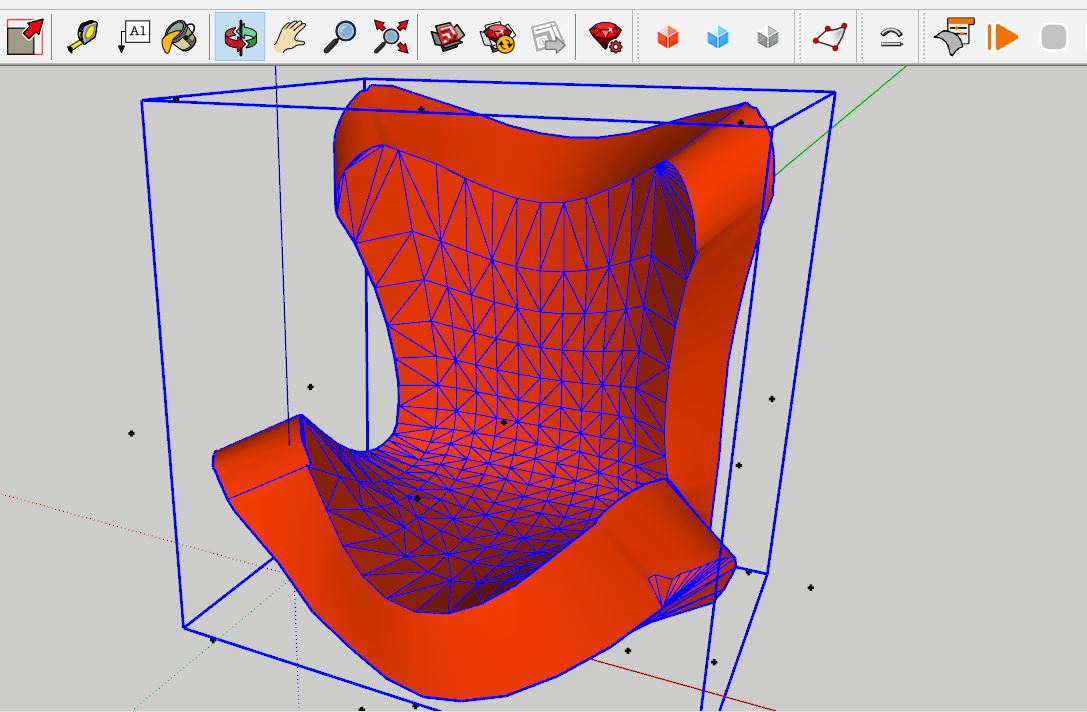
The shape looks good. You can select all the geometry and make it a component. After that, I’d suggest opening the component, selecting all the geometry again, and go to Edit>Soften/Smooth Edges. That should make all the curves look smooth.