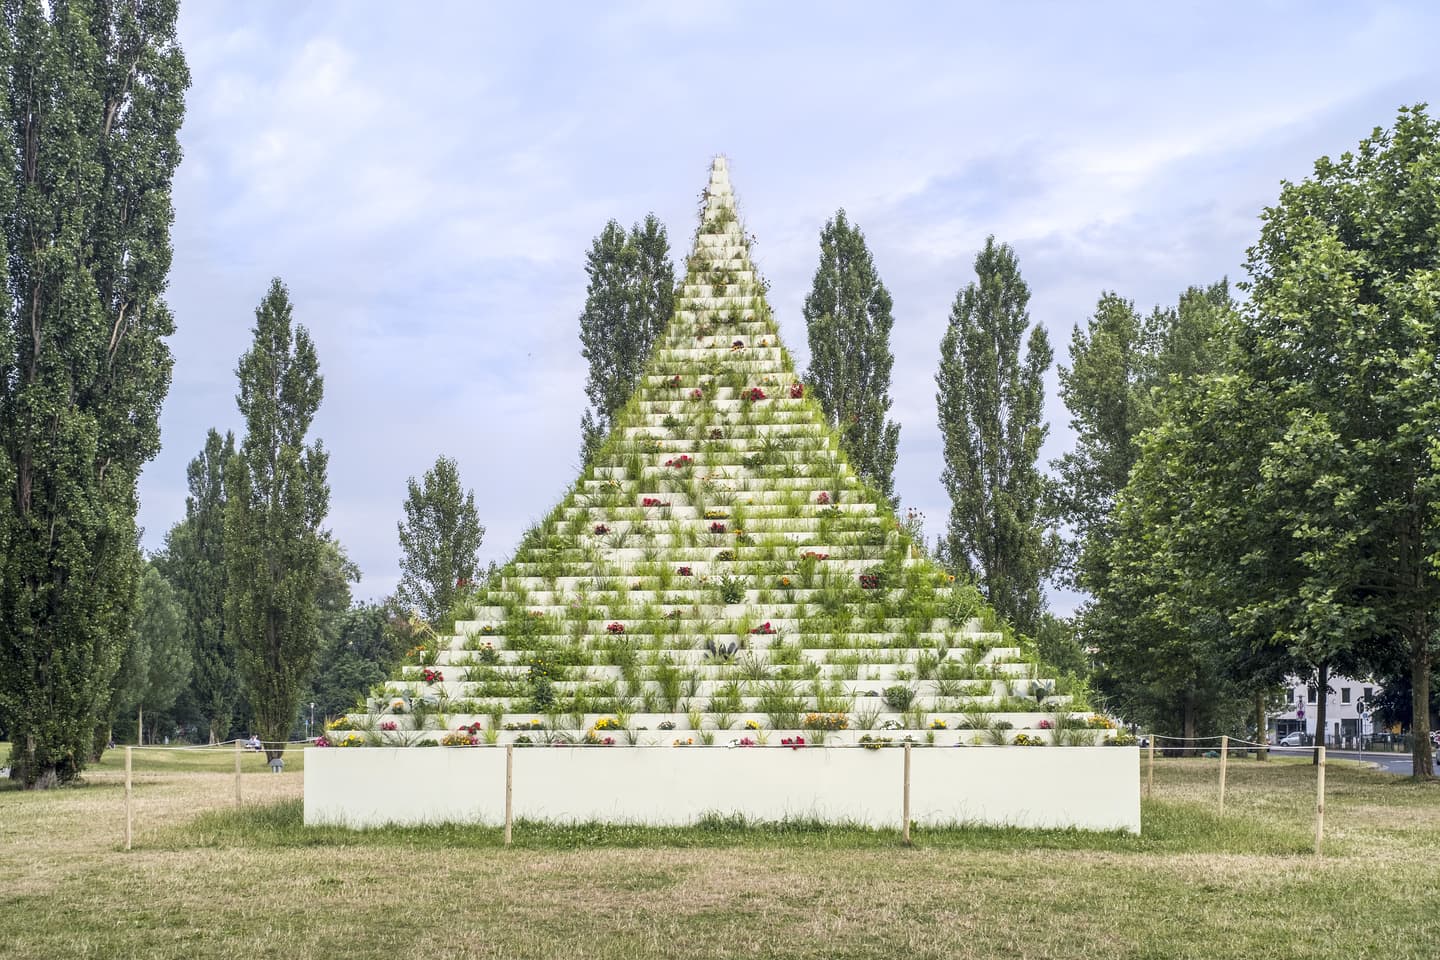
I am modelling a somewhat unusual pyramid shape to be built. It is made of several horizontally stepped layers each equal in height. Each layer, however, incrementally gets narrower in width as the layers go up.
The end result is a square-based pyramid with convex sides - stepped convex sides. Hope that makes sense! Height of each step is repeated the same, but width (or depth) of each step gets smaller.
Is there some clever way of doing this in SU to speed up the process?
I will ultimately have to also detail the methods of construction for this - not just make a nice shape in SU.
Any help or advice would be greatly appreciated.
I too am not sure I understand what you need. Is there a flat space at the top edge of each step (as one would see on a historical “stepped pyramid”), or do you mean that the slope of the sides gets less steep with each step? Or something else?
Either of these is simple to do, but the process is slightly different.
in addition to follow me, you could use the combo of offset / pushpull, both with double clicks.
Build the first slab, then offset the top face (typing dimension) and pushpull it (also typing dimension)
There is a neat trick with double clicks in SU (@TheOnlyAaron did a set of videos about it) :
if you offset a face, then by double clicking you’ll re-offset any face again and again. It’ll be the same parameter until you manually do a different offset
if you pushpull a face, then by double clicking, you’ll redo the same pushpull with the same parameters on any face. there again, until you manually do a different pushpull.
so I guess you could do the lower slab, offset it, push it, then simply alternate offset - double click - puchpull - double click - offset… (basic shortcuts, it’s F - 2clics - P - 2clics…)
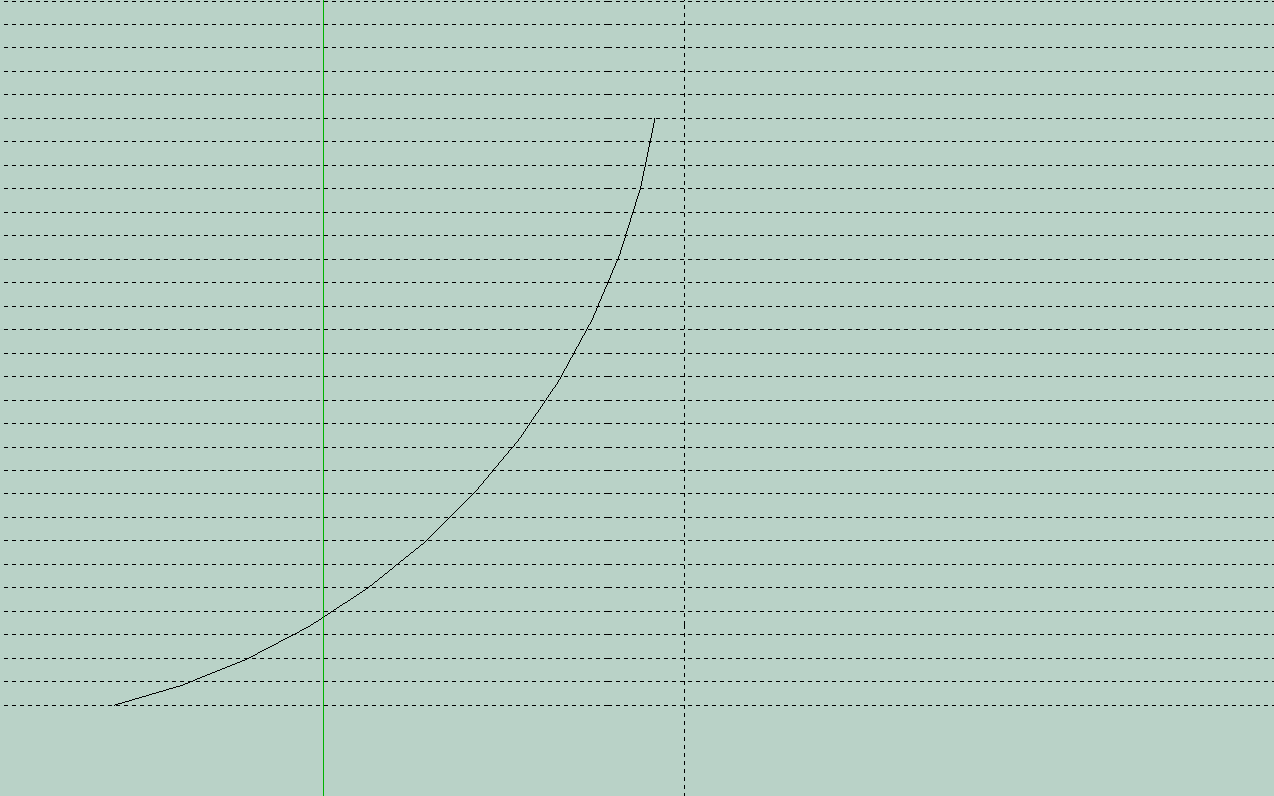
If Offset could work as a percentage instead of a distance, the model could be made like you say, by toggling between Push Pull and Offset, with a double click after pressing P or F. Here’s how that looks, but still with the limitation that the step depths remain the same.
I’m having to reverse-engineer the construction, so having a quick method of generating the geometry in SU would be invaluable in order to test the results of different sized versions.
Ideally something similar to the multiple-copy command but it needs to also include the incrementally decreasing dimension along the x-axis.
I did multiple copies of a guideline, and added an arc . from there, it’s a simple game of going up, going right, up, right…, then deleting the arc and closing the half profile.