Any advice on adding an actual road model to topo mesh?

I am just learning how to use the mesh-type tools. I’ve watched many of the youtube videos, checked out the extensions, and read through the posts here. I haven’t seen an accurate road model with the street, curb, and sidewalks, integrated into a topo contour mesh.

I need to add the streets to my model.

I have Vali Architects Instant Road extension. Should I try to use that to create the smooth roadbed and then model the streets on top of it?

Is there a different or more efficient way to accomplish this?


1 Like

I have a similar problem:

Might be able to profile street:

…But then is Vali Site Grader the answer for curbing-to-mesh?

Thanks.
That looks like a decent idea.
Run the curbs with the follow tools so I can build the intersections and fill in the street after that.

@jawsnaz Wondering if you are having any luck? I’m trying to use Instant Road (water) instead of Instant Grader because I can’t seem to grade closely set walls.

It seems there are at least two ways: From Faces on terrain and something like reconnecting from a cut with the Drop Tool.

I’m making some progress by cutting out a shape that I stamp, group, and then place at the lowest grade point that I want to grade to:

Are you getting smooth results?

Haven’t tried that yet.

The problem I’m having with the above is that it ‘removes’ the ‘road’:

But this is better than some of my other attempts:

VALI_ROAD_WAHT NOT TO DO

LOL… at least it’s connected.

Keep trying! LOL

1 Like

Still battling terrain. Vali road was leading to dead-end (Selecting terrain sometimes leads to "Not Responding hang). Tried Stamp Tool.

So frustrated that I’m backing away from the tools and just trying to adjust my estimate of how much coffee it’s going to take to get usable results.

@jawsnaz Okay, when you first posted above I was working on a model that had curbs and was trying to use Vali Site Grader/Road Builder (the water setting - which I abandoned) to create a ‘swale’ cutting through terrain, over which a bridge is to be built. I figured that a swale is just an irregular road. So, I tried a number of workflows and found a couple places where the process can be made easier.

  1. Draw your road in 2D

Terrain1

  1. Cut out your road template, group it, and copy it. Your template will be transformed into “va_road” in a later step and having the original can be useful.

Terrain2

  1. Align your road template to an elevation you want to hit. Pic is bottom view, aligning to bottom of retaining walls, but a road connecting to a driveway is the same concept.

  1. Select your road template and exploded terrain. The pic below shows thickness set to “0”. I wanted to grade ‘flat’ into my existing terrain and the thickness setting would add a lot of more or less vertical geometry separating the road from the terrain. For example, if your road passes or connects to a driveway, you don’t want the driveway-road connection to have a thickness, curb, or shoulder. One the other hand, you might want thickness for the rest of the road/terrain cut. The shoulder setting in this pic is 1’. I wanted a very steep shoulder that would act as my retaining wall infill.

  1. Select the aligned road template group and the exploded terrain and “Make Road”. This pic shows a 5’ “Max Bump Width” under parameters (The create road might align differently, I just placed it in the pic for illustration purposes).

Terrain5

  1. Let’s say your road isn’t quite where you want it (as in the above image, it is too high). Below, I have moved the va_road group that was created to where I want it. This is also where I ran into trouble with Instant Road. Sometimes the va_road that is created would not allow for the creation of another connected road and the error prompt that the terrain or group does not have connected faces would appear. The problem seems worse if you Undo the Make Road (it’s a like a “stamp”). But if it works - go with it!

Terrain6

  1. Instead of trying to ‘regrade’ the va_road, use the original copy of your road template group. Place that at your desired elevation.

Terrain7

  1. Now “Make Road” again. Example pic of placing the copy of the original 2D road template.

Terrain8

  1. This isn’t perfect… but I can work with it. Grade is connecting to retention/drainage.

Terrain9

  1. Also, move the 2D road template and va_road off to the side when processing roads. I found that Instant Road seemed to ‘grab’ va_road instances and/or road groups when they were directly above the area where I was trying to make the road (Hence the weirdly tall road pic from earlier).

Of course here I did not make the curb. But I did get some practice with Instant Road which will be nice for future roads with curbs.

Let me know if you learn any tips of your own. It was a bit of a struggle to get it working and I still don’t know how much coffee it takes to master.

Grading is always a challenge - whether in 2D via something like CAD or 3DThe most accurate. I’ve found (my background is in Landscape Architecture) is that there are two approaches to take:

  1. The engineering approach - This requires you actually work out the proposed grades using topo lines and move them up to their respective elevations. Then simply running Sandbox from Contours or other extension to make the mesh. Or…

  2. The conceptual approach. Given that you’re working in SketchUp and not CAD or Civil 3D says to me that the need for speed and creativity is balanced with the need for accuracy. In this case you can fairly accurately ‘sculpt’ the terrain with Sandbox Tools or an extension like ‘Artisan’ - which too me is a bit more user-friendly than Sandbox.

If you want to share your model (or just the grading part of it) here (upload to a cloud drive if over 4 mb in size and share link) then I can take a closer look and explain in more detail.

1 Like

I hear ya! It’s becoming clear to me that I will need to greatly improve my skills.

On this particular site I had access to 2 out of date surveys from the city and one from an architect. I did not find them all that useful. I find the 2D approach to be difficult to use (more on that). So, this would be one way I might have done the “engineering approach” (yes, it’s janky…):

Then:

elevation chunky

That could have been more fine-tuned.

But I’m advocating for a more 3D-in 3D-out approach (and have gotten no traction!).

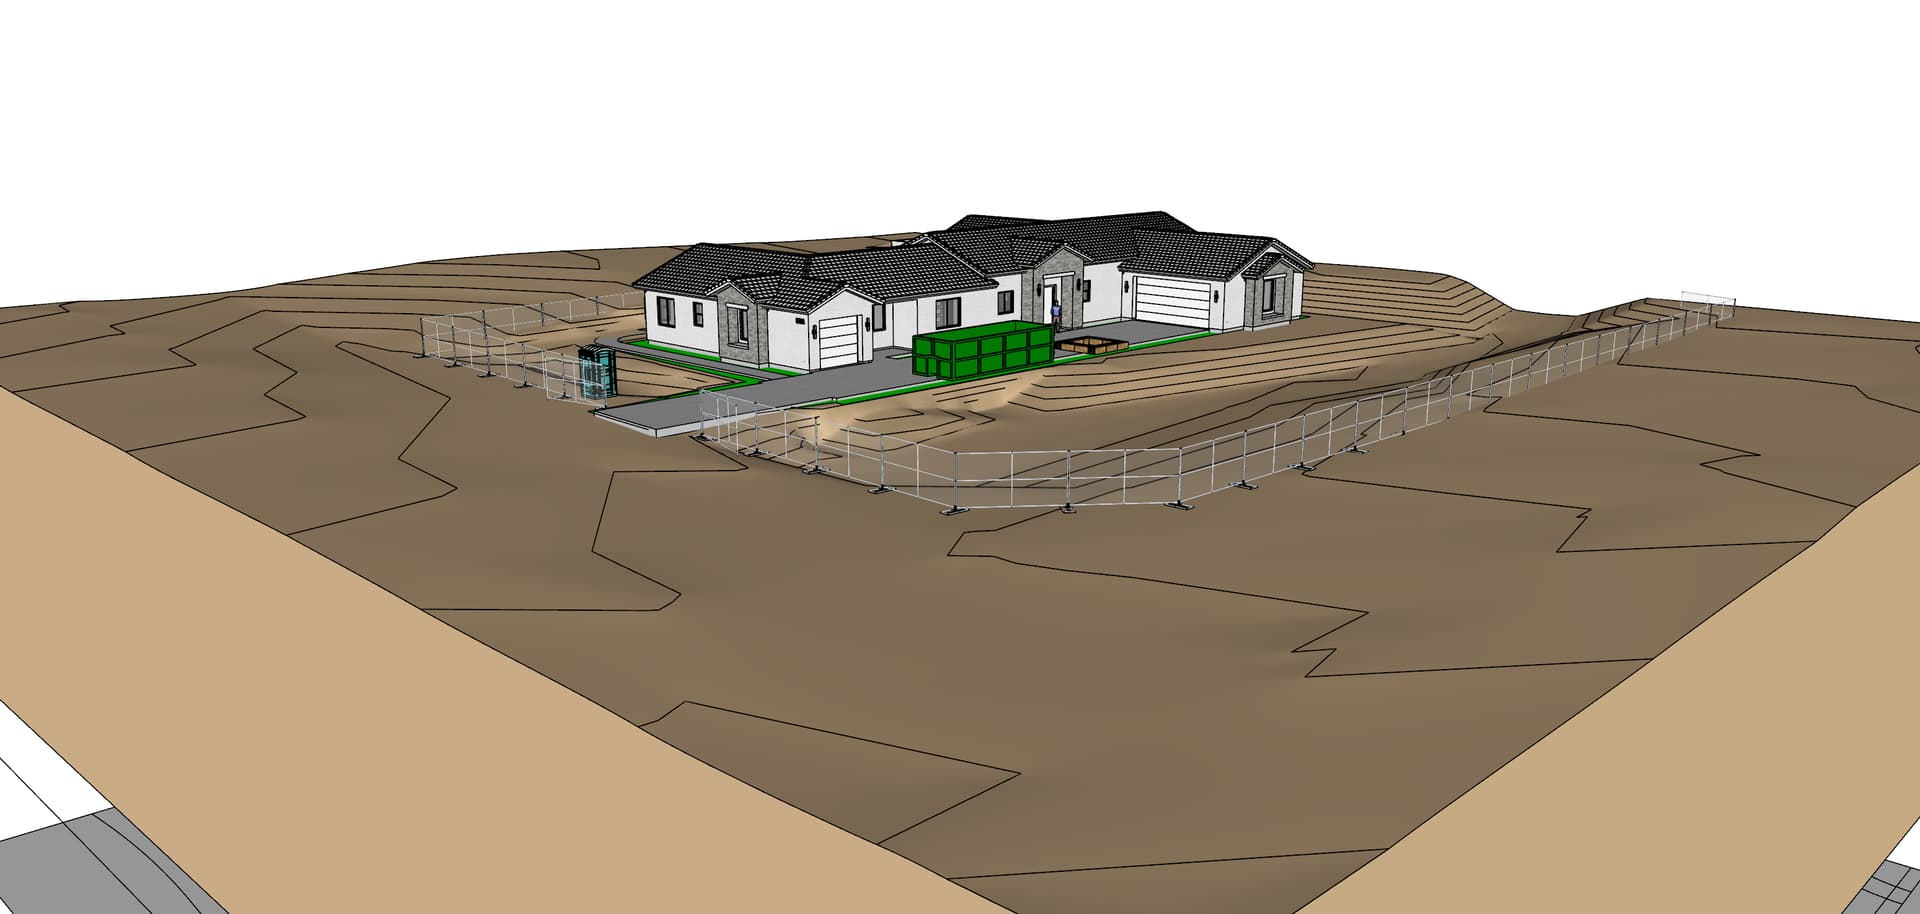
So to circumvent the 2D survey stuff, I’m using a drone to go straight into 3D:

Site

Then I can process out my own topo:

You can see I chopped some of it out. I made this with 5cm elevations… WAY TOO MUCH. So it needed simplification.

So here, I did not SandBox Tool contours from the survey/“engineering” side (but maybe I should have). But I did SandBox off 3D contours. Just as a quick aside, Undet grabs terrain from point could, so if I had that right now, I would have skipped topo altogether and gone from Point Cloud to mesh.

That seems about right. I know how this sounds, but I’m not a fan of 2D. For example, I can pull measurements from mosaics… but usually I don’t.

It seems to me that there is a bit of a disconnect between designers working in 2D and the build side. There’re are a number of bottlenecks and competing interests, but it looks to me like designers design for the client not for installation (Lots of caveats left out here). So right off the cuff, designers go to 2D.

For example with the image above. Lets say the edge of the retention pond is XXFT from the corner of the building, as the crow flies). But it’s at an elevation several ft lower. Okay, so get your story pole or Zip Level out. You could draw a nice straight line with a dimension/number that is correct. That’s what I consider the 2D way. If designers get into 3D right away, they can place layouts and measurements ‘as the human walks’, or hand over a 3D file instead of a paper plan so the installation crew can just measure ‘where they can go’. 3D-in 3D-out: The work has to be done in the real 3D world, so help the people doing the construction by keeping the design in ‘space’ that is easy to use.

Cover your eyes if you’re offended by horrific scenes of badly mangled mesh:

So here I was playing with SandBox and Artisan (a trial).

One issue here is that I wanted to grade for tiered walls. Smooving and Sculpt brushing was pulling down the terrain that I wanted ‘up’ as the fill in the upper tier. That’s why I started messing around with Instant Grader and Instant Road.

I’ll say that I went back to Artisan and started to like it. It has a sweeping feel to it that can be nice, but when I started to use it like a chisel it became fun.

At this point I think the tools are fine. It’s my skills that need improvement.

I’d have to remove some info from that one. I’ll see about doing that or maybe find some other mesh that has defeated my SketchUp grading abilities in the past.

@eric-s

Here’s a “Terrain Sketch Pad” version of the file. [edit: nasty mesh link removed]

There’s a lot of clutter that I created while trying various ways of working with the mesh. Hopefully it is understandable.

I’d be open to any tips. Thanks!

Ok downloaded. Will let you know what I find out once I take a look. FYI - you can always private message people as well on this forum if you don’t want to share info to everyone :wink:

1 Like

Wasn’t sure if shared files ought to be for everyone so they can see what’s going on or if private messages are the norm.

Also, apologies to the OP if I, ‘took over’, the posting. I know I did a long segue from roads and curbs… but was trying to work towards it!

You can make your work easier and improve your model if you work in sections and with quads.

map-06

map-07

// edit
And you can avoid working with excessive and very small edges. Overall, it will not help you, it will make your model and work difficult.

map-08

1 Like

I agree with Mihal. I don’t use SandBox anymore for this reason. I always try to create regular “quads”.

1 Like

Thank you very much mihai.s! You’ve answered a dozen questions with your demonstrations. It’s time for me to go to work practicing… and to become more familiar with the Evil Software Empire (something new everyday). I’ll be watching your mini-tutorials as I go. Thanks again!

I was aware that Artisan would get some undesired results when passing over areas that included many triangles as well as larger triangles at the same time. Would you say, as a rule of thumb, to always ‘regularize’ your mesh triangle sizes?

As much as possible I suppose. I generally work with Toposhaper meshes and when I create new parts I try to use a similar scale mesh. I can’t say how important the regularity is but it stands to reason since the sculpt tools work with vertices --so if some are much further apart than others, it may get hard to control.

Makes sense. I was reading through the SUbD info and see my way of conceptualizing (e.g., “triangles”) is incorrect.

I didn’t latch onto TopoShaper because it seemed to be geared more towards creating from scratch. I missed the boat again.

Thank you for the info. I’m going to start playing with the tools to see how far I can get.