Please see attached images and file. I’m seeing a strange effect after adding a dimension to a component. I created a 1:1 scale component, then created a 1:1000 scaled copy of the component to work on the detail. After adding a dimension across the large component’s rear face, the bounding box grew very tall. I’ve viewed hidden geometry and there are no stray elements that would cause the large bounding box. The small component (original scale) has the same behavior.
When the components are unselected, I noticed the dimension text was not in its original location. Rather, the text seems to shift way north of the component and enlarges the bounding box with it. However, when I select the component for editing, the dimension returns to its original position and the component bounds are normal. Close the component and the dimension heads north again.
I’m running windows 10, SketchUp 2020 pro. I saw this same behavior in 2019 pro and ignored it for months. Any ideas?
First question: Why would you put the dimensions inside the component. Since you are adding the dimensions inside the component, it is reasonable that the bounding box would get larger as it has to contain the dimensions.
Why are you scaling up the copy of the component? Scaling it up would require the dimension to be scaled, too and the dimension only scales vertically.
Dimension: From previous experience - in other models - I’ve had trouble getting a dimension to “stick” to an endpoint when the dimension was not inside the component. So, I developed the [bad] habit of placing my dims inside. I just tested a small box component and clearly I am mistaken about a dimension not scaling with a component. I’ll try to find some of my older models to see why I came to this understanding about dimensions. I now suspect it may have been related to moving a component, not scaling. Note that I created the large scale copy, then added a dimension. I just tested both components and found that adding a dim inside the original scale component does not cause the bounding box to extend upward. Also, I can then edit either component and the dim stays put. However, if I add the dim to the 1000 scale component, the dim enlarges the bounding box in both components. So, it seems there is different behavior depending on which component I edit.
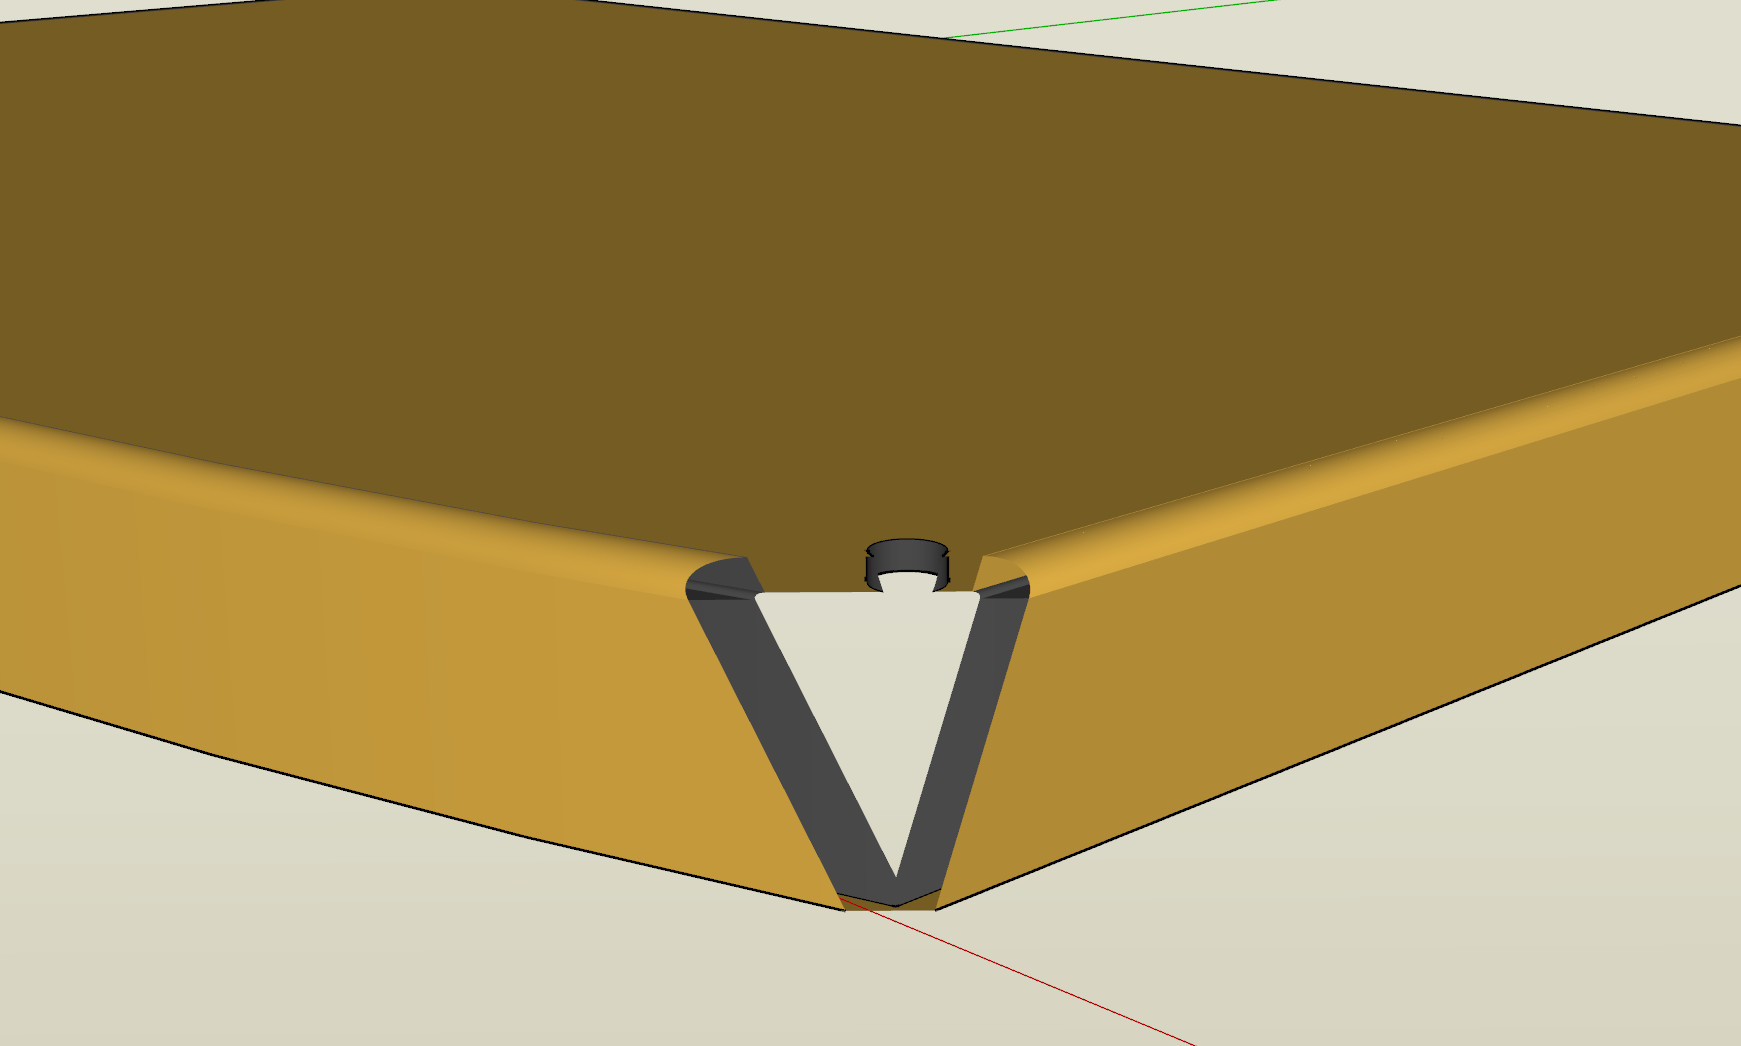
Scaling: I had problems with clipping in the original scale, even with the field of view set to 35 degrees. I scaled the original component based on a tutorial @DaveR did on drawing a threaded screw. Scaling by 1000 allowed me to work on the details of the drawing without clipping. Interestingly, in the original scale, the front corner clips but the back corner does not. The front edge of the base is curved, whereas the back edge is straight so the back corner is 90 degrees. (See attached images - not trying to start a new topic in this thread, just want to explain why I scaled.)
Generally it isn’t a great idea to add dimensions inside a component or group since it does enlarge the bounding box. If you were modeling a woodworking project where you wanted a cut list, the dimensions inside the component would result in erroneous dimensions in the list.
Scaling up to work on small details is useful but it should be a temporary thing.
Is the clipping you show on the large copy of the component or the original small copy?
If you have difficulty anchoring dimensions to the model due to radiused edges, temporarily turn on Hidden Geometry so you can see the points where you want the dimensions to go.
More likely, there were bugs that have since been fixed.
Perhaps search through the Release Notes pages on “dimension”.
( I do believe there were Ruby API fixes for coders who needed to attach dimensions to vertices inside another context.)
Interesting point on the cut list. I didn’t know that about dimensions inside a component.
I only scaled up to model the detailed work and planned to delete the larger component when done.
The clipping I show is on the original small component.
I’m pretty sure my original dimension problem was related to positioning. I used SketchUp to layout my shop and I frequently needed to position components to create space between them. For example, I modeled a workbench, then tried to position the bench component 5 feet from a wall (also a component). When I added a dim between a wall endpoint and a bench endpoint, the dims didn’t always stick. I’ll try to find one of those old models and dig a little deeper.
If the larger copy is still in the model space, the clipping would be expected.
If you have difficulty placing components in your model there are a couple of things you can do. First, set the component’s origin (insertion point) is a logical place that will have a destination in your model. For example, you could put the workbench component’s origin centered along the bottom back edge. If the bench is 5 feet long and you want the end 5 feet from the right wall, place a guideline 7-1/2 feet from the right wall, drag in the work bench from the Components panel and drop it on the guideline. (I do the same thing for drawer and door pulls as well as other hardware like hinges so I don’t have to fuss around with placement.)
Another alternative is to add geometry at the corners of the bounding box so you have nice handles. Of course with SU2020, that’s not needed because the inferencing will let you grab components by the bounding box corners anyway.
“Scaling dimensions. All connected dimensions will move and scale with the parent object. Just select the SketchUp model or Scaled Drawing or anything a dimension is attached to and connected dimensions will come along for the ride.”
I began using SketchUp with the 2017 version. Unless I’m misinterpreting the above note, maybe I developed a workaround because the application didn’t support what I wanted to do at the time.
Sure enough. Deleting the large component eliminates the clipping. Maybe I’m losing my mind being cooped up with all the virus concerns. I swear I saw the clipping first and scaled up to solve that problem.
If you wanted to move an object and it’s dimensions as a single “thing” you could always select the object and it’s dimensions, right-click and group the set.
But I think some users instead add another instance of the component off to the side associated with a scene layer (only on in that scene) and dimension the copy so that the “in place” instance dimensions are not cluttering up the main scene view of the model.
FWIW, I do all dimensioning in LayOut. I find this produces better looking dimensions over which I have better control and it helps to reduce the clutter in the model
Yes, I do as well but I use dimensions in SU to check myself before moving to Layout. When I built this model in SU, I misread a dimension on my notes so I added a dimension to the component to scale it slightly larger to the correct size.
Absolutely. In fact, I used tape measure to create guides and snapped the scale to those guides. I suppose I don’t trust myself or the app well enough so I wanted concrete visual feedback. But you make a good point.
What @DaveR is suggesting is using the tape measure tool to resize either the whole model or an individual group or component. If you pull a measurement with the tape measure tool the length will be displayed in the VCB @ the lower right. If you immediately type in a new measurement and push return SketchUp will ask if you want to resize the entire model based on the measurement you have entered. I use this often with imported .DWG files, I find one known measurement from the imported file and resize the entire model based on that one known dimension.
Likewise you can edit the size of a component or group the same way. Open the component for editing (double click), use the tape measure to snap a measurement between two points, then type in the desired length for that measurement. SketchUp will ask if you would like to resize the component.