I’m working on a shower stall with a dark tile material. To make it lighter, I’ve been increasing the Lightness value in SketchUp’s HSL slider. However, when I do this, the rendered result becomes overexposed.
Screenshot 1: Original dark tile
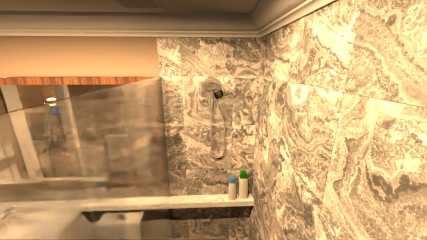
Screenshot 2: Lightness increased to 60
Screenshot 3: VRay material settings
What’s the best way to make lighter or white materials appear correctly in VRay without looking overexposed?
This is a big topic really, increasing the lightness is actually increasing the amount of light energy that surface reflects back.
Looking at the characteristic yellow hue , I’d say that you need to enable the filmic tonemapper in the framebuffer layers panel - that will go a long way to show you a more finished image and help with this.
Because you have infinite control over the intensity of light, the amount of energy a surface can reflect and the exposure of the camera you have a triangle of things that all can make similar looks, but you can end up breaking physics and making things look strange, stuck in a loop of brightening and darkening any one of these 3 things.
If you don’t have premade physically based materials which you know to be correct, then you will find it beneficial to use real world lighting parameters first.
V-Ray supports IES lights, I would use some real world LED spotlights IES-Library: Browse
I would turn material override on to a mid grey (rgb value 46,46,46) and set exposure after you’ve placed a few of those real world IES light files, keep lighting with the grey room until the lighting looks correct, then start to create materials for it then.
This at least creates a couple of anchors points so you aren’t stuck in a cycle of brightening and darkening.
If you’d like to share the file, I’m happy to have a look and show some examples
In addition to what @bmike and @Elmtec-Adam recommend, you can add an ‘Exposure’ adjustment layer in the Frame Buffer and reduce the ‘Highlight Burn’, which will pull down overexposed areas. But this is considered ‘post-processing’ and should be done after or along with the other suggestions on correcting your material properties and light sources. Take a look at SketchUp’s free course on rendering Interiors with V-Ray as soon as you have time…lots of good tips in there