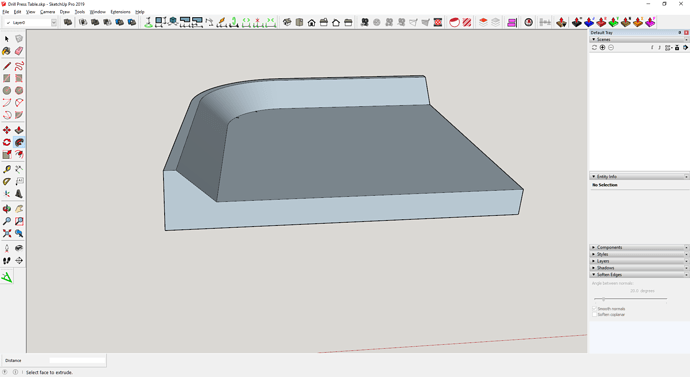
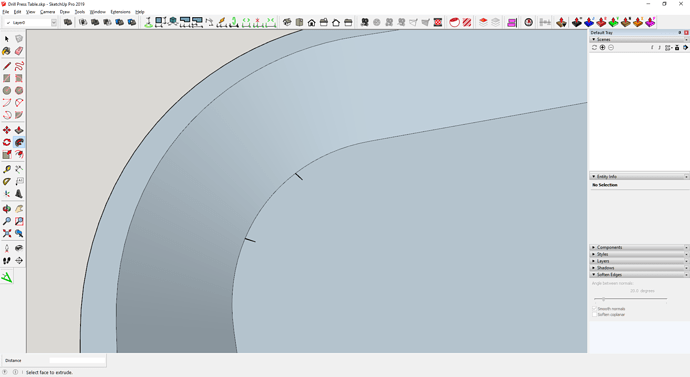
Explode the path component before running Follow Me.
There are missing faces there due to very short edges in the curve.

How did you draw that curve? It couldn’t have been as just an arc using the Arc tool. Here’s my arc drawn with 24 segments using just the Arc tool.
Sort out drawing the arc–it shouldn’t be divided anywhere like yours is–and it should all work just
fine.
Thanks Dave.
It was a copy of the original curve which was drawn in the way you originally instructed so I don’t understand why that would become a problem now.
I ended up drawing guidelines like you to set the edges of the curve and the rotational point and redrew it as you said.
Out of interest, should a drawing always be white on top? If so, why isn’t it to start with like in your example? I presume this is why you reversed the faces?
Also, following your new instructions, how do I deal with slopes?
The cross and pole have slopes on them.
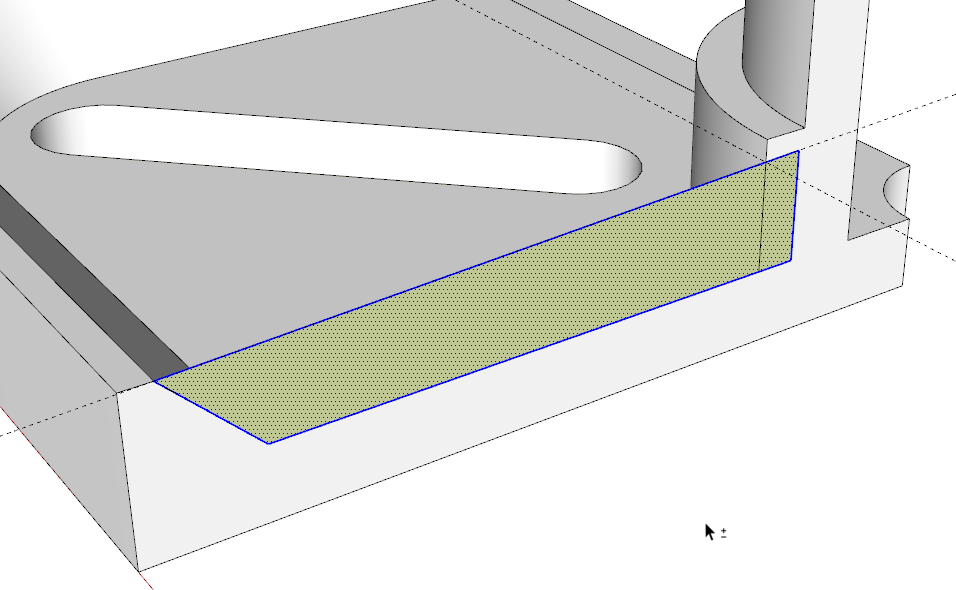
Even though I drew lines through the existing slope at the sides, when I pulled the cross it left a gap (unlike in your example).
The geometry is very complicated at this point for making sure there are no gaps.
I don’t have any idea how to make the slopes at the side of the cross hit all parts of the pole as it goes further away from the cross or how to get a seamless slope around the pole going around the cross parts.
The “slopes” you are talking about I assume are draft angles, and in the case of the cylinder might also be called a tapering cylinder. (a cone).
In that case my advice is to draw each part as a separate solid component, then use the solid tools and boolean operations to combine them into the final part.
Depending on what you are doing with this model, it might not even be necessary to combine them, like if you are using this purely for rendering or to check fit with a different virtual part cad model or something.
Another option, for the ribs is to just grab the two points at the top of the rib and drag them outward to the edge of the rim slope. For the central cylinder it is more complicated.
No. Not the draft angle.
The slopes on the tops of the the ribs.
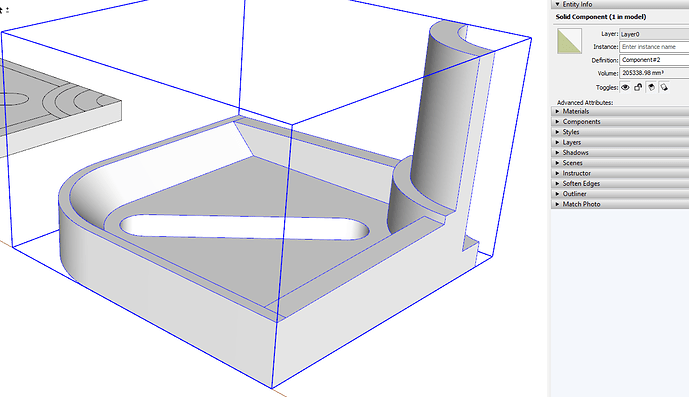
I made the quarter of the table a component making sure it shows as solid in Entity Info and then drew the ribs outside of the component making sure they extend into the central collar for the post. I started by drawing a face.
Push/Pull to give it thickness and copy the geometry to the other side…
Then with both of the ribs selected, I made a component and made sure it shows as solid. I made the ribs a component although later I will explode it. If I screw something up after exploding the component, I’ll still have the component in the In Model components so I don’t have to start over completely.
I used the Trim tool from Eneroth Solid Tools to trim the ribs to the center collar.
Then I exploded the rib component and while the geometry was still selected, I cut it to the clipboard (Ctrl+X). Next I opened the quarter table component for editing and used Paste in place to paste the rib geometry into the component.
Finally, erase any coplanar edges and make sure there are no internal faces or stray edges. The quarter table should be shown as solid in Entity Info when finished.
Ah, I thought the ribs themselves needed a draft angle and sloped sides.
Technically they probably do but I doubt that draft angle is important for the application at hand. If he was modeling this to make a die for casting a new one, then yes, adding draft to the parts would be important.
Thanks for your replies!
I have managed to get to the stage where you say about using Enroth solid tools and Trim the two ribs. I am stuck at that point. I have them highlighted after making them a component but clicking with the tool mentioned seems to do nothing?
Also interested to see Dave’s approach to the slopes.
What slopes are you referring to?
Around the pole, like in this image (but without the gap at the ends):
And the sides of the cross pieces, from the raised part down to the line on the side which is visible.
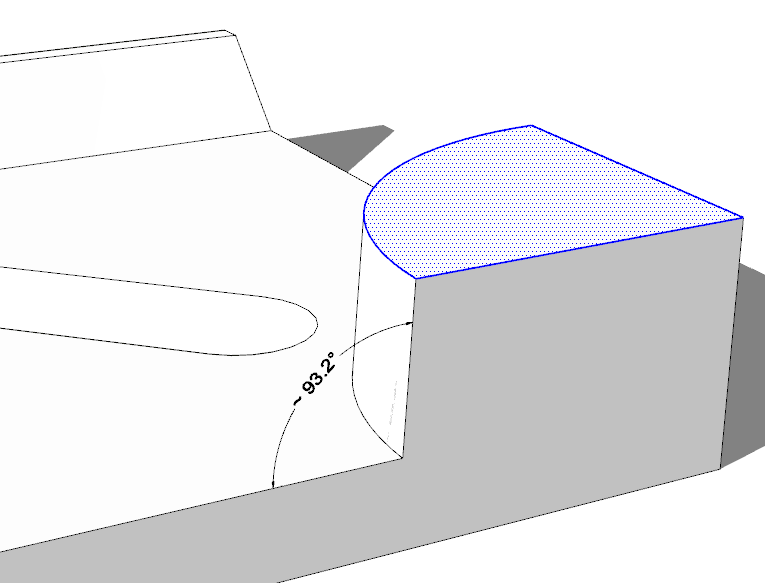
I still don’t understand what angle you are referring to. Is it the one I’ve dimensioned in this view?
Hello Dave, I have done a rough paint job to demonstrate:
I tried to describe this in previous posts. It is tapered around the base of the pole and sloped to the sides of the cross.
So now you do want to add draft to the model.
Start by drawing arcs for the base radius and top radius for the collar. Omit the other arcs at this stage because they’ll just get in the way.

Select the face inside the smaller arc along with the arc and its edges using a double click on the Select tool. Get the Move tool and move the selection up to the height of the collar. That will give you the draft on the outside of the collar. As before, I made the quarter table a component at this point.
Draw the ribs essentially as before with them extending into the table component a bit and use Eneroth Trim to trim the ribs to fit. Since the ribs I drew are tapered both from one end to the other and in width, the edges along the outside won’t be coplanar so a diagonal will be required to get faces. It can be softened so it’s not visible.
Ribs are added to the quarter table as before and then additional arcs to create the post and the hole through the table top which are finished with Push/Pull. The rest of the table is made as already shown. I used 1mm for the offsets to create the draft. That probably creates a slightly excessive draft angle but it shows better for illustration purposes. You could work out the required draft angle if you really needed it.
The exterior surface of the post would be machined to a cylinder so I’ve modeled it that way. If this model was a core for casting, the post would also need draft both inside and out. It would be easily created as above. The outer perimeter would also not be square to the machined face of the table. That angle would most easily be modeled way back when setting up the profile, though.
I did omit part lines from the die. I’m not going to add those, though. I’ll leave it to you to sort out that details.
Hello Dave, thanks for your reply.
When I double click on the line you describe, it selects more than just the line:
It tries to move everything up?
Also, the way that you have angled the rids from this view is correct (where the angle shows as 93.7):
I totally can’t understand how that is created though. I think a GIF is in order if you don’t mind please. In my deign the ribs are tapered at the sides but not along the length. I would be interested to see how you achieve both results.
The face inside the smaller arc is the face between the smaller arc and the corner.
If you don’t want the ribs tapered make the shape as the one on the left. It’s a simple enough shape. Draw the end profile and extrude it to length. If you want it tapered over its length, draw the shape on the left and then Move one end edge up to create the taper while holding Alt to invoke Autofold. That will result in the diagonal line.
Unfortunately I can’t put any more time into this project now. I’ve got several jobs for a client that need to take priority.
Thank you both for your replies. I am grateful that you have spent time on this.
I have now managed to create the four quarters and am trying to figure out how to join them all up properly.
I can’t get the trim tool to work properly nor the eraser tool. Not sure what I need to do to get this sorted.
Drill Press Table.skp (1023.0 KB)
Spending some time With these videos might be of some help.
Even though solid inspector is reporting no broken parts, when I try to use the solid tools it does not work. There appear to be nested instances but I don’t know how to fix this so that I can manipulate the shapes as required.
Drill Press Table.skp (1.1 MB)
