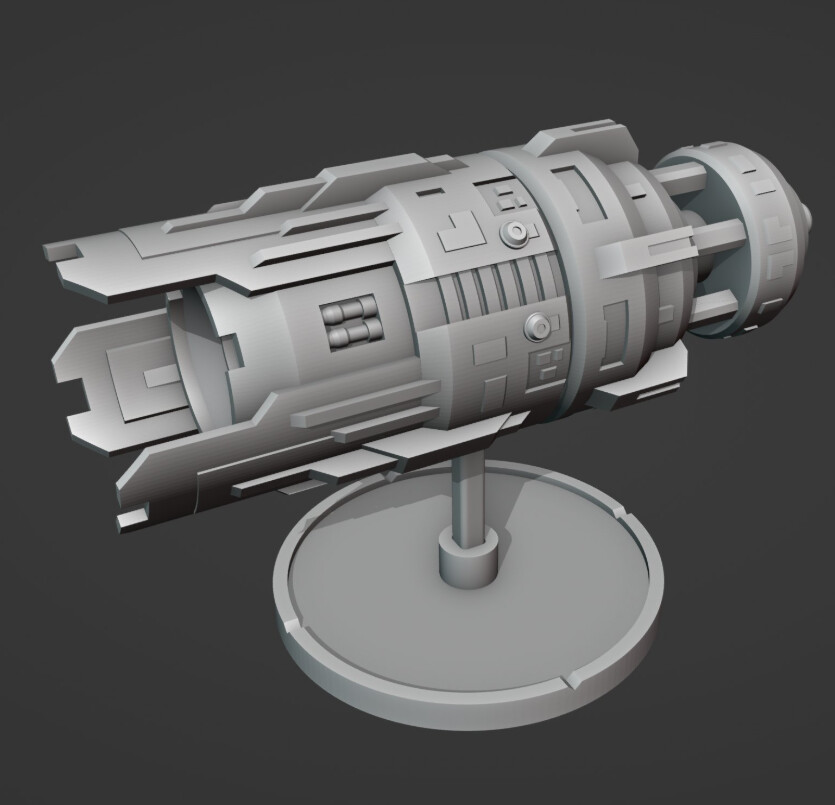
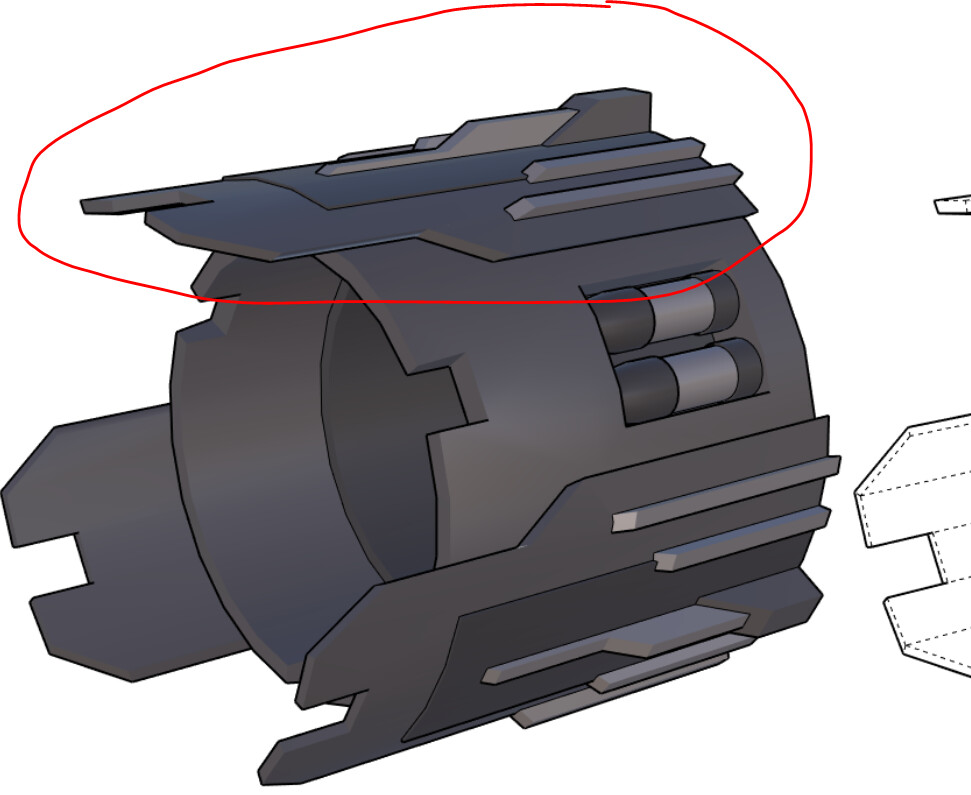
Hey guys, i want to try and do some scifi modeling in SU pro. There are some things i am not sure on how to complete or achieve. For example, the attached image is of a game piece from a game that i play with some family and friends. But i want to try and model this. Some of the parts im not sure SU pro can handle are the 3 front prongs (for lack of a better word) Looks like there are alot of extrudes on curved surfaces.
What extensions would i need to install to complete this piece?
You could do most all of that with the native tools.
How much experience do you have - what other types of modeling have you done?
Is it possible? Absolutely. @mihai.s could probably make that in 15-30 minutes and make a tutorial of it…
Can you do it?
¯_(ツ)_/¯
Maybe try to model some of it - break it into small pieces…. And I would model it vertically with the center point being the world axis. And model it treating mm like meters.
i come from a solid works background BUT i have modeled many things in SU pro in the past. But nothing of this sort. it was always engineering based and more realistic sort of speak.
I usually model big and then scale down at the end. I try to avoid the tiny face issue the best i can.
I used to use su pro exclusively, then i had to switch for 2 years into a modeler like solid works and Ondsel Engineering Suite so that i could do lots of cfd and fea for my job. So i do not remember all the tools and stuff Dave R taught me.
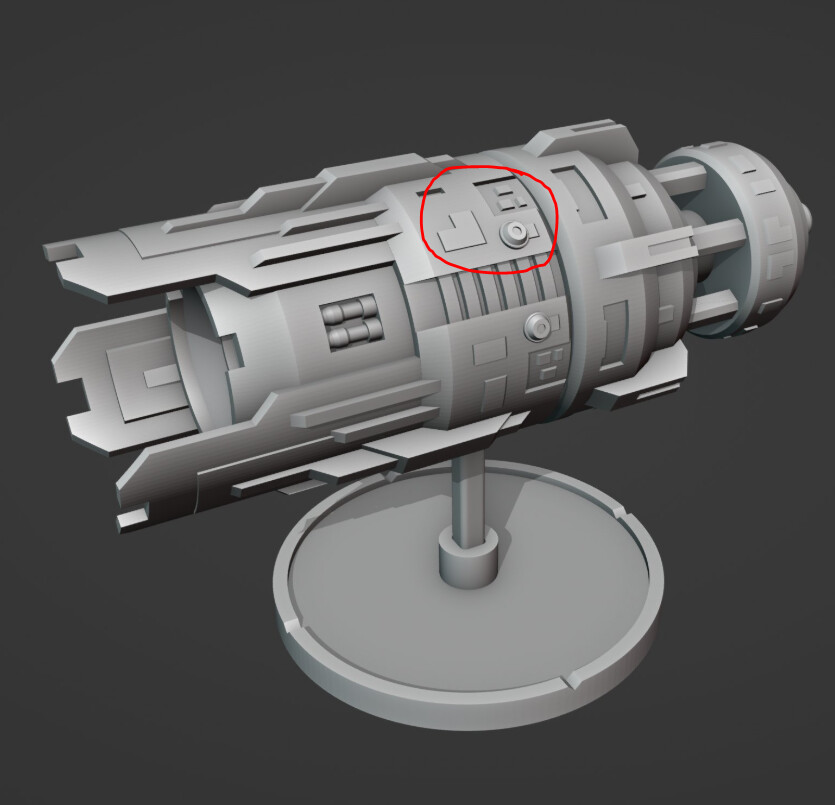
it seems that a lot of the little pieces, i wither need to extrude them on the curved surface, or model them separately and “embed” them into the curved surface such as the stuff in red
i mean, so far in the last 5 minutes i got the backend with the engines, but some of this stuff i have not figured out how to do it yet. I used the move tool to create the 45 degree chamfer by using the ALT key. but yeah, some of this stuff is tricky for my brain haha
are they simply raised panels ? well then the best would be to draw on your existing ship and raise the panel. for that, a pair of plugins comes to mind, “tools on surface” and “joint pushpull”, both by fredo6, both available on sketchucation.
but other bits are not supposed to follow the curvature, lithe the round bit you’re circling.
for bits like that, I would create a set of greebles, bits and elements, make sure all of them are solid groups or components, and use the solid tools to add them to the main ship.
the second method makes you build it in 3d like you would make it as a model, global shape, then add details.
it’s like switching from an language you’ve used a lot to another you haven’t really… not in a long time.
it’s there, it’s coming back, slowly, and sometimes you’re stuck thinking “darn, it would be simpler in that other language…”
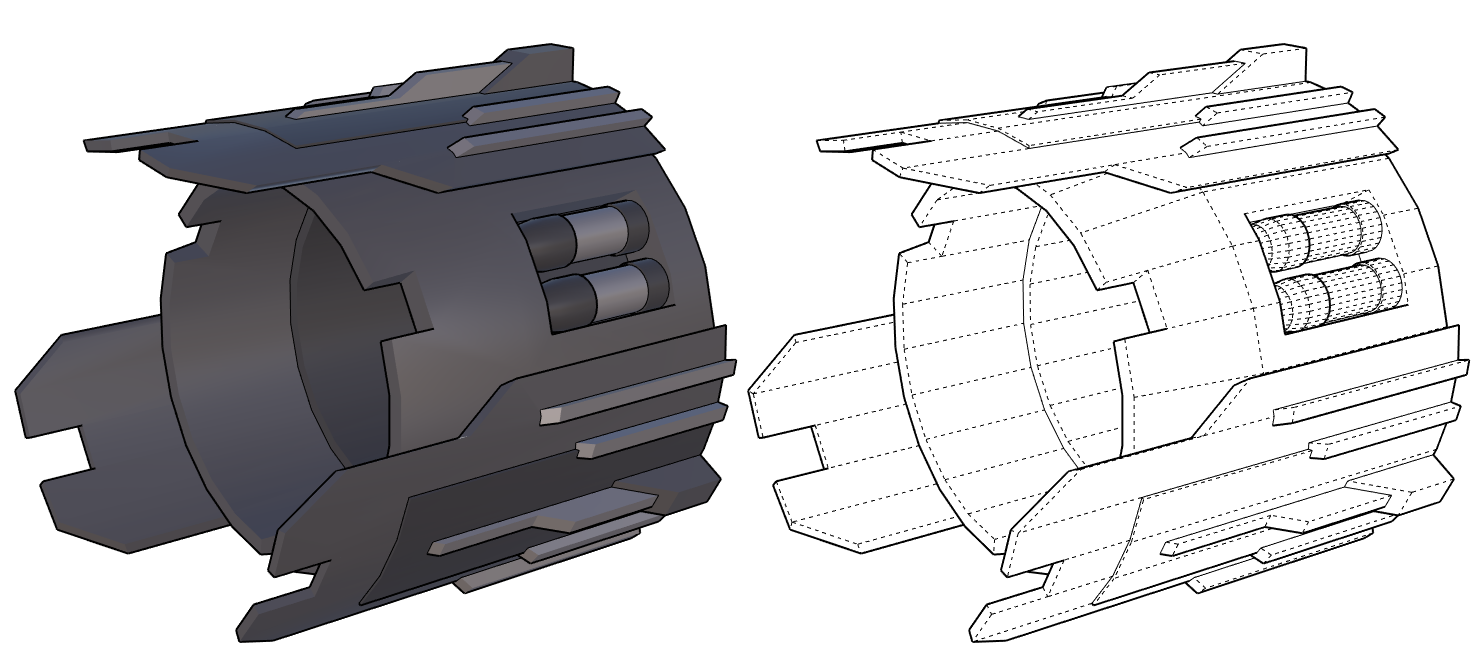
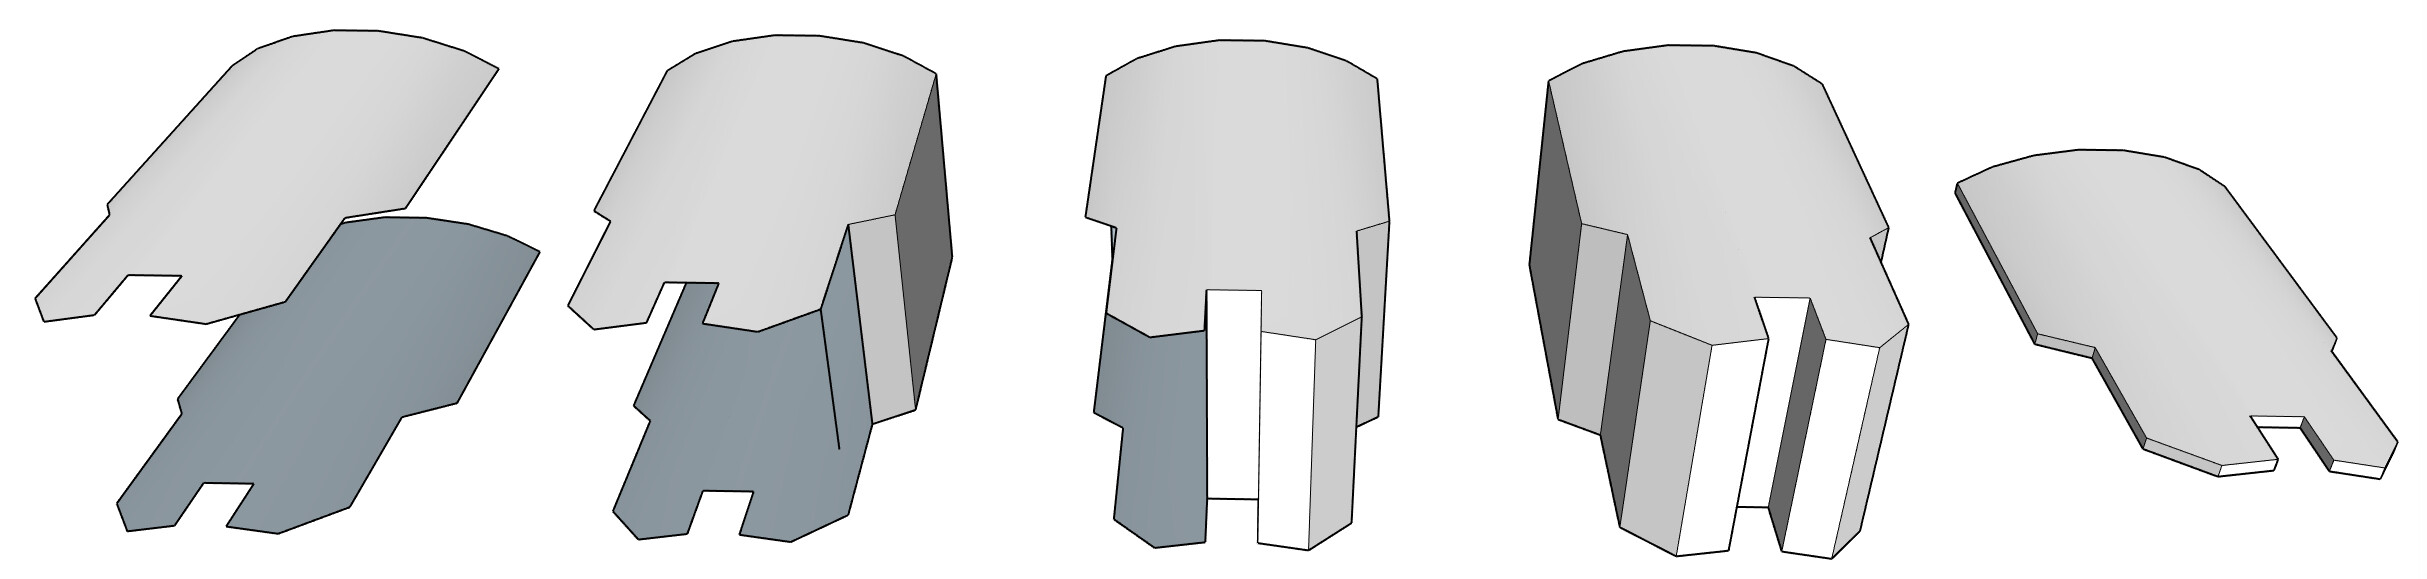
This was made just using the native tools in Sketchup Pro, + Solid Tools (For just the four line structures on either side of the central spine on each armor piece and the piping on the side).
Like Ateliernab said, You can create a whole bunch of greebling on the side, just make sure they’re air tight (solid groups/components), and you can copy/paste/rotate into place and use solid tools to merge them to the main body.
If you’re 3D printing you don’t need to worry too much about geometry, especially if it’s smaller in scale. The main concern is making sure everything is air tight.
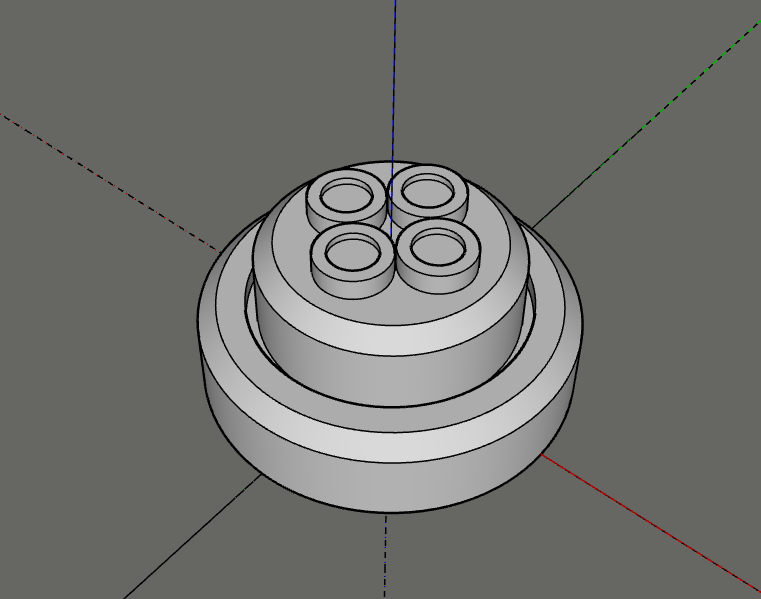
I’m a Make 2017 user and thought I’d give this a go. How many segments did you use for the circles please? I count 30 from what I assume are your hidden geometry lines/back lines on the white model.
My Sketchup generates a standard a 24-segment circle, and that was what I used. The only difference is I rotated it 7.5 degrees so flat segments were sitting on the top and bottom instead of the endpoints of two joining edges.
■■■■, how did you do this? Mostly right now, i want to learn how you made the section in red in my image. I can make the small louvers and greeble (first time hearing the word greebling, but i can assume it means all the random kipple) its the main prong/tip armour piece in red i want to figure out. Its been a good solid 2 years since i used su pro for my design work.
ok, great. I do like fredos work. I have used some of his extensions in the past.
Its been a solid 2 years since i have used su pro extensively. Trying to remember how i did things compared to Ondsel and other cad programs, is a little tricky right now haha.
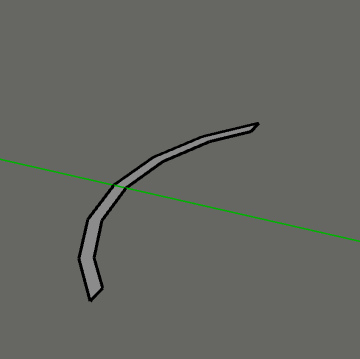
I can duplicate the faces and connect them together to make a solid segment, or I just give the cylinder a certain thickness and meticulously cut it out from here. Here’s an example of the former, which would be easier. This can also be more quickly accomplished using a tool like Curviloft:
ok, i went the direction of making a thin walled pipe (2d surface) then cut the section i needed out, then extruded, BUT that makes it now even more difficult to cut the angled pieces out, unless a make a cutting tool in the shape i want and use solid tools. not sure which takes more time, connecting 2 faces together with lines or making a cutting tool haha
interesting approach. I think i may work on this for this week. I need a break from modeling engineering stuff and maths so i thought i would give some sci fi stuff a go.
thanks for this. ill post later when i run into trouble again, which will happen haha
oh, and in case anyone wants to get the game or at least see the pieces, here is the link to it. Its a full tabletop game. I find it fun because i get to paint the pieces and print them.