Photo Match - Photo Editing Software?

Hi again everybody

This a photo editing question rather than a SketchUp question, but because I am having great success using Photo Match, I will ask it anyway.

I recently had a project where I wanted to create a render using Photo Match, but the subject property was being altered in a way I found impossible to model.

I took the photo below of a property I want to add a glass structure to, but the green foliage on the house is being removed and a few windows are being replaced with doors. I tried for days to work out how produce a render without modelling the entire house but I failed miserably. In the end I paid a company to produce the render you see in the second image which is very nice but not really the standard I hoped for. I basically sent them my original photo and my SketchUp model of the glass and they produced the render you see below.

What I would like to learn is how I can edit the original photo myself to look like the background of their render (without the glass) before rendering the model using Photo Match & Vray.

I would prefer the house walls to look more realistic with shadows etc and I would appreciate any guidance as to how I can achieve that, and any pointers as to what software I should use?

Many thanks in advance as always.

1 Like

hello,

you have multiple ways of producing such an image.
from what I can see, the company you paid clearly used a photo editing software, like photoshop, to remove the green foliage. you can see there is a lack of shadows below the roof, the coating is too plain, looking unatural, and a repetition of reflection on the new door. my guess is that they edited the base image and used it as a background with the glass rendering as a front layer.

But you could perfectly use your photo match skills to do the same rendering the whole thing, and keep the original roof to maintain the illusion.
vray is a good for this kind of exercice (so would be enscape) as it will keep your photomatch camera settings and you pointed it out yourself, you then just need to master a software in order to paracheve the integration. Honestly it is not very hard and photo editing softwares now have very powerful tools to achieve such a thing.

Thanks Paul.

I use Photoshop Elements quite a lot but I couldn’t see how to use it to remove the foliage or add the new doors in a realistic way. I was thinking if I could edit the base photo just to do that and make the new walls realistic I could create a great visual with Photo Match and Vray.

I think I need to find some new software which I can use to change photos before the Photo Match stage.

Thanks

Since you’ve paid this company to edit the photo for you, might you not just ask them to further edit it to make it to your liking? It is what you hired them to do, after all.

Perhaps they would be able to provide you with the layered working file (PSD, if they used Photoshop) so you can make the additional edits on your own? Or at the very least, give you the flattened background image (without the added render).

1 Like

I have Photoshop CC, but I believe Photoshop Elements also has the Quick Mask tool. You could use that tool to add more realism to their edits. I blocked off the roof line here and added some shadow. Then, I used the quick mask tool to select the wall area, and used filters to add noise to create more texture.

2 Likes

Thanks - but this project is over for now. The render is already with the client who seems happy enough with it, and hopefully they will proceed.

My aim is to learn how to edit photos myself for future projects - if I can learn how this photo was edited then I can do pretty much anything myself going forward to a much higher standard using Vray and Photo Match.

Thats my goal.

Photoshop itself has a set of perspective tools. Find vanishing points, define working planes, and the like. It allows for example to copy the door and move it over and it follows the rules of perspective…probably what they did there.

1 Like

Thats brilliant and exactly the sort of advice I am after.

I think I have underestimated what PS Elements is capable of - I obviously need to study its drawing abilities a lot more.

1 Like

Coincidentally, Ive just been reading about the relative capabilities of Photoshop & Photoshop Elements which is the program I own. I guess I will need the full Photoshop program to achieve what you’ve described but I will see what Elements can do for now. Thanks for your post.

It’s been so long I had to refresh my memory. It’s actually a plugin with Photoshop called Vanishing Point. It’s a lot like Match Photo, except with Photoshop. I posted this screen shot of what it looks like in another thread here:

Lots of resources on the web about using it, but here’s Adobe’s:

Quick Mask, Clone Stamp, and Healing Brush will be helpful tools in that endeavor. I believe Photoshop Elements has all of these. Essentially you would use Quick Mask to pull apart the windows, doors, etc. onto different layers, and the Clone Stamp / Healing Brush to fix any overhanging foliage on them. Use the selection tools to draw up the wall area, and the filters to add noise/texture.

When dealing with the shadows, you can use the standard paint brush, and play with the hardness of the brush, the opacity/flow, and the layer blend modes to blend them into the wall layers (I used the Overlay blend mode for the shadow layer in my example).

In some instances, you might also try using the Content-Aware Fill tool, which samples the surrounding area of the photo and fills in a selected area with computer-generated match.

Look at Affinity Photo Website. Way cheaper than Adobe products at $55.00. It has all the tools you mention and many more.

1 Like

Fantastic.

I didn’t realise you could do so much with Photoshop Elements. Basically all of the tools are there and the possibilities are limitless. Just have to learn how to use them :grinning:

Thanks again.

1 Like

Practice and patience my friend! I’ve been using Photoshop since maybe 2005, and I’m still learning new things all the time.

Noted :+1:

Whilst I agree AP is a great product and I use it myself, it doesn’t have a perspective grid creation tool… to my astonishment. It has a perspective warp tool - equivalent to the Photoshop Distort tool. I know and have seen perspective tools on Photoshop but I don’t use it any more, so I can’t say anything about it.

I think some of the photoshop advice here is getting a bit complicated…

Anyway, here’s the process that I use…its not exactly what you’re asking but it migth give you a few tips or ideas.

First, model the basic house shape, and make sure you provide a bit of detail around any parts that you will be changing. This is because your VRAY render will need to provide reasonable shadows and reflections, otherwise it will look fake.

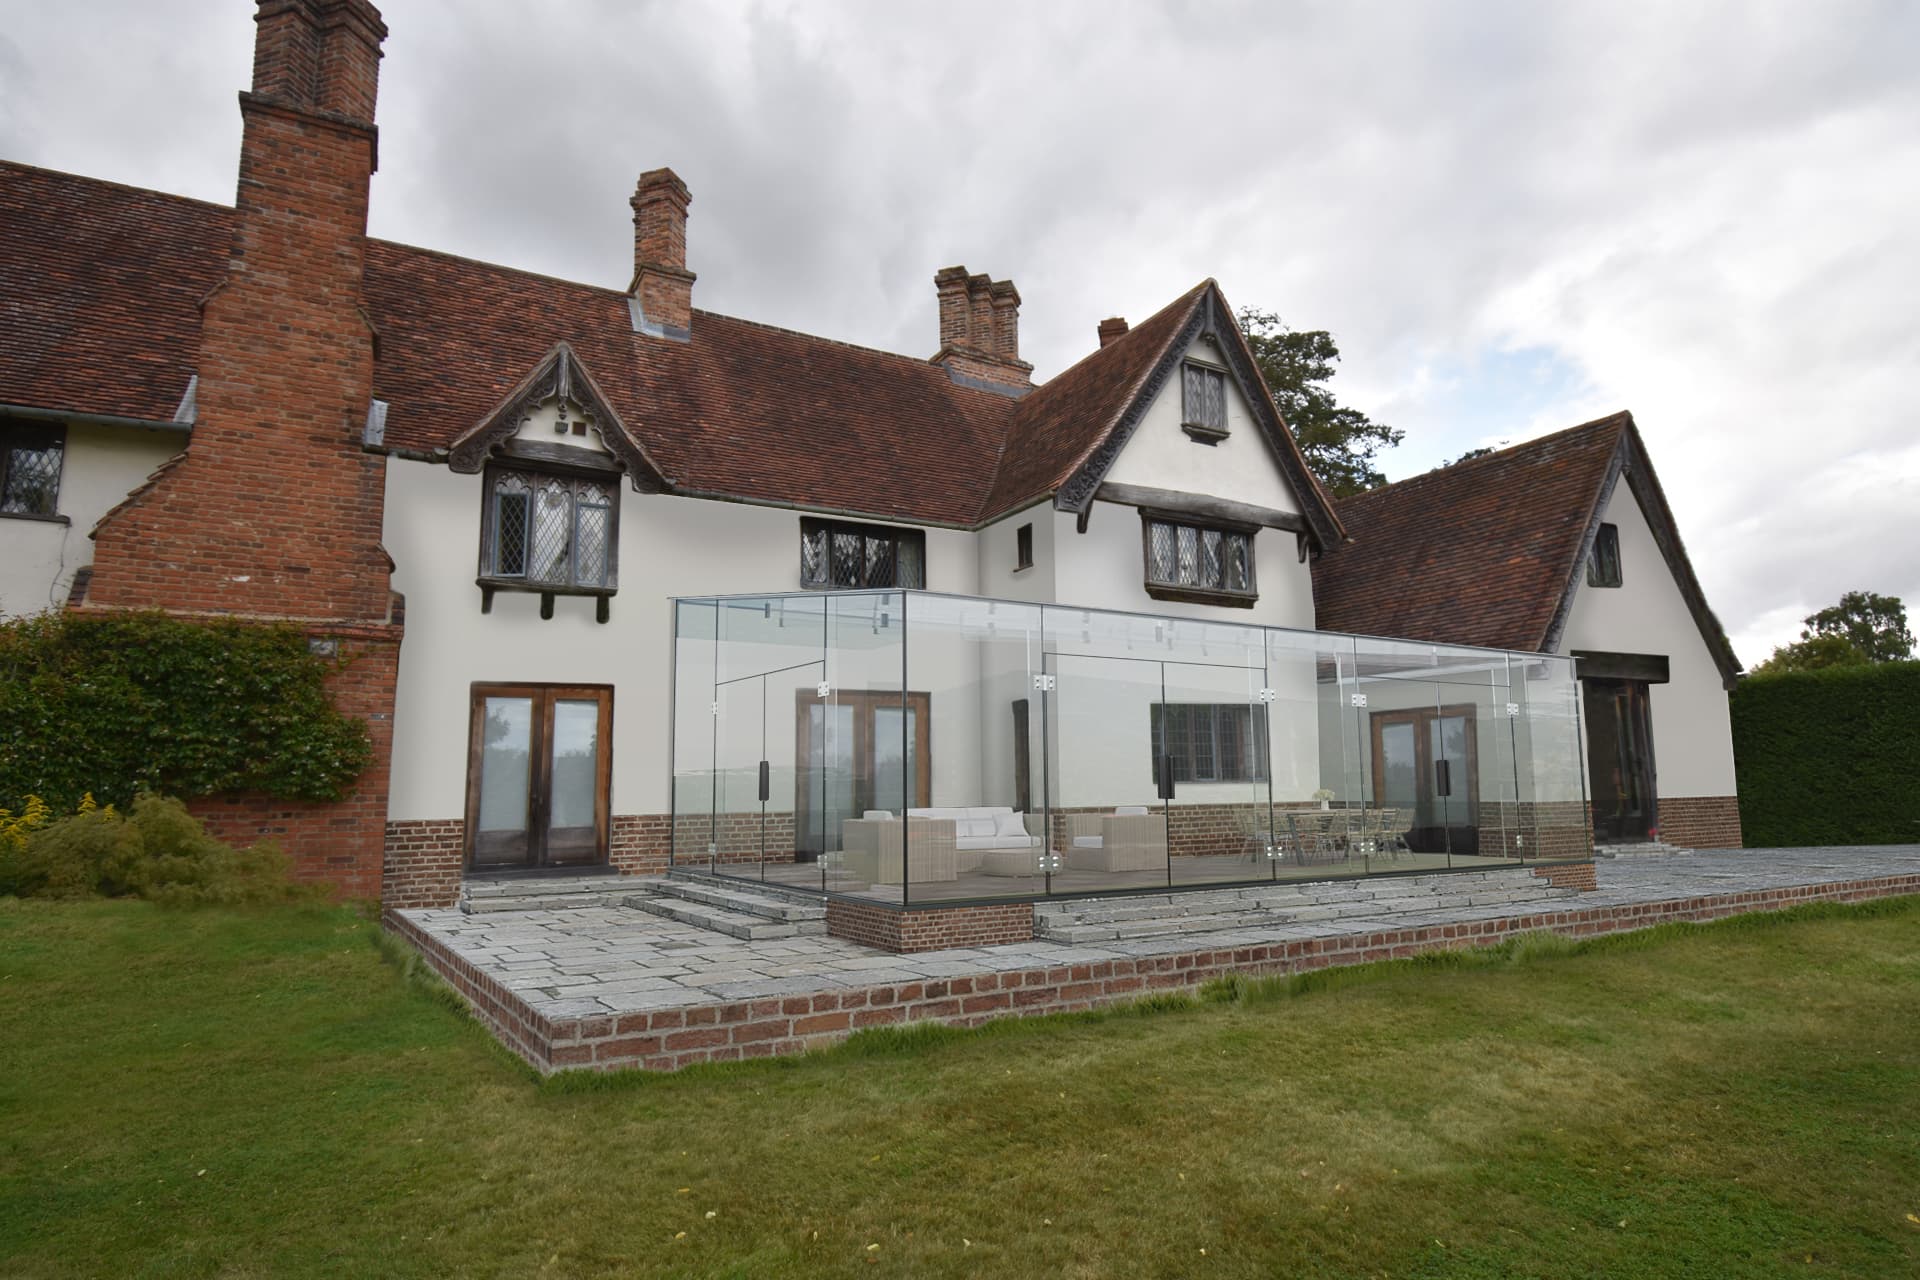
Essenially what you need to do is create a model of the house, but without the ivy, the existing windows that you are removing, and with the extra french doors, patio, and glass structure added.
To assist with this, you will need to create a few custom materials:
Main cladding material (stucco)
Brick material (lower cladding)
French doors.

You can do this using SketchUp (just import, trim and resize the photo, used as a material) , or if the materials are generic enough (like stucco or brick) you could download some seamless / repeating materials (or create your own). To help this process it would be handy to have a photo of the house straight-on (not on a perspective).
They dont have to be perfect, but should match as closely as possible in colour tone and lightness. For the french doors you can blend out the reflections first, otherwise theyll repeat and look fake.

The next step is to render it.

Then, use photoshop (or any simple photo editing app) to overlay the orginal photo on top of the render. Erase any bits of the photo that are changing and keep as much as possible of the original.
Then, using a Clone Stamp tool, borrow bits of the original photo and brush them around to add “roughness” and detail, and blend out the edges of your 3d model (it will be too blocky so the edges need to be softened a lot. Using layers (masks or erasing bits you dont need) will make this easier, particually around the ivy areas… These are simple tools and you dont need to worry about perspective etc.

In this particularly case, the area behind the glass structure will be difficult to edit afterwards so you would be best to create your render of the house Without the glass structure, then do a second render WIth the glass structure. Overlay the two images and erase out what you don’t need.

Filter (eg Add Noise) is a good idea, too… one of the most difficult bits of a photo edit is to match the “quality” of the image. Starting with a very high res image is helpful.

The final thing you need for realism is some reflections…can’t escape the fact that glass reflects everything about 8 times. This is by far better done using Vray. The easiset method is to take a photo FROM the house looking back at the landscape, wrap this inside a half-cylinder and put it behind the cemera as backdrop. You shoud also be able to download a basic “Sky dome” (environment Map) as well - Im not sure th eprocess in Vray ( maybe it’s got some built in feature) but this will add cloud and sky reflections to your glass…

This whole process sounds complex but it’s not really…you will have to become good at using the Clone Stamp tool (and lots of layers).
Some other brushes in photoshop /lightroom that work well are the Paintbrush with the mode changed to lighten/darken or hue or saturation. This is useful to adjust the tone of the image.

Good luck.

1 Like

Great post - thanks very much for the info Sam. I may be back to you with a few more questions if thats okay? :grinning:

Here’s a perspective grid tool in AP. Not sure if it’s like the PS one as i’ve not used it but it’s easy to use in AP.

https://affinity.help/photo/en-US.lproj/index.html?page=pages/LiveProjection/perspective.html?title=Perspective%20projection

2 Likes