I’m not suggesting the user calculate the length of these plates but my estimator can report the overall length and for example a shed top plate would be calculated by the following:
I’m not sure if you’ve laid out your road map or timeline for the estimating module, but I’m just trying to experiment with ways to view the data in a more summarized way in the meantime. I’m trying to create a view of the data that isn’t grouped by wall, like you currently have it, so I can apply my own custom calculations.
Some thoughts I have about your estimating module (I did a quick search in this thread to see if you talked about this but didn’t find anything too quickly):
Will I be able to quantify other (non-medeek) things in the model based on tag assignment, material area, entity name match (partial or exact match) or by object?
Will I be able to see total length of each 2x lumber, total number of sheet goods? (Not grouped by wall, but just an overall total?)
Even better, will it tell me how many studs of each size I need to buy based on standard sizes, accounting for cut-offs and waste? Same goes for sheet goods. Can I customize my own waste %?
Will I be able to add my own, custom calculations for labor, overhead, profit? Both for the overall project in addition to individual types of building materials?
Will I be able to calculate objects not represented in the model like the number of fasteners needed for each sheet of plywood? Basically, add multiple line items to each quantified item? Maybe 2x lumber will have a cost item driven by the size and length, but I should also be able to add a fixed count and cost per stud for the number of nails needed.
I should be able to export a CSV template of cost items, that can be updated or maintained outside of SketchUp, then reimported.
Right now, I feel like generate report might give me a more useful output to play around with in Excel, just until you’re able to get your native estimating module completed. That’s why I’m having this challenge of figuring out lumber size. I understand it’s a work-in-progress, that’s why I’m trying to figure out a solution in the meantime. I’ve also thought about trying to integrate Quantifier Pro - Calculate Area, Volume, Weight and Costs in SketchUp with Medeek, since it does many of the things I mentioned above, but it seems like I’d need to be able to target groups/components by name in Quantifier, and create conditions based on dimensions, which is more complex than what Quantifier is capable of…
I just accidentally discovered that you can toggle from ext/center/interior alignment when drawing walls by tapping zero. It was accidental because I was trying to type in a dimension for the wall of 20’, but what ended up happening was it drew the wall but then canceled my ability to continue drawing an additional wall. So I ended up with just one wall, as if I were in Line mode. Then the next wall drawn was aligned to the center. It took me a while to figure out 0 is a hotkey for changing the wall alignment, lol.
I also discovered that the zero on the numpad does not toggle wall alignment, so it seems like you’re assuming everyone uses a numpad? I don’t always use the numpad for dimensions, and there are a lot of laptops and keyboards that don’t even have numpads, so I wonder if it would be better to use a different hotkey to toggle this?
Also, it would be really helpful if you can add all hotkeys to the status bar when the tool is active.
This condition keeps popping up for me when I join an interior wall to an exterior wall corner. I get an additional stud protruding from the interior wall face from one of the exterior walls. Seems like the auto corner configuration is choosing the wrong corner type for the interior wall in this condition.
Not hard to override the corner configuration manually, but it also requires regenerating the other exterior wall too. Hopefully my image makes sense below. I’m basically showing you the order in which I drew the walls, and the corner configuration that automatically is applied. Hoping this condition can be identified in the code and the correct corner configuration selected automatically.
P.S. - I know I’m throwing a lot at you right now on this thread. Please don’t interpret this as me requesting that you fix all this stuff right this second. I just want to record it somewhere for you to see as I encounter these things or have ideas and you can choose whether you want to add it to your list of improvements or not. I’m having a lot of fun exploring the extension and learning its behaviors.
With the wall justification (ext/center/int) are you testing this on Mac or Windows?
This feature was created with Version 1.7.6b - 12.05.2020
The intended hot key for this ability is the Tab key.
The key codes used are: 9 and 48
You are correct when the justification is set the tool defaults to line mode since polyline mode will only work correctly when the wall justification is set to the exterior wall alignment. The reason is not due to logic or anything it is due to the actual geometric problem.
That’s strange. I just tried TAB, and it works as intended. But if I tap 0 on the top of the keyboard it also toggles the wall justification. I’m on Windows
@medeek Maybe this is over my head, but couldn’t you essentially treat all justifications as if they were to the exterior face of the stud (in the code) by just offsetting the polyline after the user inputs it?
User creates first line segment of polyline.
In Ruby, offset that line by X (X = distance to ext of stud)
Generate wall along exterior of stud line segment as normal.
User creates second line segment (from their view in the UI, it’s still center justified.)
In Ruby, offset that line by X, but also go back to the previous wall, and edit its line length and project it until it intersects with the offset second line segment.
Regenerate first wall (to extend it properly to the outside corner), then generate second wall.
Does that make any sense or am I talking nonsense, lol? You could then allow the user to justify against any surface using polyline mode. (Personally, I’d like to see a justification against the outer face of exterior sheathing, because an architect I work with aligns the sheathing with the face of foundation)
Key code 48 is triggering the zero key on Windows.
I will look at this further.
P.S.
I just needed to setup a different key code map in the tool for Windows and Mac. The next release will include the fix for this bug.
P.S.S
The next release will also include an estimating update so that gable, shed and hips walls will now be able to be analyzed and report on by the Medeek Estimating module. A very tedious upgrade on this end but hopefully it is worth the trouble.
You’ve hit upon the issue with offset changing and the polyline tool.
The projection of the first wall which has already been drawn (and completed) now needs to be modified to properly terminate with the new wall being drawn.
I will look at your algorithm posted above and give this some more thought.
This exact issue is the reason I disabled the polyline mode when the user starts adjusting the offset, it really complicates things.
After further testing it appears that the auto-corner logic is trying to assign a tee connection for the interior wall that butts into the exterior wall(s). The problem of course is that in this particular condition the appropriate end wall condition for the interior wall is the “Terminal” option.
The extra studs are just gypsum blocking since the exterior wall now thinks it has a wall that is teeing into it.
I will need to figure out some logic to detect this particular configuration. It is a little tricky though because in some cases a tee intersection might be appropriate. I will have to give it some consideration and think on the problem when I can really focus.
P.S. After giving it some thought for about 30 seconds I think I have the solution. If the location of start/end of the interior wall falls within a stud’s width (ext. wall) from either end of the ext. wall along the ext. walls length then it should be classified as a terminal connection and not a tee connection. I will have to test this out and see how robust it is.
It might be a bit more complicated than this but that is the basic gist of it.
Adjusted the auto-corner configuration algorithm to better predict terminal wall configurations when three walls come together at an inside or outside corner.
When multiple walls come together at a corner or junction it is arguably quite hard to predict the intent and desired configuration of the builder/designer/user.
I think what I have now addresses the immediate issue where a tee intersection was being created instead of a terminal connection, per the previous discussion.
I will need to continue to test this new algorithm further (put it through its paces) and also receive additional feedback from users. If you notice anything that appears unpredictable or counter-intuitive please feel free to email me so we can discuss.
P.S.
Thank-you Matt for bringing this issue to the forefront. I don’t think it was ever a deal breaker for too many but it certainly is one of those annoyances that could do well to be fixed. A simple reminder, even if the wall plugin doesn’t get the end condition correct in every instance, one can always manually modify the start or end condition of a wall panel in the edit menu.
I’ve been recently contemplating the progress I’ve made on this plugin and my others (that are not quite far along as this one) and I would be remiss to not give a huge shout out to all those who have helped me along the way in some fashion or another.
Specifically I would to thank @DanRathbun and Christina @eneroth3 without whom much of my code would not have been possible, or at the very least horribly inefficient. Dan’s assistance throughout the past few years in particular has often help me get past multiple Ruby and API coding roadblocks.
I still have a ways to go and many more hours of coding before these plugins are polished enough to be called a “product” but without some of this outside help I would still be like a fish out of water, flopping about and never gaining any sizable footholds.
Awesome. Another fast update. I certainly understand how hard it must be to predict all the edge case configurations of wall intersections. But like you said, allowing the user to manually configure wall start and end configuration is a very useful feature.
I’ll keep experimenting with the plugin and let you know if I come across any other issues or feedback.
I’m also working on a review video for my YouTube channel
Instead of drawing each wall segment on the fly as each endpoint is clicked, have you considered delaying the generation of each wall segment until the polyline has a completed loop, or until the user double-clicks or something? That would enable you to offset the lines and generate the walls in one step, instead of having to regenerate walls already created. It might also be considered a better user experience, since the 3D geometry of the wall won’t obstruct the view while placing end points.
I will give this some more consideration. The Regen of the previous wall is really not that big of deal I just need to experiment with this a bit further and see what I can make it do.
This is why I love coding this stuff, you write a bit of code and suddenly (magically almost) you have a new feature or tool. The SketchUp API is an amazing feature of SketchUp.
Don’t forget your regular user base, who while trying to do real work, uncover the bugs. Many hours are spent documenting bugs, trying work arounds while missing deadlines. Also appreciate these coding professionals assistance for the developer, everyone benefits.
The power users are not forgotten. The help on the coding is one thing (a very important part) but the new feature requests and the bug discovery is largely a result of the efforts of the power users like yourself who have spent countless hours actually using the plugins and dealing with their imperfections.
Previously the shim space or window clearance was hard coded in as 1/4" or 6.35mm. Now the user can customize this clearance between the rough opening framing and the window frame. If you do adjust this parameter you will probably also want to adjust the Window Trim Inset parameter so it matches, this way the window trim will butt up against the window frame tight.
This was a user requested update from New Zealand.
P.S.
If you downloaded this update earlier today please re-download and install. I don’t know if the file on the server was somehow corrupt but I did notice it was not behaving as expected. I have re-uploaded the .rbz file and that seems to have corrected the problem.
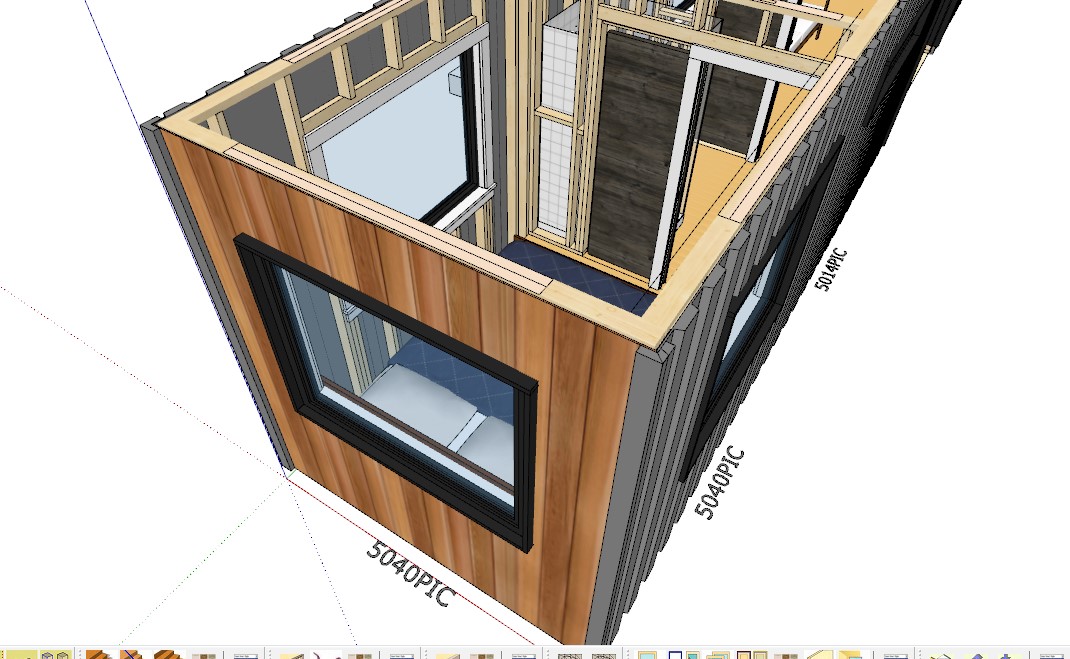
Using Medeek’s wall plugin with it’s 3D siding feature I was able to replicate the walls of a container home project and setting them inside the frame of the container, this allowed for easily punching holes for doors and windows. I was able to set the trim settings for those to replicate the metal frame that would need to be inserted into the openings. I used the roof plugin for the ceiling and walls. So far it is working great, the 3D siding feature is a great upgrade!