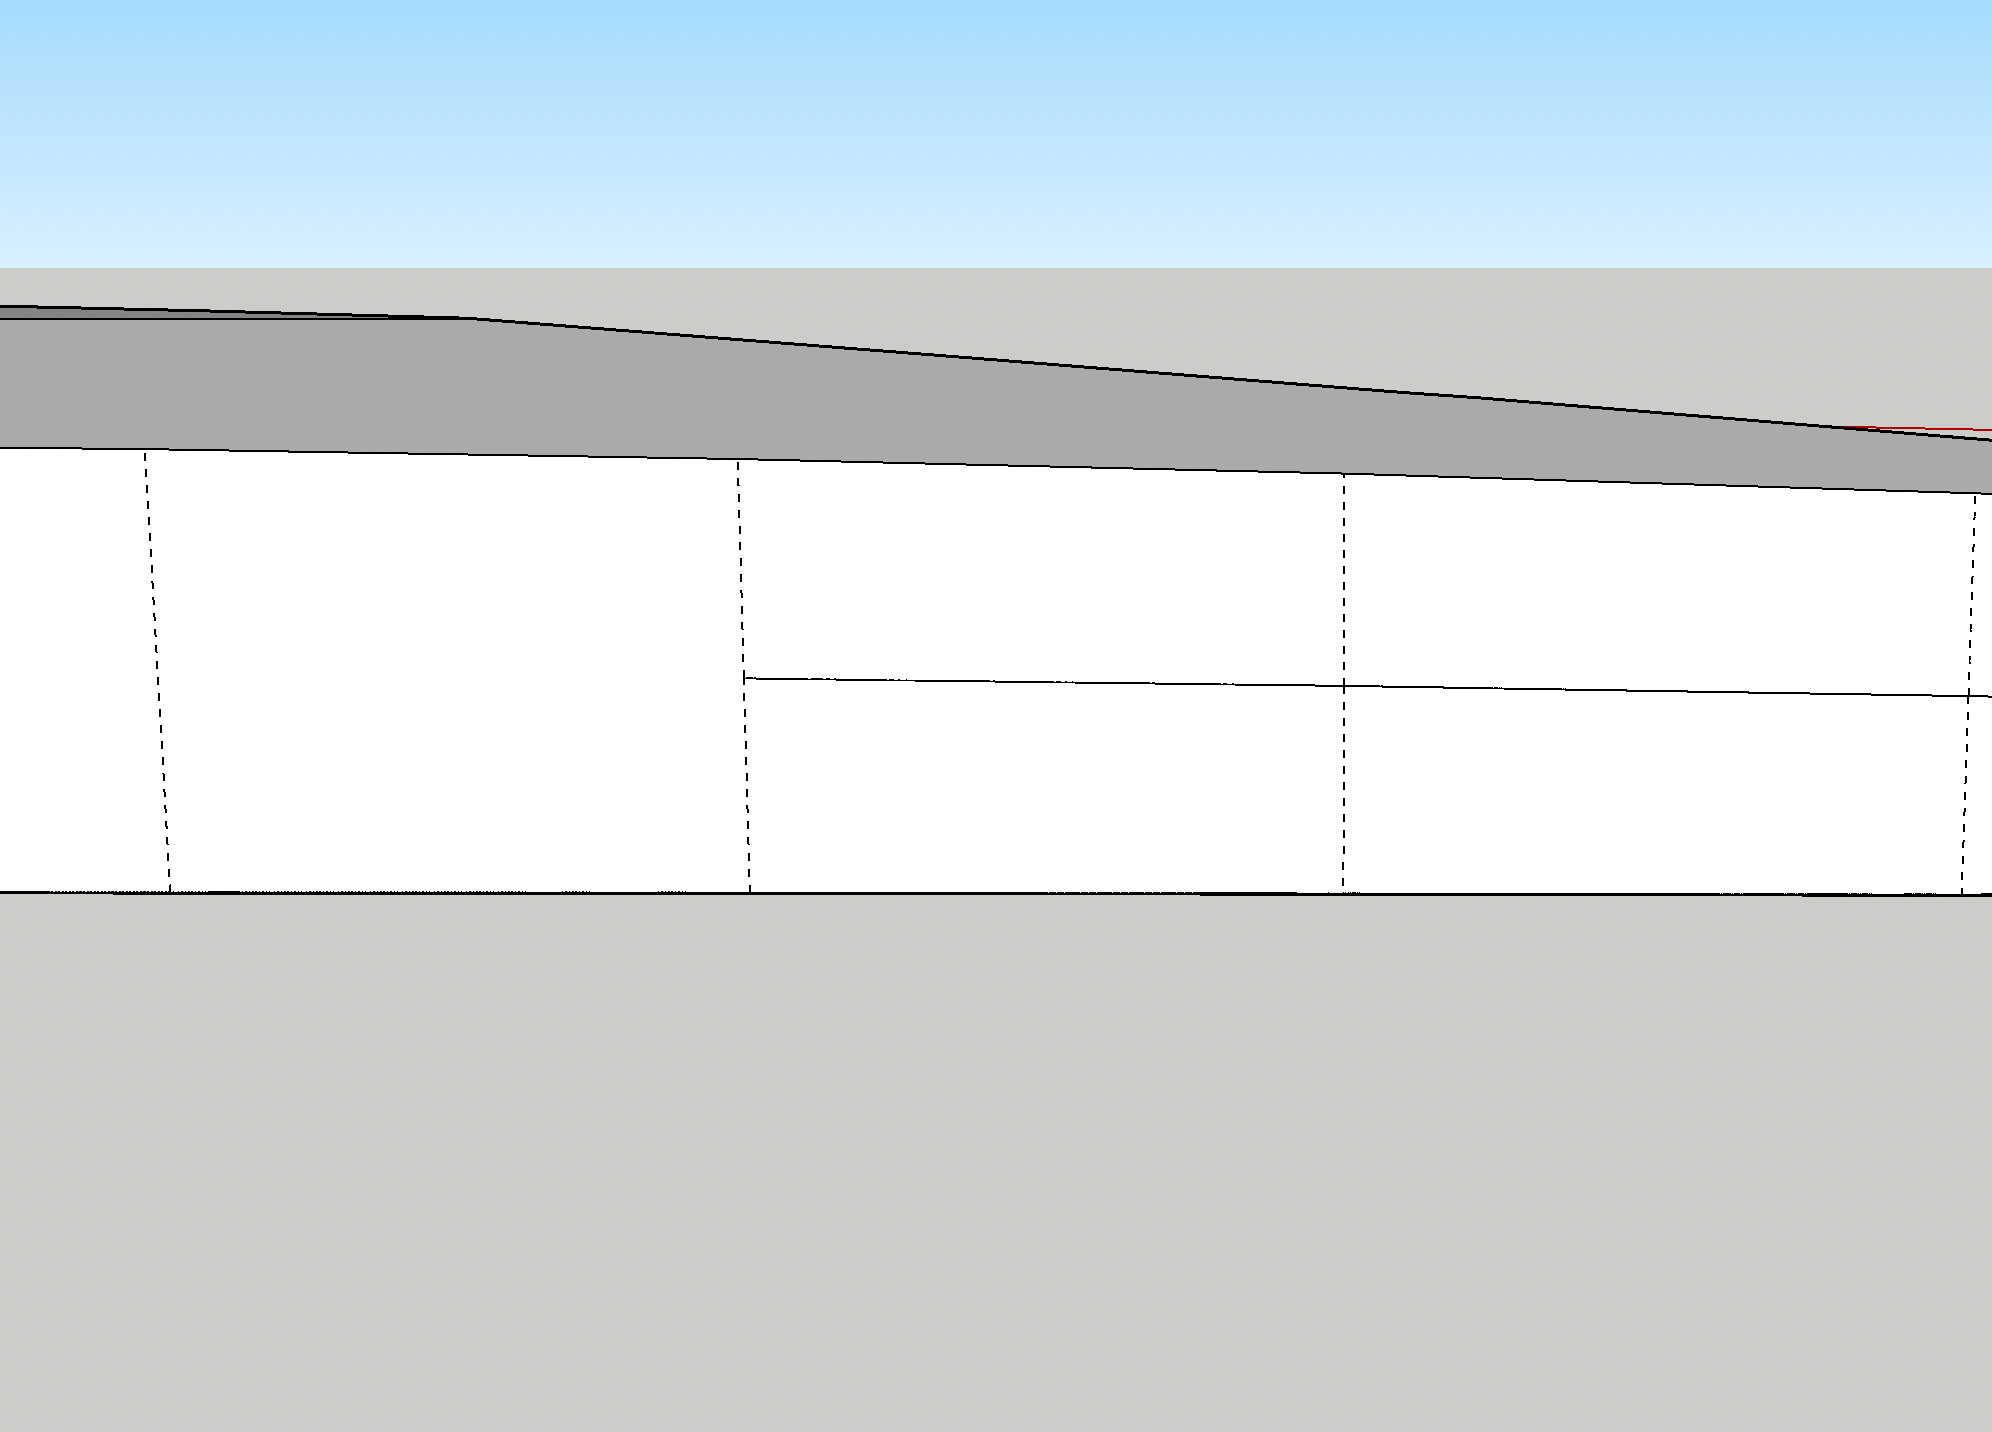
I have a rogue line in my shape. When I remove it a gap appears. I tried to fill the gap, but couldn’t get that to work.
Does anyone know how I should approach this?

knife.skp (139.8 KB)
I have a rogue line in my shape. When I remove it a gap appears. I tried to fill the gap, but couldn’t get that to work.
Does anyone know how I should approach this?
knife.skp (139.8 KB)
knife.skp (142.3 KB)
That centerline may have been (was) running on a different plane than the edges. I just drew lines across it from each edge using the midpoint and endpoint guides.
You can’t remove an edge that’s needed to support the face.
Either soften/smooth the edge or hide it…
@3DxJFD Yours looks good. I tried to do the same thing but I must have missed something

@tweenulzeven I’m surprised that this edge is needed to support the face. It seems unnecessary. I tried smoothing it but that didn’t seem to have an effect.
Draw an extra vertical line where where the lines on top and Bottom meet the edge to heal the gap…
@cstoddart I added an image above. It must have just gotten out of alignment a bit. It was a little suspicious that the line wasn’t meeting the hidden geometry.
I see what you mean about the hidden geometry not lining up! That definitely feels like the underlying issue here.
Should that be fixed like this?

Or like this?
I actually haven’t had luck with either…
If the edges are symmetrical, then all the facets of that curve should be coplanar.
If that’s the case you should be able to remove the line without creating a gap.
See if you can remove it after healing the gap with the vertical lines.
Or better, remove the line and heal the gap with vertical lines.
You can soften them afterwards…
I did it! I think I was running into several issues, and I don’t think I understand all of them.
Thank you @tweenulzeven @3DxJFD ![]()
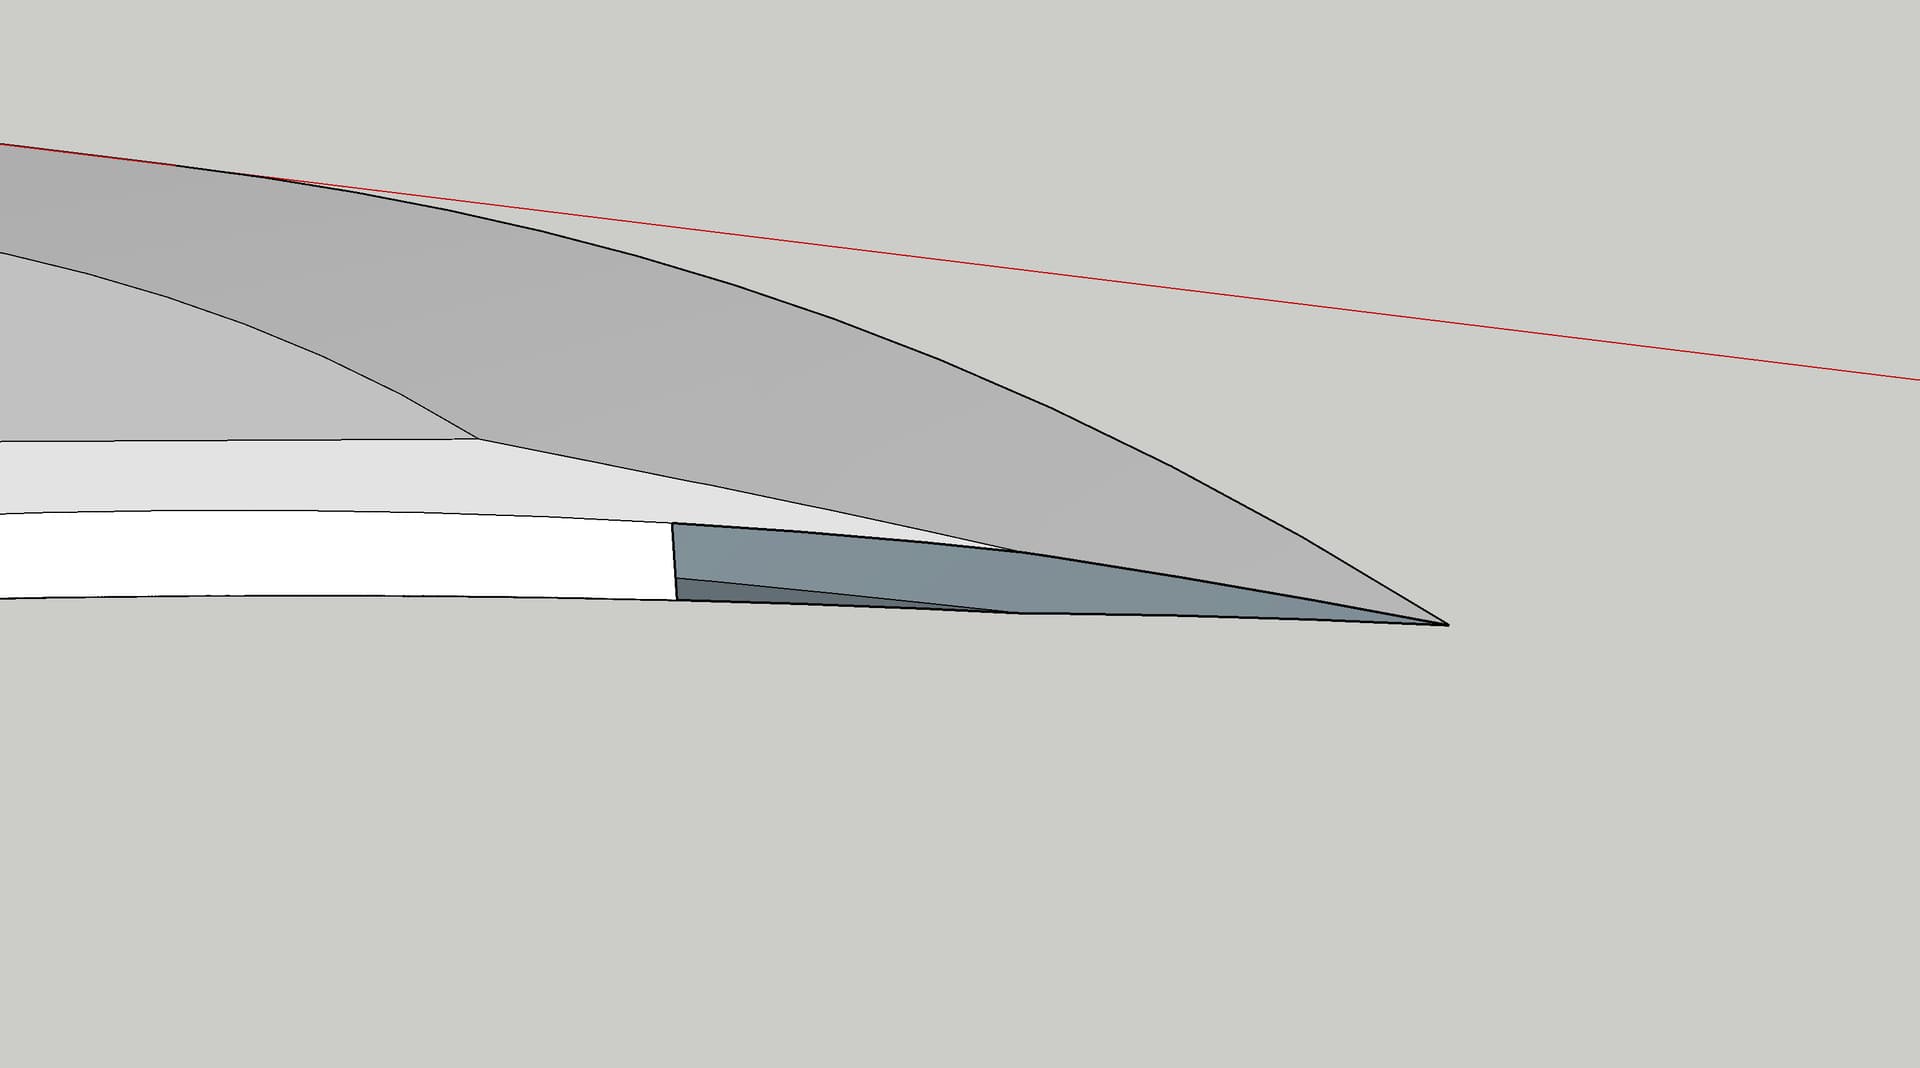
My guess is the way you moved the shape to create the sharpening has slightly distorted the face at that area causing the edge to form. Removing all of it and stitching it back together gives you a nice flat faced curve, which is probably the best result.
Remember that all curves in sketchup are made of flat edges and/or flat faces, so for the arc of the blade you need the hidden geometry to create the curve. In this case the face has bellied out and cracked giving you an imperfectly formed set of edges. The dark ‘profile’ edge is the giveaway, it shows that that part of the curve isn’t cutting the face, and yes if you turn on hidden geometry you can see it doesn’t hit another edge.
By exploding the curve I can isolate just that segment and delete it, then use soften to make the others disappear.

What part of this are you having trouble with?
Wow thank you for the great answer! That really helps demystify how I wound up there. I am really happy to learn that I could easily identify and fix the problematic section. I learned about “explode curve” too which will undoubtedly come in handy.
Regarding the smooth erasing, is it accurate to think of it as converting visible geometry into hidden geometry? If so, I think I get it but I just wasn’t sure if that was the right way to look at it.
There are slightly different ‘types’ of geometry.
Hard, Soft, Smooth and Hidden.
Hard is obvious, visible solid looking lines.
Soft and Smooth are very similar to each other but still different, simply put they visually soften the look of edges and become ‘Hidden’ in the process.
Hidden can sort of be all of the above, a soft edge is naturally hidden but a hard edge can also be hidden, this will still give a sharp corner but the edges won’t be visible.
To soften an edge you use the eraser and ctrl (option on mac?) but for hidden you use Shift with the eraser. People often mix them up and run into issues.
Here you see with your model I soften the bottom one and it becomes a selectable single face, but with the top they are Hidden and each face is still individual.

There are other ways of softening and hiding geometry, in entity info and the soften/smooth dialog. The eraser is more for specific edges.
@Box This feels like very important stuff. Thank you for the detailed information. I had actually gone back and forth on whether or not soft and smooth were actually different. Now that you’ve taught me, I’m sure I’ll get the hang of the differences once I play around with them more. I’d love to learn about this in more depth.
Thank you and everyone for all your help! I don’t think I could learn faster anywhere. You guys rock ![]()
Here’s a quick example of how soften and smooth are slightly different.
I used 3 versions here, the first is the eraser with shift to make Hidden lines, then used entity info to soften, as you see both cases have facets. But then using Soften and Smooth sketchup makes a graphic adjustment to make it appear as if the surface is a smooth curve. Be aware this is purely a graphic trick, everything is still faceted but it just doesn’t look like it. This shape 3d printed would show the facets. But it makes nicer looking models.

Do I have this right?
Pretty much.
Hey alright! ![]()
Now to put this knowledge to work.