Difficulty making a stove pipe elbow - filling in segments between irregular circles

Hi all! I enjoy using sketchup to dream and design cabins. Hopefully someday, I will find a design that I love, and have the finances and time available to bring my dream to life!

I was working on my most recent design, and in recent builds, I have taken the challenge upon myself to build as many of my own components as possible, as the design comes together. I believe this helps to refine my skills, and challenge me in new ways.

The larger challenge here was to build a wood stove, with a stove pipe that goes up and out of the building. I believe the stove has come together nicely. The straight stove pipes, although challenging, have also been achieved. My next step is to create a segmented stove pipe ā€œelbowā€ (which would be used to achieve a 45 or 90 degree turn in the stove pipe). I did search the Warehouse before attempting the build, and only found a single item, which isnā€™t a very detailed object - so I was hoping to make something more visually accurate available to the sketchup community.

It has proven to be very difficult!

From the designs Iā€™ve seen on Google Image search results, it appears that most elbows have 4 cylindrical segments in them, two on the ends that are flat on one side, and beveled to 22.5 degrees on the other. The two inside pieces go from 22.5 degrees to 45 degrees.

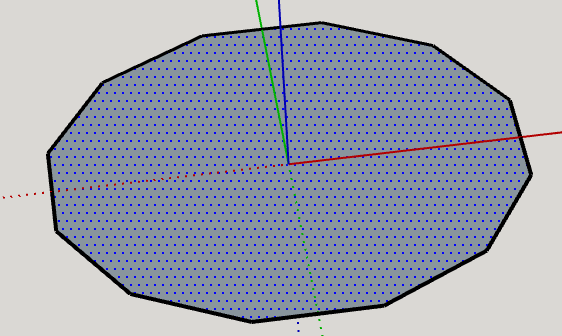
I first attempted to use the push/pull, then the move tool, to create each segment, but I could not manipulate the object into the correct shape. So I moved to creating two circles, and joining each segment of the circle with a line. As you can (hopefully) see from the screen shot, I was able to successfully join the ā€˜outerā€™ segments together, and complete the side walls of the structure.

Once I started to create the inner segments - I made my two circles, the first rotated to 22.5 degrees, and the second rotated to 45 degrees. I then started making lines between the circle segments, as I did with the first objectā€¦ (in the screen shot, you can see the first two lines near the bottom of the circles) ā€¦but I could not get sketchup to ā€˜fill inā€™ the squares that make up the outer walls of the segment. I find this strange, because I was able to get these ā€œtrapezoidsā€ to fill in on the first segment, but not on the second segment.

I am wondering - have I reached a limitation of sketchup? Or am I possibly coming at this from the wrong perspective?

Thank you for any suggestions or input you might be able to offer me. I greatly appreciate it!

Steve

I can think of a couple of ways to do this that would be easier. The first would be to use Follow Me. Use only as many segments for arcs as there are in the elbow. The other option if you feel the need to position circles at angles like you are doing is to use an extension like Curviloft to stitch them together. Iā€™d start with Follow Me, though.

For example, here Iā€™ve started with a 12-sided polygon.

I cut out what I didnā€™t want to keep and then used the remains for a path for Follow Me.

If I was just going to do a long run of ducting and didnā€™t care about the individual parts required to assemble it, I would draw the entire path and run Follow Me along that path.

5 Likes

Daveā€™s method using FollowMe is the quickest way to get the design you want.

But I thought it might be helpful to explain why you couldnā€™t get ā€˜quadsā€™ - four sided faces - to form.

The faces arenā€™t always flat.

If you did want to do it ā€˜the hard wayā€™ by stitching, you either need diagonal lines in each face, or you could re-orient the circles so that instead of having a vertex on the red axis, you have the mid-point of an edge of the ā€˜circleā€™.

To illustrate, and using only a 12 sided circle for simplicity:

  1. Draw the circle centred on the origin, vertex on red.
    image

  2. Rotate it from the midpoint of an edge onto the red axis.
    image
    image

  3. Use the Tape Measure tool to draw a guide point the radius of bend you want, from the origin, then select the circle, and use Rotate/Copy to copy the circle three times by 22.5Ā°. Make the first rotation, then type 2x to make two copies (totalling 45Ā° bend), or more, depending on the angle you want between the ends.


And because the circles are rotated so the midpoint of a side, rather than a vertex, is on the red axis, you can now stitch with quads rather than triangles.

2 Likes

Gentlemen - thank you for your kind, knowledgeable responses. As I read them, I am slapping my forehead and saying ā€œduh!ā€ wondering why I didnā€™t think of that solution.

I had worked on this a couple times, getting frustrated and using my ā€œset it down, and come back to it another dayā€ problem-solving method, and I had certainly just hit a mental block. When I read Daveā€™s follow-me suggestion, it made me think that maybe I had tried this on my first iteration, but for some reason, it hadnā€™t succeeded. Iā€™m guessing that it may have been because I was using too many segments for the follow-me path, or possibly because I was trying to run the follow me path from the outside of the circle, instead of the center of the circle? Either way, thereā€™s not much sense in trying to figure out how/why I did it wrong, especially when you have presented a simple solution for how to do it right.

Also, John - thank you for your explanation about how to form the quads. As you saw, when I created the initial 6" diameter circle (using the circle tool), I had set the circle in a weird orientation to the red axis. Being inexperienced with this leveI of sketchup design, I chose to re-orient the circle so the red axis was aligned with the vertex instead of centering it on an edge of the geometry. My mistake - I guess I had a 50/50 chance of getting it right - but Iā€™m a terrible gambler, ha ha!

But, it was nice to have the explanation as you gave it - Iā€™m sure I will deal with more and more complex structures and geometry as I continue to grow in my knowledge.

To both of you: I greatly appreciate your time. Youā€™ve been a great help to me!

Thank you again,
Steve

Happy to hear youā€™re back on track.

FWIW, I used a 12-sided polygon, not a 12-sided circle in my example. That resulted in the edges at the bends to approximate the seams in the real elbow. Thatā€™s not critical and might actually detract from the view if thereā€™s a lot of ducting but if you do this using a circle, those edges will be softened. Itā€™ll just look different when it is complete.

1 Like

Glad you found it helpful. Happy future modelling.