I am in the event Audio/Video/Lighting business and use the same components to do multiple drawings. I also handle scenic elements which is where my question comes in.
In the below picture we are setting up 2x Projection screens (colorbars), some black drape, a stage and some white scenic panels (white boxes). I have a client that is requesting that we use projection on the scenic elements to create a projection mapping look. Is there a way to represent this in SketchUp?
I have a model that has the same white box scenic component used in various forms and I would like to be able to apply a picture to it to see what the potential projection would look like. Is there a way to apply the one jpeg texture (in this case the blue shooting stars) stretched across multiple components?
I used photoshop to manually create the above image as a reference.
Unfortunately, You can apply textures to different components but it will not map correctly. You will want to apply textures to the face but as they are all the same component, you still wont get the results you are wanting.
You need to first explode components into raw geometry and then apply the texture to you the selected face at once.
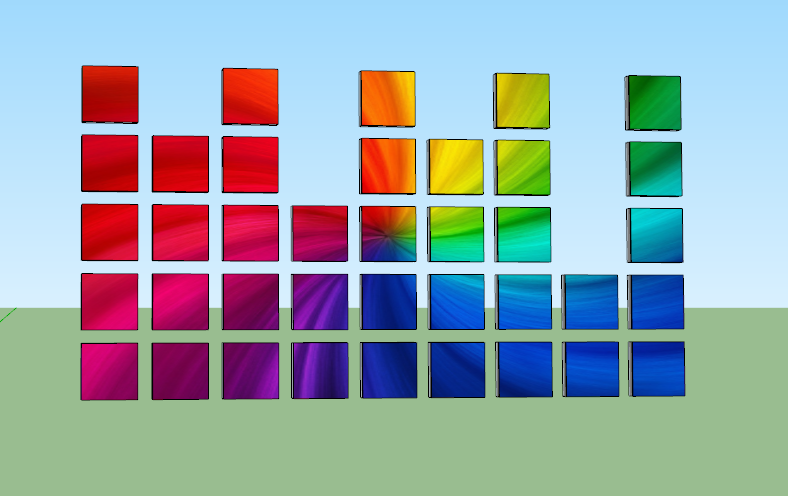
So that works when you make a box, apply the image as texture, select the texture “projected” but as you can see from the below image, I am getting a weird sizing issue and it is off center once I eyedropper it to the individual boxes. How do I correct for that?
If it was me I would intersect the image with the components and remove the bits you don’t want leaving all your components intact and a changeable ‘screen’.
Without knowing how you positioned your projected texture, you have a few options. In this animation, you will see …
Option 1 - You can change the position of the projected texture and then reapply the texture to your tiles.
Option 2 - You can select one the textured tiles and then change the mapping via the Texture > Position feature. After you have remapped the texture on the tile, you can sample the new mapping from the tile and apply it to the other tiles.
Chris, Option 2 seems to work better for me in this instance to center the texture over the entire tile surface and then re-apply the texture to all tiles to get it centered up.
robertjuch, thank you for this option. This works well. The only thing is I have to be mindful of the grouping of the tiles. Sometimes I have multiple clusters that I want to apply different textures to.
After applying textures, you can group them in separated groups Triple click on each box (in my case double click on each face) will select all edges and surfaces on each element and custom keyboard shortcut for grouping will help you make it faster.