The problem is that the base of the model isn’t flat and I don’t know how to add a flat base onto it that matches up with the terrain but doesn’t go over any of the buildings on the lower areas.
I’ve already tried extruding a rectangle to the lowest point of the base, but that leaves a gap in the print where the terrain goes up.
John is correct. If you can share the .skp file we can give you guidance without having to guess at what you currently have. I did guess, anyway. Is this the sort of thing you are trying to end up with?
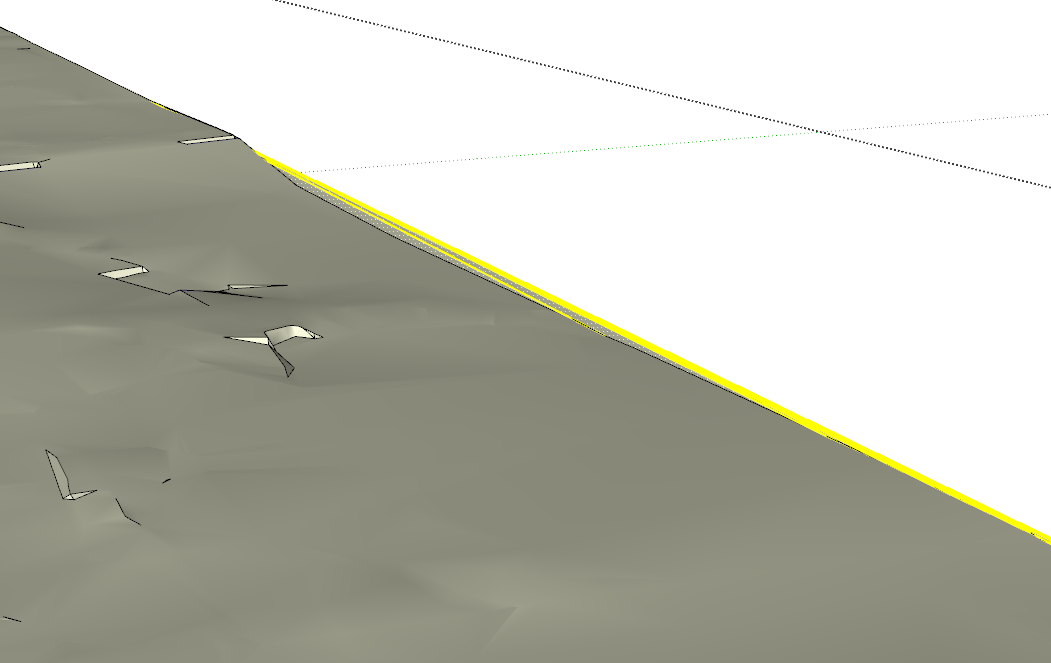
First you need to clean up the perimeter of the terrain group. You need to open it for editing (right click on it and choose Edit group) and erase the bad geometry along the edges. Here I show some of it selected in yellow. Those faces are vertical and will prevent the object from being considered solid and 3D printable. I also softened the edges on the surface of the terrain to make it easier to see the stuff that needs fixing.
In order to make the base a “solid” and 3D printable, you need to add the geometry into the terrain group so that also requires having the group opened for editing.
Here I’m using a simpler example because your model is so huge it’s killing my graphics card. Draw vertical lines down from the corners and connect them with horizontal lines.
Note that in order for the group to be considered a solid every edge in the group mush be shared by exactly two faces. No more and no less. This means no stray edges (edges not connected to any faces), no holes in the surface (edges only connected to one face) and no internal faces (edges shared by more than two faces.) Those vertical faces on the edges of your terrain will result in edges with only one face and that will be a problem.
If the perimeter of the terrain isn’t straight you will have to draw additional vertical lines down to be able to create the required faces.
Your profile says you are using the free web version of SketchUp. If that’s the case, you have a lot of manual work to do. If you were using SketchUp Pro there would be some extensions that could help you with this.
Dave’s solution was absolutely correct, but turned out to be practically impossible because of the massive file size. In the end what I did was simply add four sides and a base onto the model. The sides all met together on the bottom, but then extended up over the edge of the model.
The slicer interpreted the base as solid even though it didn’t actually create a solid volume with the rest of the model. Additionally, the slicer interpreted the zero thickness walls as nonexistent so it didn’t print anything that wasn’t needed. It turned out pretty nicely if I do say so myself: https://drive.google.com/file/d/1k_3NFw4f0BgIefABLc9MIzxSDu9uokZw/view?usp=sharing