First post, looking for as quick a solution as possible (please).
I am modelling a cable that needs the 2 outer skins amending. I need the 2 outer skins to coil (if this is the correct term) around the same cylindrical shape. Is this possible? If so, what is the quickest way to get there?
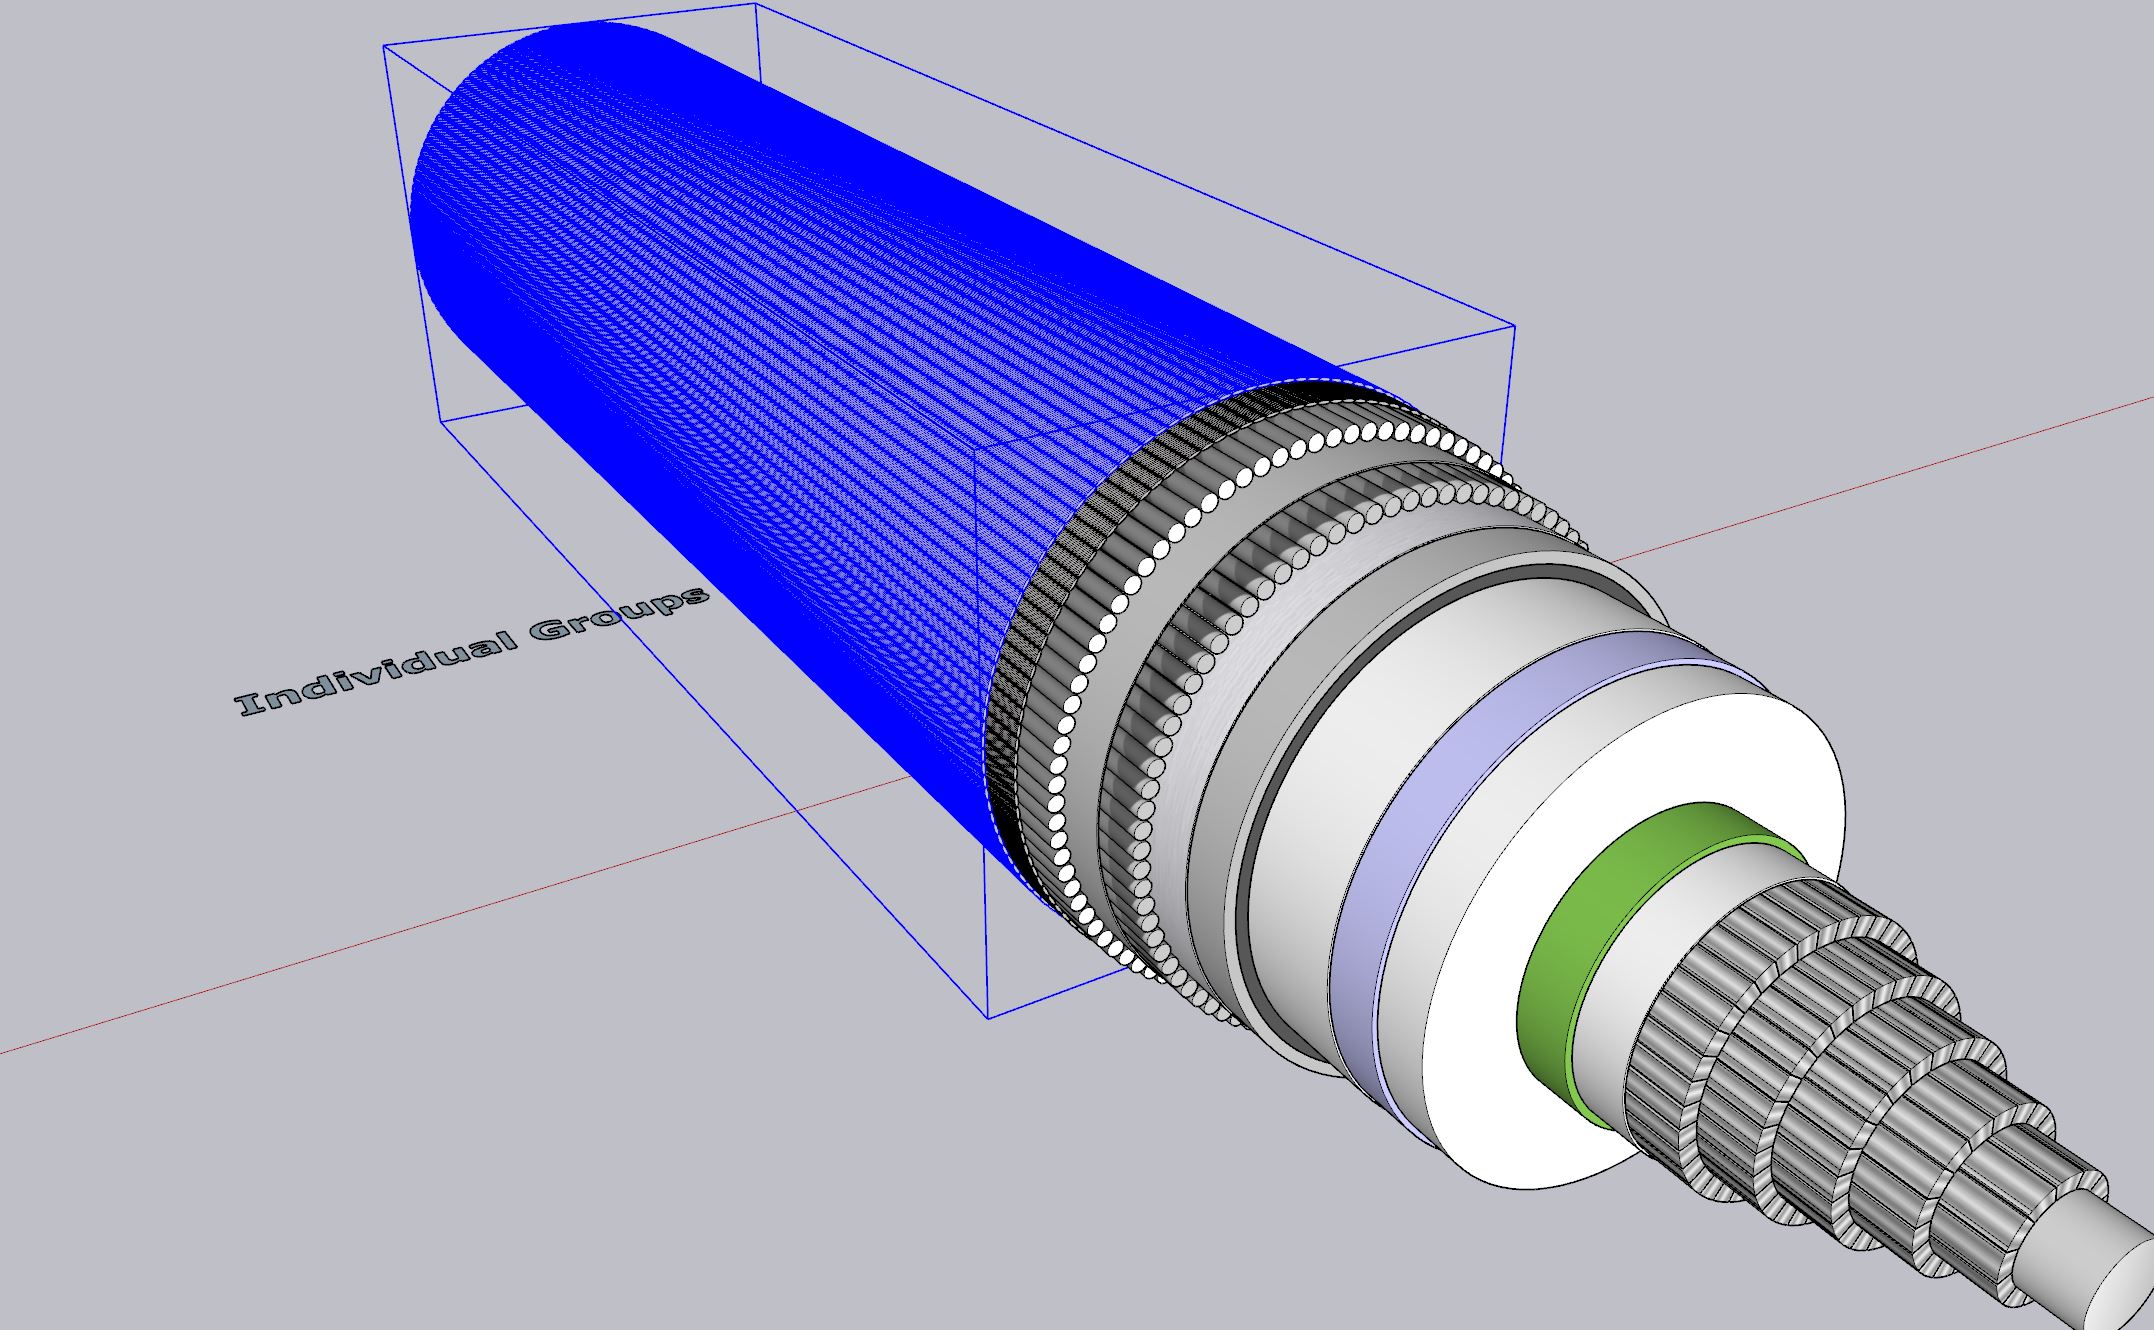
First image is a draft of the current model, second image is and example of how the outer skins need to coil.
I have downloaded Helix along curve (looks a great plugin), however your example isn’t exactly working for my problem. I need to be able to have the oval shape (oversized in the attached image) following the path of the helix. then several copies to simulate multiple wires wrapping around in a cylindrical fashion.
I guess it’s still not clear to me what you are having a problem with.
I imagine neither of these is what you want but since I did them I’ll leave them here. I used the Helix tool from Curve Maker to draw a helix and added a circle at the end. I selected the face of the circle and the helix and used Eneroth Upright Extruded to make a single wire. Then after making that a component I used Rotate.Copy to make the additional ones. On the right I copied the “wires” flipped them along the red direction and then use Paste in place to put the copied ones in to create a braided appearance.
The profile of the outer sheath is oval, but needs to follow a cylindrical helix. Much like the left example on your above post. Your left hand example is almost perfect, but I need each sheath needs to butt up to the next (and have a more oval profile.
So changing the profile is simple enough and once the thing is a component make as many copies as you need. I used 30° and 11 copies for a total of 12.
I get the concept now, however the geometry really doesnt behave when using the Eneroth Upright Extruder. I have even tried with a simple circle and it still misses faces off. See image below. Any idea why?
Basically
Firstly as @Anssi mentioned above, scale up. Your model needs to be scaled up by 1000 to get the faces to work properly. Or use The Dave Method.
Next, best to only use one rotation of the helix.
To get the best single rotation, rotate what you have by half a segment, so the midpoint of the last segment is on axis, then draw a vertical edge up from the midpoint to the ring above and delete the excess, including the half segment at the start and the straight edge.
Move the Profile in line with the end.
Run upright extruder.
Copy the result up six times, if done correctly the ends will meet and you will have a single helix.
Rotate array from the center as many times as you want to get the density you like. The one in the image is rotated 30 deg 11 times. Making a total of 12.
Scale down to size.
This is the density arrayed at 15 deg 23 times. Making a total of 24.
I am back on with this project. I have a similar issue whereby I need several of these components to rotate specific angles around an extrusion.
I have drawn lines as an example of what needs to happen, to try to help visualise. Basically, the faces from the bottom of the line need to extrude and meet the top face, whilst following the same path. I guess this would be a helix.
I can get it to this point, but as you can see, its doesn’t quite line up in. It needs to be perfect, then I need to replicate the workflow on other sections of the cable. Any idea?