Hi,
I have created a 3d model that I want to print with my 3d printer. when I have exported it as STL, OBJ, … and open it in simplify, cura, … a lot of edges and surfaces are missing.
Why is that?
where is the problem?
what can I do?
Unbenannt.skp (426.1 KB)
Unbenannt.stl (120.1 KB)
Most of the problem comes from all the reversed faces. You painted them with a color so you couldn’t see them. The reversed faces are shown in blue when they haven’t had a material applied to them.
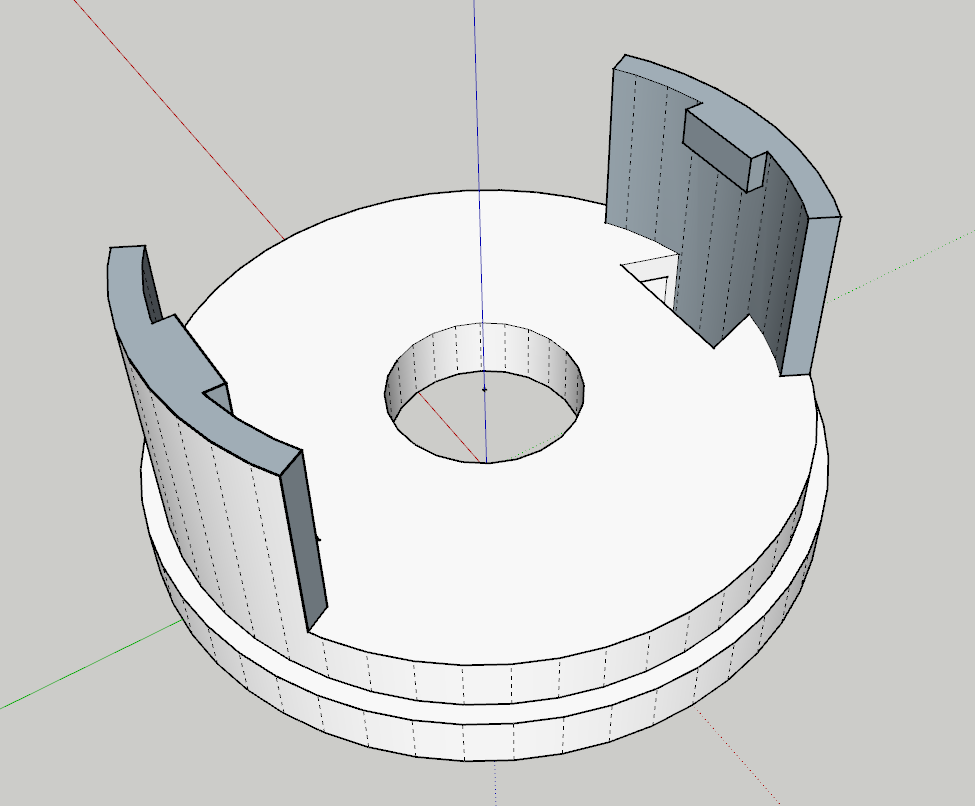

There are also a bunch of internal faces that need to be removed.

Solid Inspector 2 is useful for identifying problems. It can fix some of them, too. But if you’ll be doing more of this it would be helpful to adjust your workflow to avoid the problems as much as you can. That’ll make your modeling process easier.
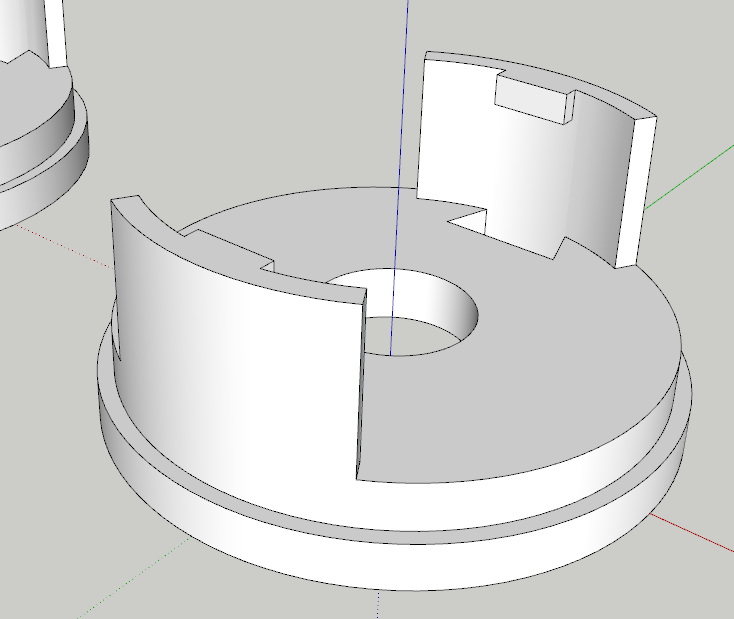
Here it is after fixing it. Notice I made it a component and SketchUp reports it as solid.

Unbenannt.skp (163.8 KB)
3 Likes
I’ve been looking at your model more.
I see some things in your modeling process that can cause you problems. One of those things is the number of sides you choose for circles and arcs. You used 50 sides for circles in a number of places but not all. Better to stick with some multiple of 12. That makes the circles evenly divisible by 2, 3, 4, and 6. Also use the same number of sides at least for concentric circles.
The extensive number of reversed faces and the internal face imply to me that you drew all or nearly all of the details in 2D before starting to extrude things and make it 3D. I redrew your model. I started by getting the center area where the cursor is in the cross section to 3D before I added the features on the bottom and the top. After the disc was the 1.5 thick, I built up the rest of the features from there.

Working that way I never had any exposed back faces nor any internal faces to clean up and the object was considered solid from the moment I made it a component.
Here’s the .stl file if you want to try it.
Unbenannt DR.stl (199.7 KB)
I used i.materialise to check the .stl and they seem to be happy with it. At least enough to collect my money. ![]()

2 Likes
There is also no really usefull reason to paint a model wich is going to be 3D-printed.
And as you have said many times before: wait with painting untill the model is finished and clean as it obscures a lot of problems.
1 Like
Both of those are true. I probably should have added that in my post.
2 Likes
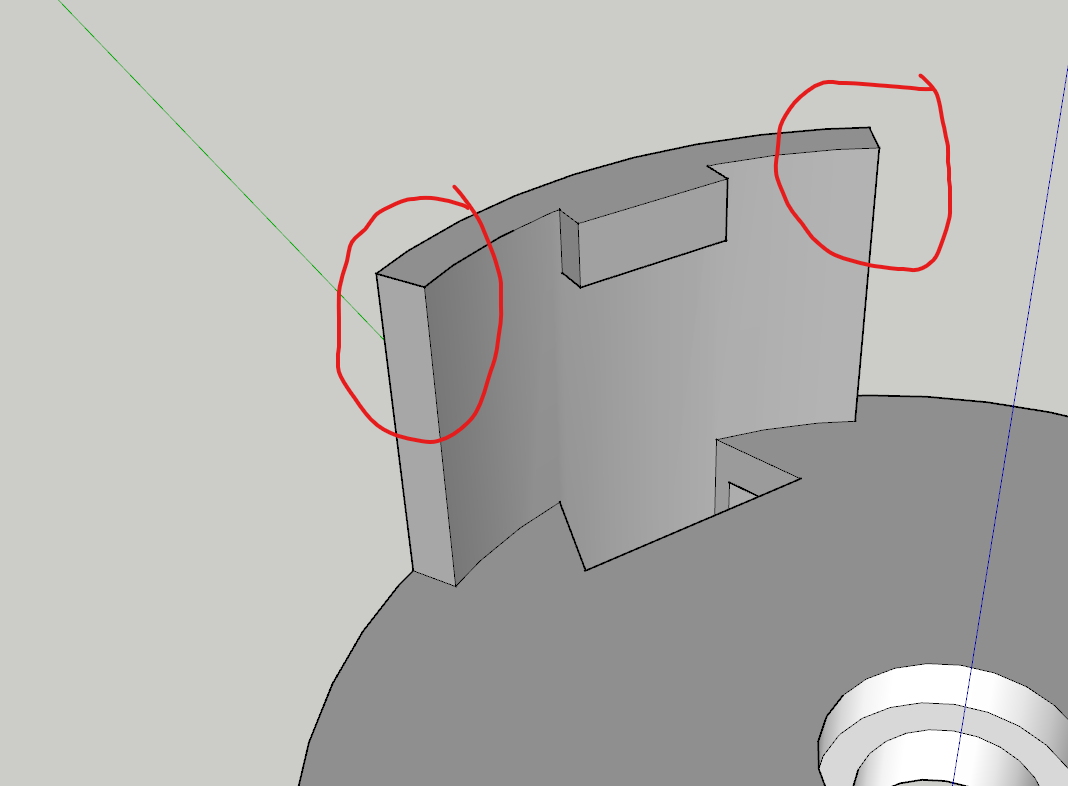

Yes exactly like this. ![]() how did you do that?
how did you do that?
It’s a secret. I could tell you but… ![]()
My initial thought was to use FredoCorner to round those over but because the shape of those bits of the model, that doesn’t work. So instead I created some “cutters” to lop off the corners with the radius. These are solid objects (I use components but they could be groups) and then I used Trim (you could use Subtract) from Eneroth Solid tools. Also, to avoid potential problems with tiny geometry, I used what some wag has named “The Dave Method” which involves making a copy of the component being modified and scaling it up before doing the modification. I use Eneroth Solid Tools instead of the native Solid Tools because the native ones convert the thing they modify into a group and because of that the Dave Method doesn’t work. Eneroth Solid Tools respect the component thing. I used Trim instead of Subtract so I could keep the cutters in case I wanted them later.

By the way, here’s a view where you can see two copies of the normal sized components and the one I trimmed with the cutters. Since I made the thing a component instead of a group, whatever I do to the giant copy gets done to the original as well.

I did it the way you said and im getting the error “Output is not a solid”
I used Eneroth Solid tools and the Dave Method.
Did I something wrong?

Did you use the “Dave Method”? It shouldn’t happen but you can edit the part and trace an edge of the opening to restore the face. I didn’t get the gap when I did it, though.