See what I’m sayin’?
You could go flush or have overhang but flat. Depends on the style you want though. Also see the nailing board for the inside edge of the sheathing (bottom two):


See what I’m sayin’?
You could go flush or have overhang but flat. Depends on the style you want though. Also see the nailing board for the inside edge of the sheathing (bottom two):
Yup. Thank you. That was a big help.
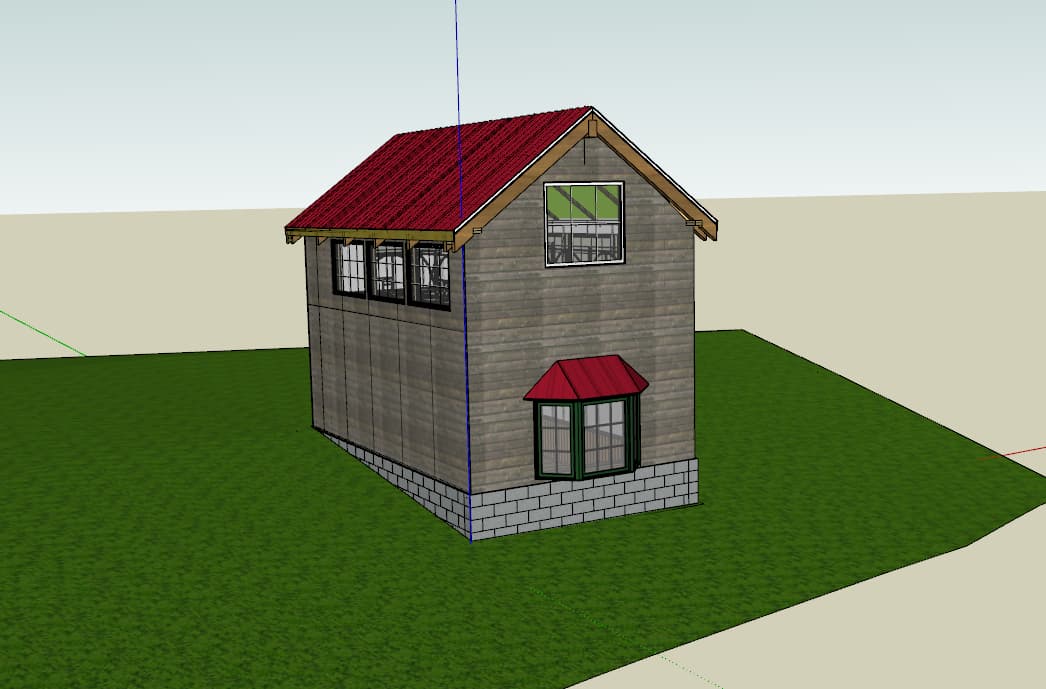
I have decided that I am largely done with the exterior and structure, and will soon move inside. However, before I do, I am wondering what is the best approaching for adding fill around the foundation. The topo is based on local elevations converted to a mesh, the ‘cut’ into the ground was made using the SU surface tools (I can’t remember which one right now).
Should I just start over on the ground surface, or can I use what I have?
If I use what I have, can I just do some sort of ‘fill’ operation with a shovel tool followed by a rake tool?
Any help is greatly appreciated. The latest file:
Library v3_1.skp (5.2 MB)
Cheers,
Cookie Dough
Just a video…
Now my computer is in super lag mode, so pics.
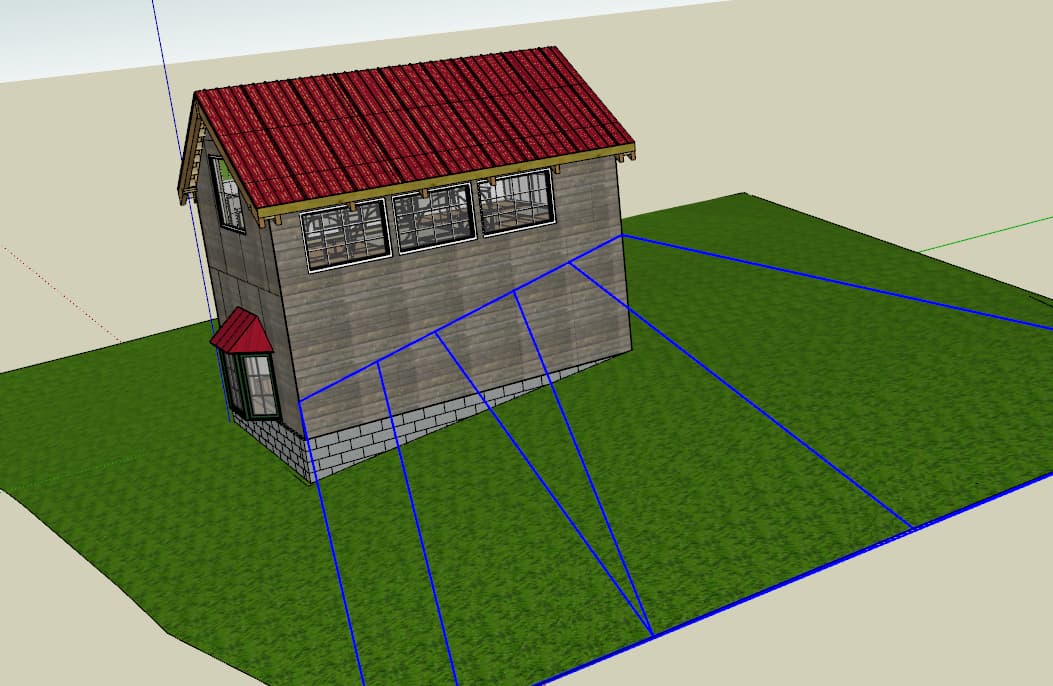
Eh for redo or cut ‘n’ knit.
If you knit: Group and Hide the building and turn on hidden geometry.
Select all of the below grade stuff (including the little bits in the corners) and delete it:
Try to simplify the number of vertices. For example, use left to right side drag selection (and ctrl) to get the short edges on bottom side of your building foot print:
Delete them.
Same for the outer edge:
Draw a line between the ‘corners’ of your building foot print. Connect those lines to the vertices of the hidden lines:
Draw a diagonal line to fill in:
Same for the other side. Select and delete all the little stuff:
Draw long lines to fill it back in:
Then you can knit the foot print it:
It’s not too egregious as far as filling in with lines.
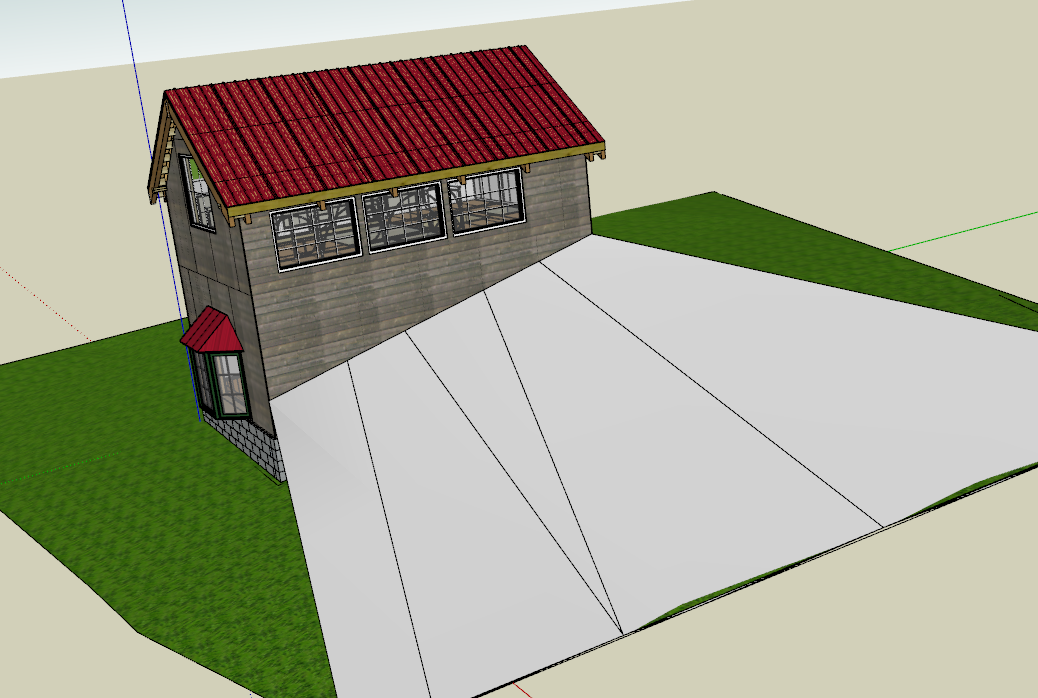
Otherwise, you could select the edges and use Sandbox Tools:
Turn your building back on and trace around it making sure to hit the points where the hidden geometry lines hit your building.
If you used Sandbox Tools, you’ll have to explode the geometry to merge it. Then delete the foot print.
Eye drop, paint tool, hide lines:
The general idea is to connect grade lines to mesh:
You could try making terrain like below.
In our parts a general rule of thumb is that the ground ought to have at least a slight (1:50…1:100) slope away from the building for about 3 meters on all sides, so the ground uphill from the library wall must be addressed in some way. Also, any wood surfaces ought to be at least 300 mm clear from the ground. Our weather has quite a lot of things that stress a building, rain, snow, cold…
To follow on Anssi. You can use drape and terrain from contours. For example, draw a walkway, including your slope for a cut. Bring that above your terrain and drape it. Bring your walkway down to your grade (in this case, just flat) and offset your walkway. Then use terrain from contours to stitch the edges together.
So this is too steep but shows the idea:
The walkway that was draped and moved to ‘grade’.
You can also see that there is a rectangle 3’ out from around the shed. That one was draped onto the mesh. There’s another one around the foundation, but that one is tilted to ‘grade’ using the move tool on the low-side edge of the rectangle. Those two are connected using terrain from contours:
Dear All,
I hope your holidays went well. Other than Laurie falling out of the hay loft (9ft to hard ground), ours was pretty good. She is doing well, given how close she came to doing very very poorly.
I still have nightmares…
Anyway, I really do hope you all had a good holiday, and I wish you the best for the new year.
Here is the latest on the Small Library Idea. Please explore the model. As per usual, let me know the great, good, mediocre and horrible.
I am up to version 3.6, so I must have made progress.
I am now targeting 4th quarter 2024 for involving engineers and architects. Unless my house in TX sells before then. In that case, party in TN.
Thank you all for your help. I don’t always respond, but I am truly thankful for the input.
Best Regards,
C. C. Cookie, Ph.D.
Library v3_6.skp (8.3 MB)
Hi again,
I forgot to ask my painting question.
I have walls with wall board. Each wallboard chunk is a group or component. How can I make them look like a solidly painted wall?
For example:
How can I have this wall look like an undivided wall?
Do I just put a new surface over it and call it painted surface and color it?
Any help, as always, is very much appreciated.
CCC
Sorry to hear about the fall. Not good.
You could Hide the edges.
I did not realize that was an option! Thanks tons.
Dear All,
I am still working on this library model. I am struggling to figure out how to incorporate a wiring scheme in the model. Any help, pointers or resources would be very helpful.
I have been working on different designs for the interior, as well as doing some re-organizing of model bits. Here is a view of the stove with my new decorative bricks (which are available for the low price of $0.00 in the 3Dwarehouse).
I also made a new hanging pendant lamp (also available):
Lastly, after a discussion with Mrs. Cookie, we decided the glass stairs were too Danish Modern. I was hoping for a more 20s Art Deco Look. So I swapped in wood for the risers, removed the wainscot, changed the color scheme, and put in parquet flooring.
As always, thanks tons for following along and all the help. Please let me know your thoughts and suggestions.
Cheers,
Chip
If you want to model it out you could use a profile and Follow Me. First part, a welded line with arcs. Second, just lines to a box.
Later, if you want it in LayOut, you could swap your boxes for components that are flat versions and maybe use a different line weight (Tags with Dashed lines).
The chicken coop is looking good by the way!
3D,
I think I follow you (pun intended). I would like to produce a wiring plan that an electrician could follow, but also one I can trace through the framing. I think that was your idea, and I will explore.
Cheers,
Chip
Dear All,
Happy Valentines Day! I love you all, in that vague way of Valentine’s day.
I am back with more questions than progress. I have made a few section planes, like this one:
and made scenes using them (Model here). This is fun, but…
I would like to make some nifty 2D ‘drafting like’ views, but I am not sure how to proceed given the multiple heights important things happen in the model. I have gone through the tutorials, but they don’t seem to applicable to this model.
Do I need to do some additional advanced steps? Is it time to contact an architect (though the wiring plan is still just a vague idea?)?
More importantly, perhaps, is should I stop this thread here, or keep going through contractor hiring, constructions, etc.?
BTW, I really think my pendant lamps are nifty. If anyone knows a good glass person, feel free to send me a pm.
Thank you so much to all. I would still be wandering the deserts of Sketchup push/pull without you.
Best Regards,
Chip Blockoff
Thank you for your, … warm Valentine’s Day greeting?
I think you ought to play with making sections and sending them to LayOut. You’ve got your model, so you’ve got an opportunity practice.
As far as whichever tutorials not being applicable: break it down into how you would do it. …However that would be done. Foundation, (blocks, -stubs for utilities: water, electric), framing, windows, siding, roofing. Insulation, wiring. Sheathing. Finishes. Give it a shot.
Also, you’ve started this little diary of a project/learning SketchUp. This seems like a reasonable place to continue it.
Golden brick
Dear All,
In my latest version you may have noticed the decorative bricks on the fireplace surround. I have now uploaded new versions of those bricks to the 3D Warehouse under ‘Golden Bricks’. They are cleaner and I think nicer looking.
If you fancy some nerdy decorative bits, here are two possibilities.
Regards,
Tom
Dear All,
It has been a while since I updated this thread. I have determined a few things, including that I don’t need any permits and the only inspection I need is for electrical. I have also added electrical outlets, moved and eliminated some fans, calculated the amount of dirt that needs to be excavated, and added some decorative bits the exterior.
My next step is to create a set of plans that can be used to build the building. I would be willing to pay for a tutor for this process. If anyone can lead me to someone that can help I would be super appreciative.
I am trying a link to Trimble Connect for the project file:
Let me know if it works.
Best to all,
Chip
Dear All,
I assume from the huge response that my attempt to link the model via Trimble did not work.
Here is the latest from a Drob Pox link, I think.
Let me know if it works. I have made a lot of changes, but most are details.
Which brings me to Layout…
Library documentation.pdf (8.7 MB)
I am trying to create a set of ‘build’ documents, with details and stuff. I am not, as you know, an architect or designer or builder. If you get a chance, I would like any comments you have on my first attempt (pdf attached). Harsh criticisms are welcome, and probably warrented.
Merry xmas to all, and to all a good night.
Best Regards,
Cookie Fer Santa
Really cool that you’ve stuck with this!
I used to stay in a shack with a wood burning stove… make sure you talk to someone about shielding the walls and passing through the roof.
Thanks for the heads up! I am thinking I would get a licensed installer for the fireplace. Although I love both, I don’t trust myself around fire or electricity.
Merry Merry,
T. Chip