Hi Brain’s Trust … hoping you can help (and please use small words and very clear step-by-step instructions as I am still new to Sketchup.
During the rendering of my shop model the light and shadow appears to have inverted (like a negative of a photograph). I have made a shop model before without this issue.
All light are switched on (checked all 30-odd individually) with the attenuation being an “inverse square” (standard setting). I have tried adjusting the light size/energyattenuation with no affect.
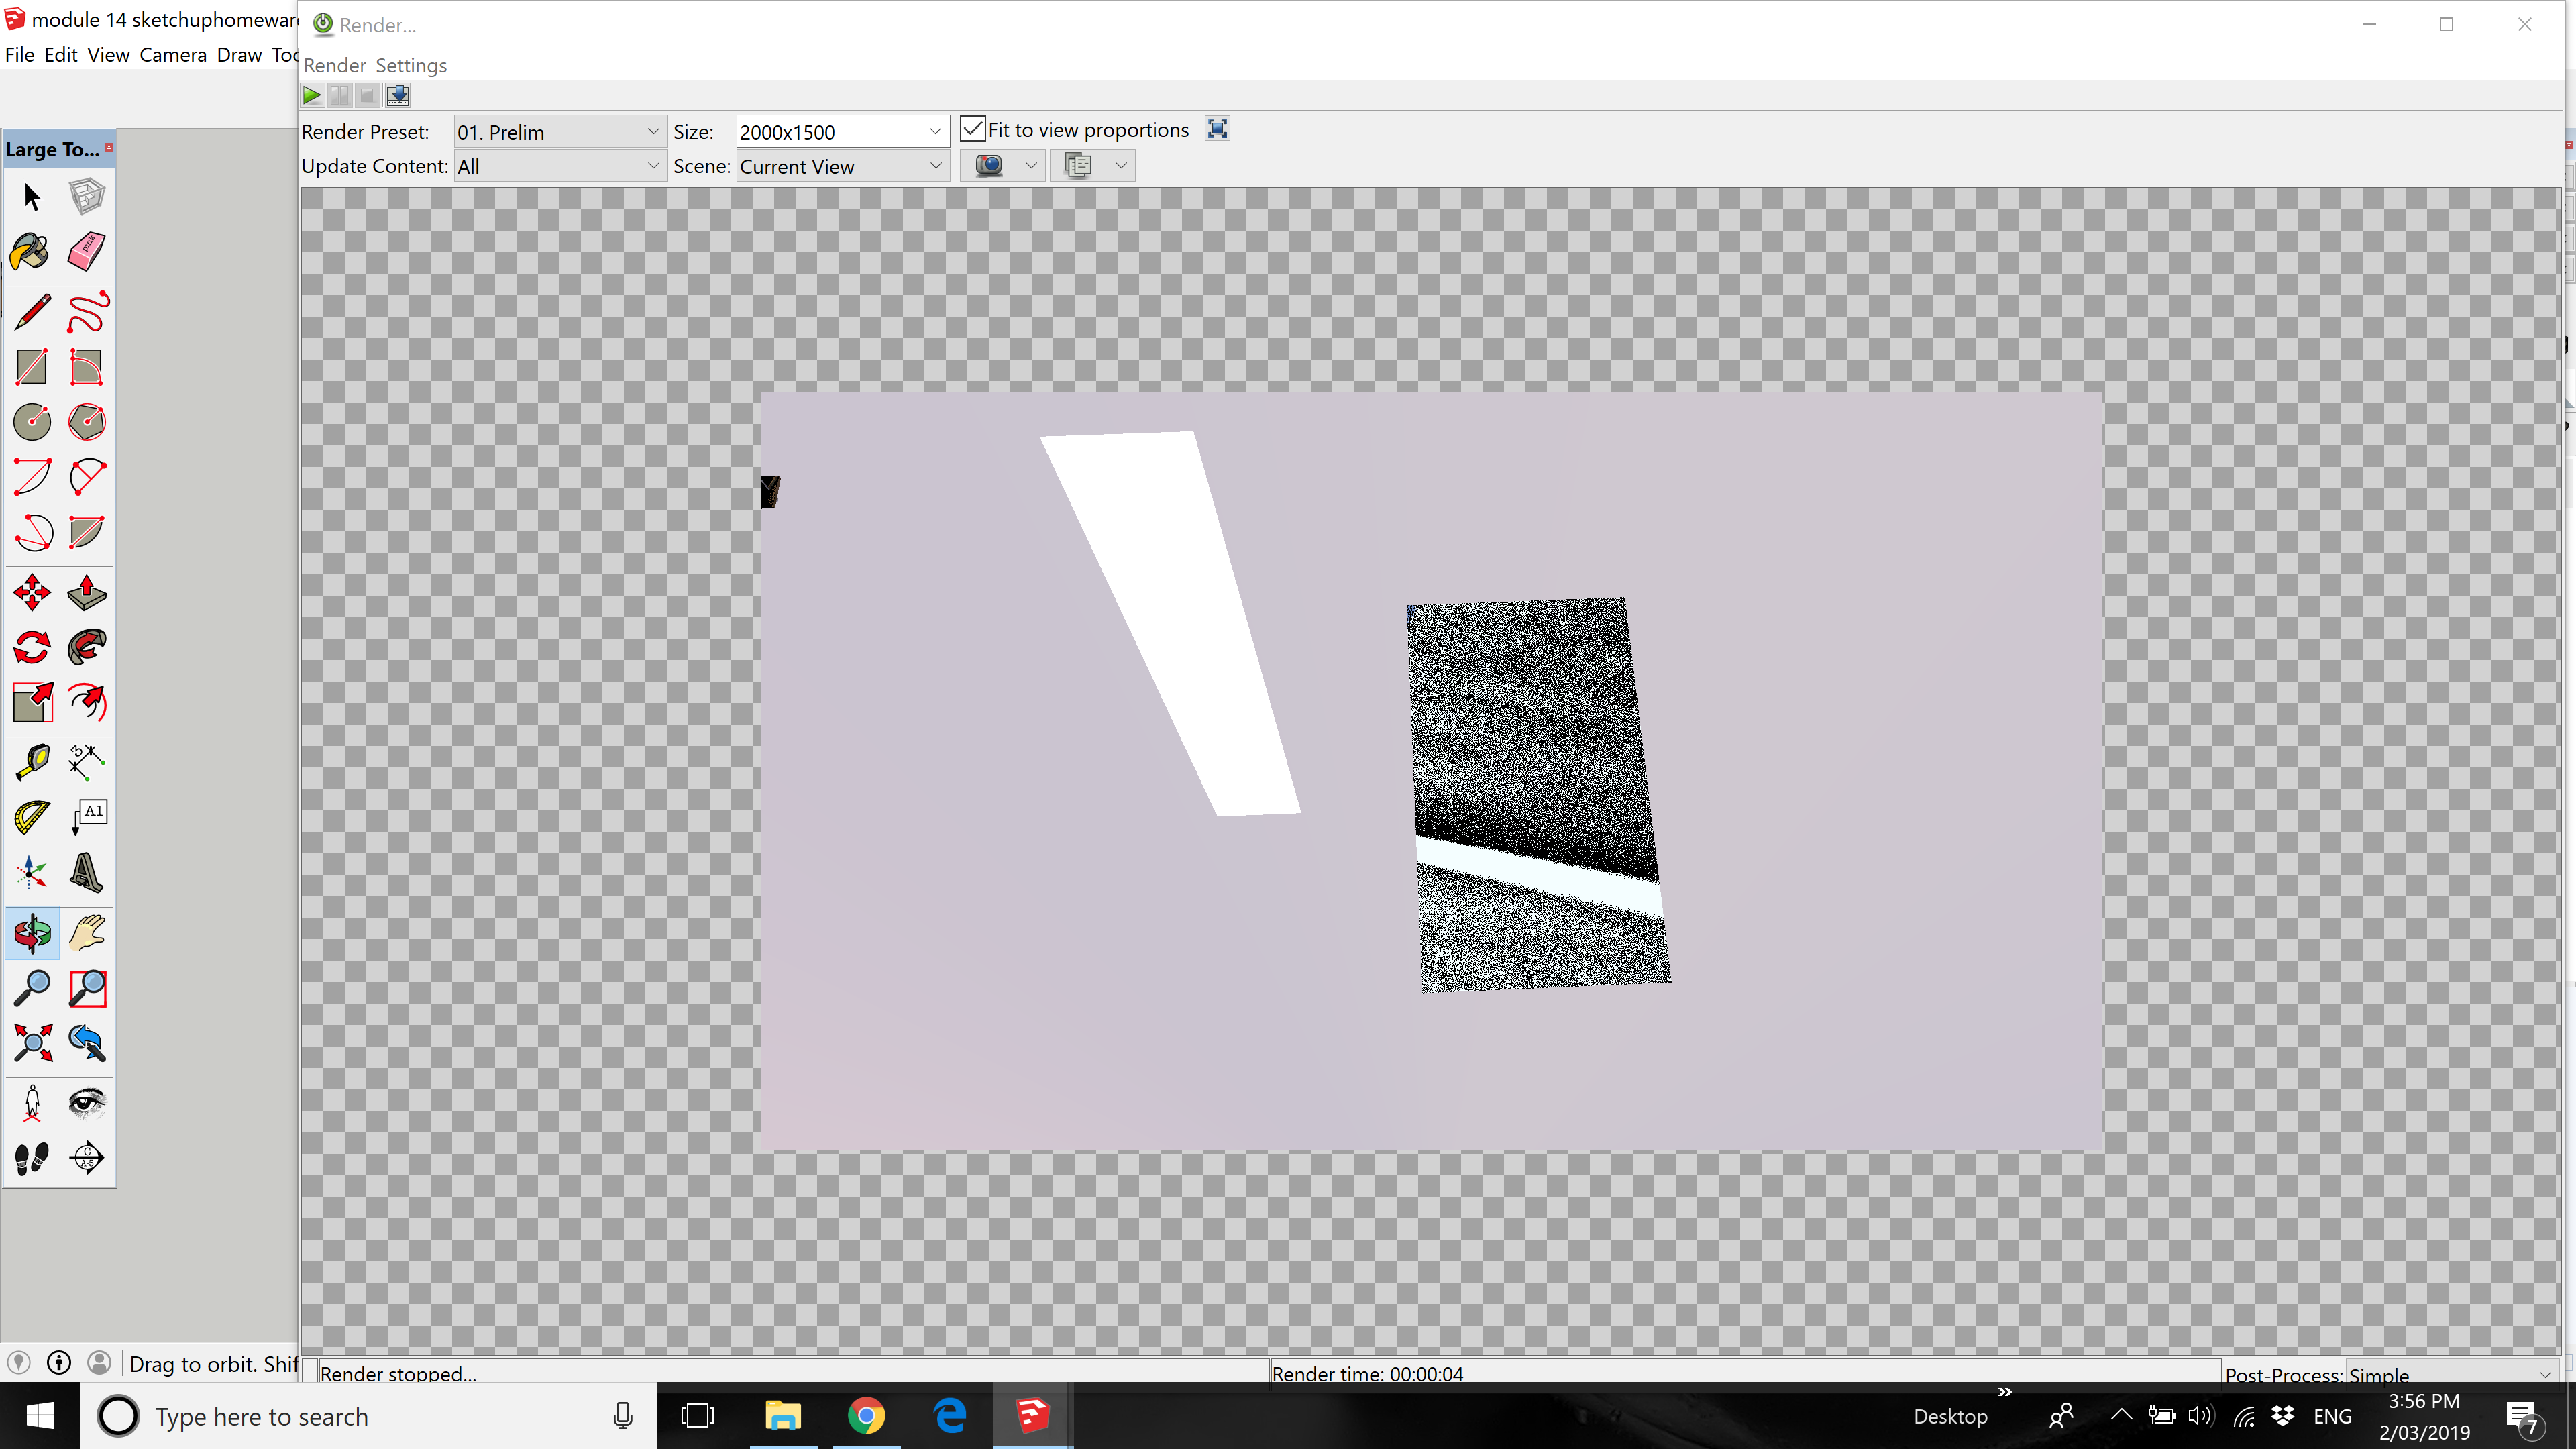
When I process the model to the Twilight render program the initial view shows the internal lights are how I want them … but once the Twilight program runs it renders black/shadow where light should be (screenshot) - and light where there should be shadow. Just like a photograph negative. Obviously I’ve “inverted” my “rendering light” somewhere but no idea where/what/when
I have tried different clarity options - have googled my freckle off - peered into every tool option I think might make a difference - and still no change. Help! I am sure the answer is something very simple.
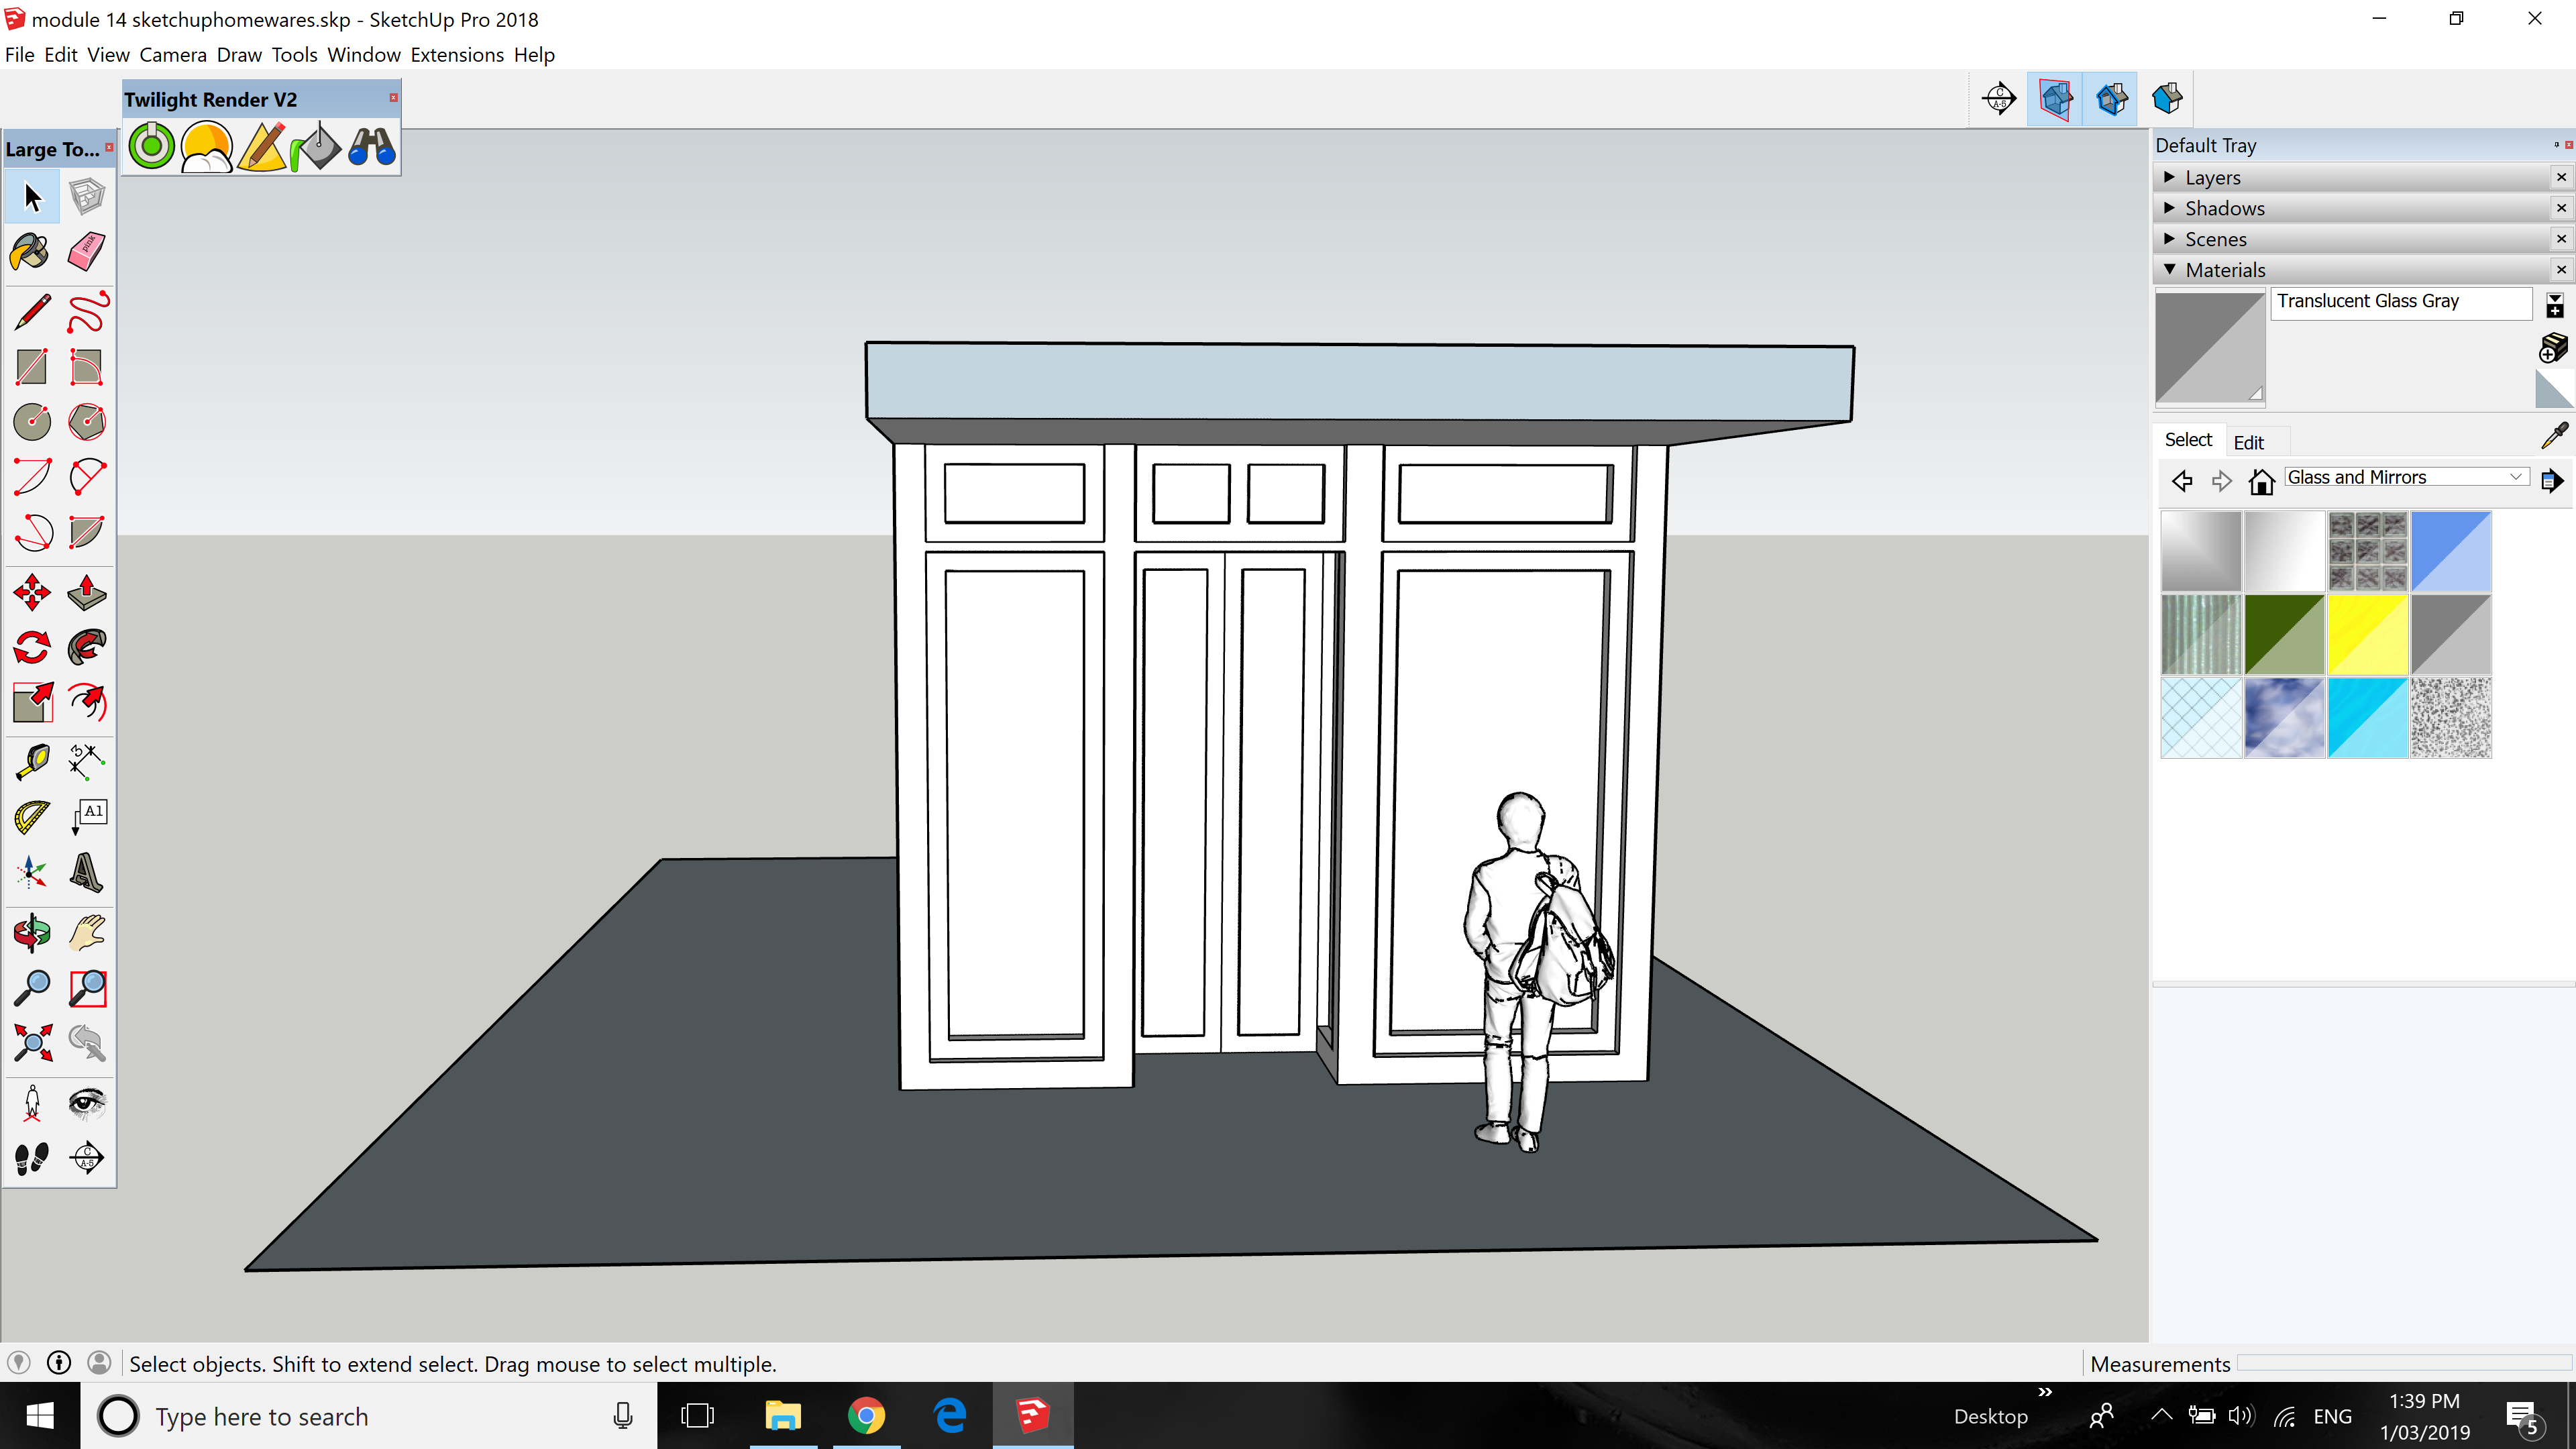
Below is the screen shot of the SU model … I’m very new, so I’ll google on “face style” and see if I can work out if something there is what happened. If not success then I’ll upload it to the dropbox.
I did check that all my internal walls/floor/ceiling were correctly facing
No banana - view>facestyle>monochrome just changed my model to look like the below - but the rendering still came out the same inverted light - I’ll change it back to it’s default of “shaded with textures” - and work out how to upload the file onto here
I just went thru the whole model and the front face of the facade was the only reversed section - although not sure which way to have the windows as if they’re the right way on the outside, then there showing their back inside.
There are a couple of object, uploaded from the 3D warehouse, that are showing a blue-ish face - tried exploding and reversing but that just messed the models up and suspect the blue-ish may just be shadowing.
The “reverse” light rendering result is the same from a close up inside the model as it is outside - so is something affecting the whole model rather than just the above screenshot-ted.
Uploading model to dropbox now … will share after the school run (no bus out in the country)
I’ve fixed up the overlap on the rear right hand corner (next to internal door) - and have extended the internal door/architrave, to become a solid, through the wall
First, you should use groups for every construction element, like wall, floor, window, door, etc.
Then, use the template Twilight material for glass, like in this GIF. You have two glass materials for the windows and doors in your model.
Took a look at your model. Simply put there is a lot of not so good things going on. Agree with mihia’s comments about better use of groups and components. Some more things to point out… Your model had a large amount of confusing layers. Most of the layers were associated with one object ( a trunk ). It’s best to delete these unneeded layers moving everything onto Layer 0. Also saw quite a few reversed faces. Many of them were on the small decor items. I assume you got a lot of these off the 3D Warehouse. It’s always a good idea to first download warehouse models into a separate “parts” file and check them for problems and clean them up before using. On last thing the large image on the left wall and the picture image on the right wall were both imported as images and placed directly against an existing face in the model. They should be imported as textures and “painted” on the face where you want them. The way you had them will create “Z Fighting” between the two faces and cause rendering problems.
Now for issues relating to using Twilight. Your biggest issue is you had two Twilight point lights with a diameter of 1000 mm. The size off your Twilight lights should reflect real world dimensions , a standard lightbulb is about three inches in diameter. Most of your other Point lights were larger than they really needed to be although not as bad as the first two mentioned. A lot of your Twilight lights also intersected other geometry in the model. I think a combination of oversized and over powered lights , intersecting other geometry and the handful of reversed faces all played a role in the odd results you were getting.
What was interesting - I totally dismantled the model by moving out all the added 3d warehouse items (rendering all the time to see if anything that I may have “exploded” was the issue). Nothing. Deleted the building. Drew a red/green axis rectangle and rendered - turned black. Drew a red/blue axis rectangle and rendered - all good. Seems the issue is a setting somewhere affecting the green axis. Both rectangles had front face presenting. Still no idea. Will simply open a new document and start again with better knowledge.
Hope you don’t think your model was total trash , it wasn’t. I did some clean up to it and deleted your Twilight lights. Set the lights back up in a more sensible way and ran a test render. Test was 25 passes Easy 9. Took about an hour on my iMac. Posting the render and a screen shot of how I set up the lights. Hope it makes sense. Ask questions if needed.
There was no need to create so many lights in Twilight. If you have a bunch that are going to be the same , create one than just copy how ever many you need.
Final note. I couldn’t recreate what you had happen in your last post… Have no clue what was going on.
Wow - it looks amazing so thanks. The issue must’ve been something on my computer with the green axis - so starting from scratch - armed with lots of new information and knowledge. Think I might pinch your idea for the pavement too
Hope it helps. Forgot to mention I simplified the ceiling can light, deleted excess stuff and cut holes in the ceiling for them. That allowed me to place the Twilight point light up in the can were it belongs. Just want to reiterate the biggest cause of the problems you originally had was the Twilight light set up that got a little out of control. Don’t beat yourself up it’s all part of learning.