Tutorial 7 - Subtractive Geometry (10:57 min.)

Tutorial 7 - Subtractive Geometry (10:57 min.)
Tutorial 8 - Staggered Joists (5:06 min.)

The updated todo list as of (10/05/2024) in no specific order:
1.) Floor Coverings: Tile, Carpet, Hardwood etc…
2.) Floor Openings: Stairwell and Crawlspace or ladder access
3.) Ledgers: customize each edge or side of an assembly with a custom ledger or rim joist setting. Enabled a rim joist removal parameter.
4.) Hardware: Beam Hangers, deck holdowns
5.) Railing: for decks
6.) Max. Joist Span Indicator: Engineering related
7.) MPC Wood Floor Trusses (Mod Warren etc…)
8.) Steel Trusses (not high priority)
9.) Battens for ceiling gypsum
10.) Option for 2 layers of ceiling gypsum
11.) Flooring module should include options for various backer boards, carpet pads or even foam insulation.
One additional parameter for removing specific rim boards:

Eventually I will probably need to add in more functionality as far as customizing certain rim joists but for now having to ability to delete certain ones will probably suffice for most projects.
Any feedback in this regard would be much appreciated.
Tutorial 9 - Custom Blocking (6:26 min.)

That will be very helpful! Floors can be so complicated with regard to joist direction to accommodate various spans. I think the Floor plugin is already at a point of high flexibility to create complex floors. Excellent work!
I am currently working on the floor covering tool which will then become the code template for the floor opening tool. Once I have those two big items completed I think we will finally have a mostly usable plugin.
I am sure there will be requests for additional features and/or changes to the functionality but the core of the plugin will be mostly in place. At that point I will test the plugin in as many states as possible and attempt to discover any final bugs or issues, then within a couple days I will probably release Version 1.0.0.
Further integration with the estimating module will also be something on the todo list in the weeks ahead.
As always please feel free to chime in with any specific requests or items you feel need to be addressed. I take all feedback and suggestions very seriously and I take everything under consideration. Ultimately I will weigh every idea in the balance and based on its relevancy and time considerations your ideas may quickly become a reality within this plugin or any other plugin in the Medeek family.
Very instructive video showing off all of the Medeek plugins but I think one of the first to show the Floor plugin actually in action:

Testing the floor plugin with the other plugins a bit today, sometimes it is good to do this just to see what deficiencies there are. A couple things immediately jumped out at me:
The most obvious being that I need that opening tool/module ASAP. Without it cutting holes for stairwells is too much work.
P.S.
I also think that I need to spend some time on the no-framing mode (similar to the Wall plugin) so that one can work in a lightweight mode while massing things out. Then once the overall shape has taken form one can get into the weeds with joist layouts, hangers, insulation, blocking, metal bridging etc…
P.P.S
Designing a house, even a simple one is not easy (organizing the space). A lot of respect to those guy and gals who know how to do this well and somehow make it look easy.
Probably a little overkill with the 6x6 squash blocks under those trimmers and kings but just testing the blocking module in this scenario and making sure my load paths are complete. I am an engineer after all.
app.sketchup.com/app?3dwid=81476a33-bd9e-46b0-9471-30b75d3673e7
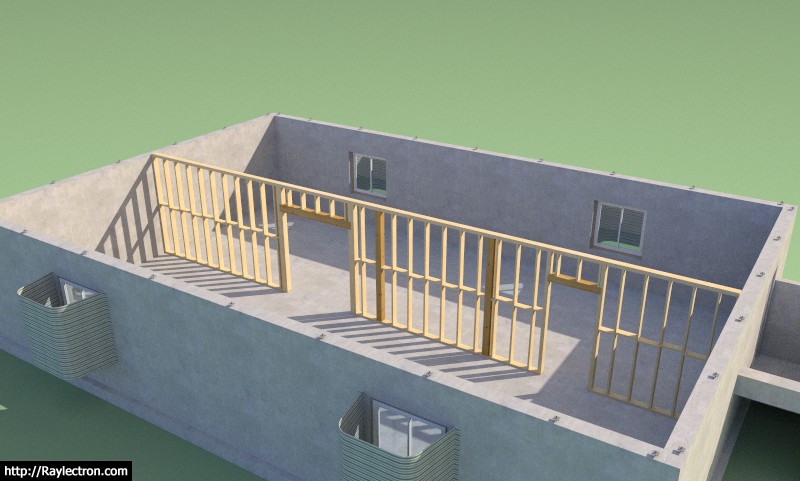
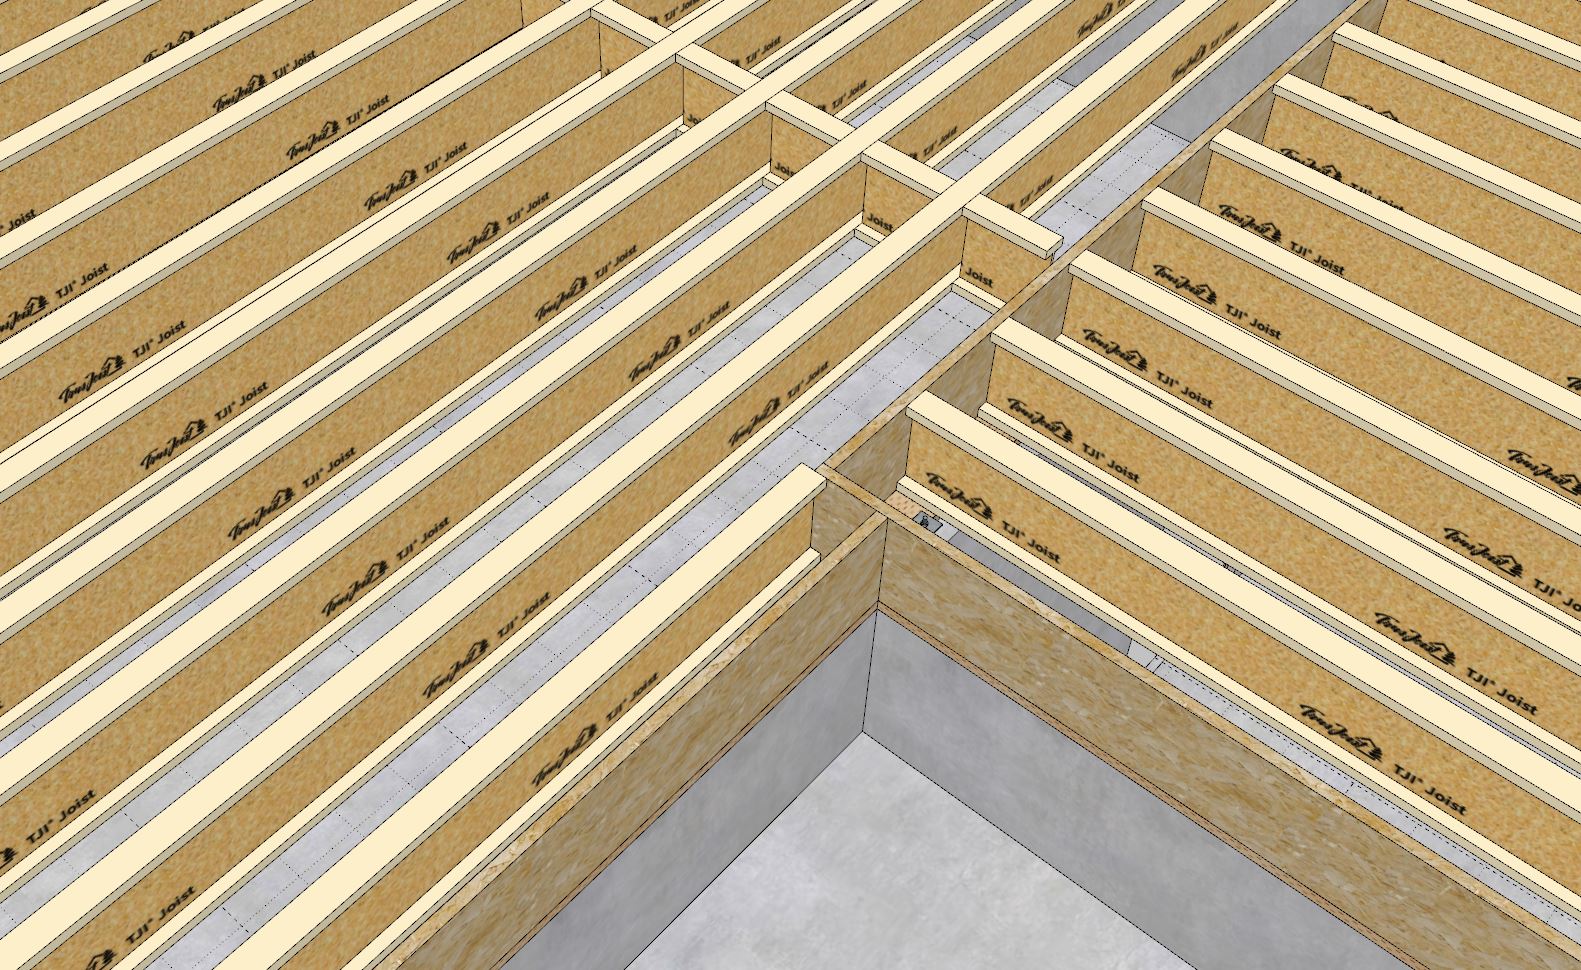
So the previous model was a bit too simple. Next I tried a more complicated floor plan with two different floor assemblies. I used a couple subtractions to trim out what I didn’t want from the one floor assembly however I’m a little unsure on how one would actually frame this up. I may be completely wrong here:
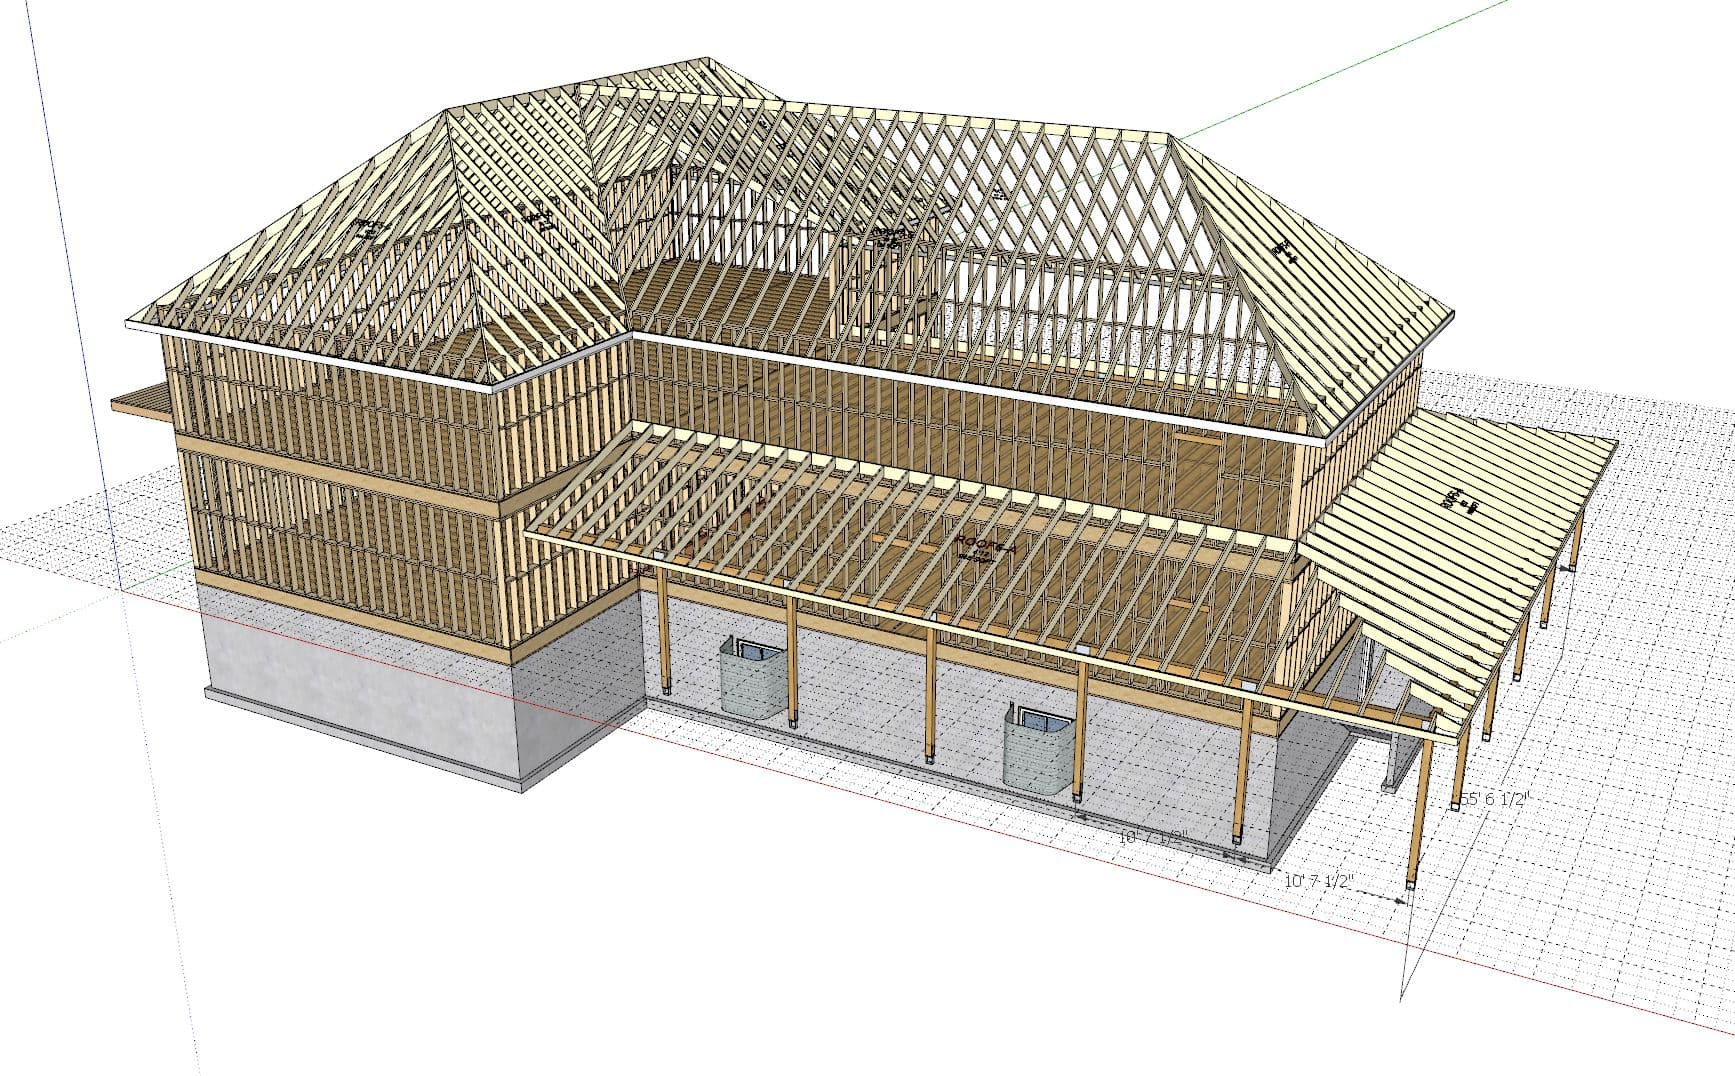
Also a few more screenshots of some other fun variations using the foundation plugin and some posts and beams:
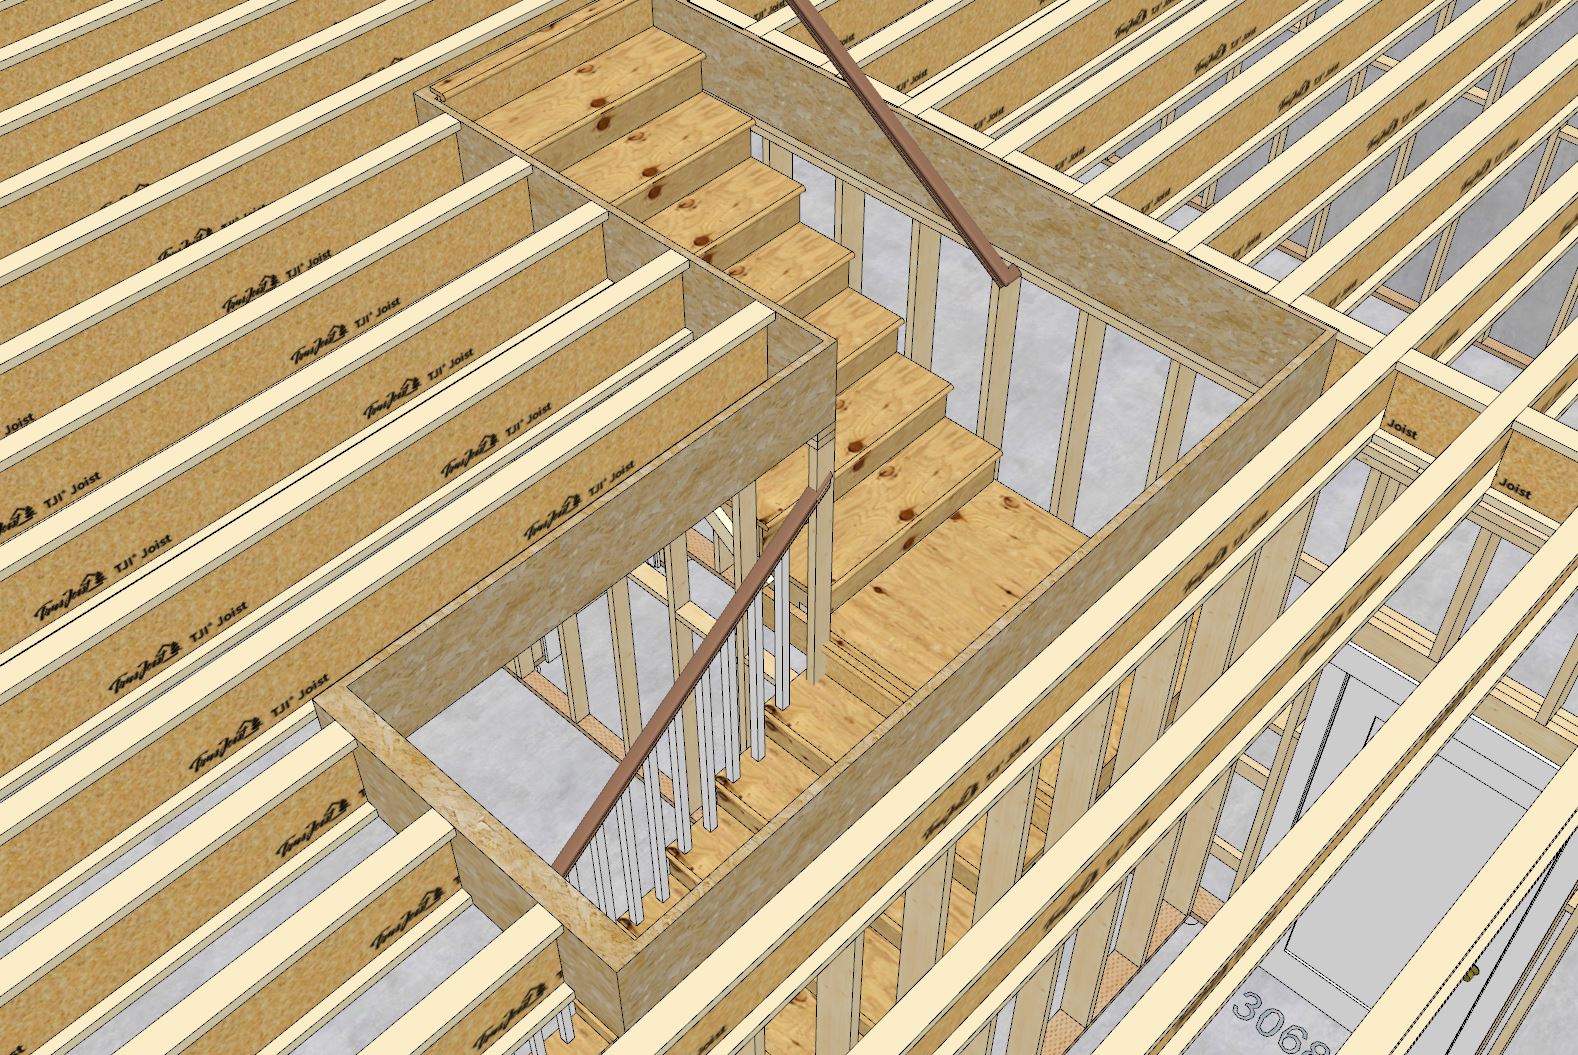
Still working on the opening tool. Here is an example of a non-rectangular hole (L-shape) that is quite typical for these type of stairwell openings. I haven’t bothered to manually model in all of the headers other than to create a quick and dirty LSL (1.25") around the perimeter of the opening. Things can get quite a bit more complicated once you enter the domain of non-rectangular openings.
Note that the floor is still parametric. I used two subtractions, one for the joists and one for everything else (ie. sheathing, gypsum)
Here is a link to view the model (Version 12):
app.sketchup.com/app?3dwid=20e25813-c156-4fda-915b-45474553dd26
Tutorial 10 - Creating a Deck with a Face (9:33 min.)

Version 0.9.9f - 10.17.2024
The cutting of deck boards was per user request.
Tutorial 11 - Cutting Deck Boards (6:05 min.)

P.S.
This is one of those features that is still in flux. Someone has suggested that I provide a randomizer as well as a max. board length. I really like the idea of having a specific tool that allows for the quick insertion and deletion of these board breaks. I also just realized that if the boards are rotated I will need to also angle the board cuts accordingly.
The current method of inserting board breaks is a bit clunky but workable for now.
Giving myself a rest from the code for a few days to work on a more complicated test model has helped me realize that polygon openings within floors are crucial. Yes, I can probably squeak by with a rectangular opening tool but it will leave all us wanting and at times probably a little frustrated with the plugin because of this limitation.
After some further thought I realized that the (10) following parameters previously outlined for an opening header:
1.) Header Type: Lumber, PT Lumber, Timber, PT Timber, I-Joist, LSL, LVL, PSL (note this will also set the material for these members). Down the road I may also add a steel option.
1a.) Header Depth: Not applicable to I-Joist headers
1b.) Header Width: Not applicable to I-Joist Headers
1c.) I-Joist Family: Only applicable to I-Joist Headers
1d.) I-Joist Type: Only applicable to I-Joist Headers
2.) Header Ply: 1,2,3
3.) Start Extension: positive or negative value accepted
4.) End Extension: positive or negative value accepted
5.) Start Hanger: None or a list of hangers to choose from
6.) End Hanger: None or a list of hangers to choose from
Are really not any different than the parameters needed for an opening trimmer. Functionally and conceptually there is no real difference between the two (just that one typically hangs off a joist and the other hangs off of a header). I just came to this realization tonight as I was looking at my manually drawn rim joist solid around the stair opening in my model (see images in previous posts).
What this means is that I will proceed with a polygon floor opening tool rather than a simple rectangular opening tool and then code in the ability to edit each edge/side of the opening and configure each independently. I’m not entirely sure how I will setup the edit menu for floor openings but I will do my best to make it as intuitive as possible. This will be a bit challenging and interesting at the same time. Essentially the HTML menu will be somewhat dynamic.
Very interesting how Tony is using ChatGPT to create the random string to insert deck board cuts, never even considered this possibility.

After watching Tony’s video I realized we probably need a couple additional advanced options for floors/decks with deck boards enabled. The two that immediately jump out at me are:
1.) Trim Band or Picture Frame
2.) Deck Wrap
Both of these can easily be achieved since they are very similar to my existing rim board code.
In fact, I can even enable a remove option for each of these modules similar to the rim board module. The parameters shall be:
1.) Trim Band: Yes/No
2.) Trim Width
Trim Thickness: Typically one would set this to the same thickness as the deck boards but I better provide this just in case.
3.) Trim Overhang
4.) Trim Corners: Lap, Reverse Lap, Miter
5.) Trim Material
6.) Remove Trim: Empty by Default
1.) Deck Wrap: Yes, No
2.) Wrap Depth
3.) Wrap Thickness
4.) Wrap Corners: Lap, Reverse Lap, Miter
5.) Wrap Material
6.) Remove Wrap: Empty by Default
Version 0.9.9g - 10.19.2024
Tutorial 12 - Trim and Wrap (6:42 min.)

How does one manage having a deck flat against a building with the overhang function especially with the picture frame ability?
You could use a subtraction object where the building and deck meet.