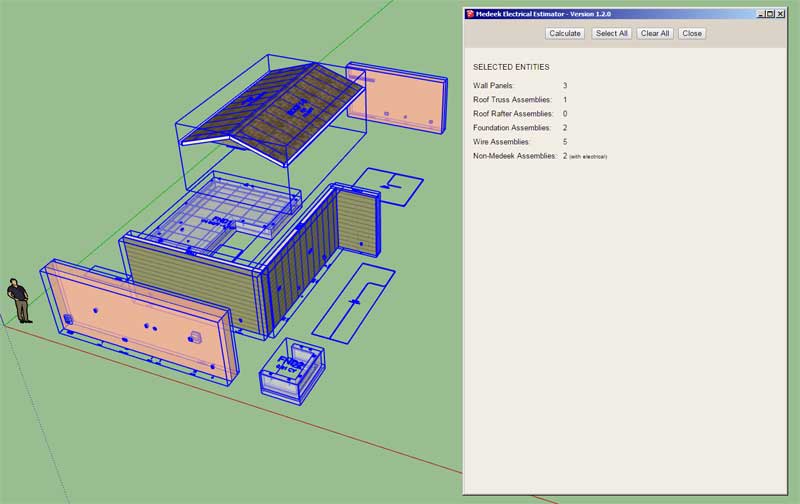
The non-Medeek wall and roof assemblies will also be selectable since the Electrical plugin also works with non-Medeek walls, roofs etc…
I don’t feel like it is necessary to break the listings into the assemblies they are part of however I will include a column in each table which lists the main assembly the electrical component is found in, this should prove useful to some.
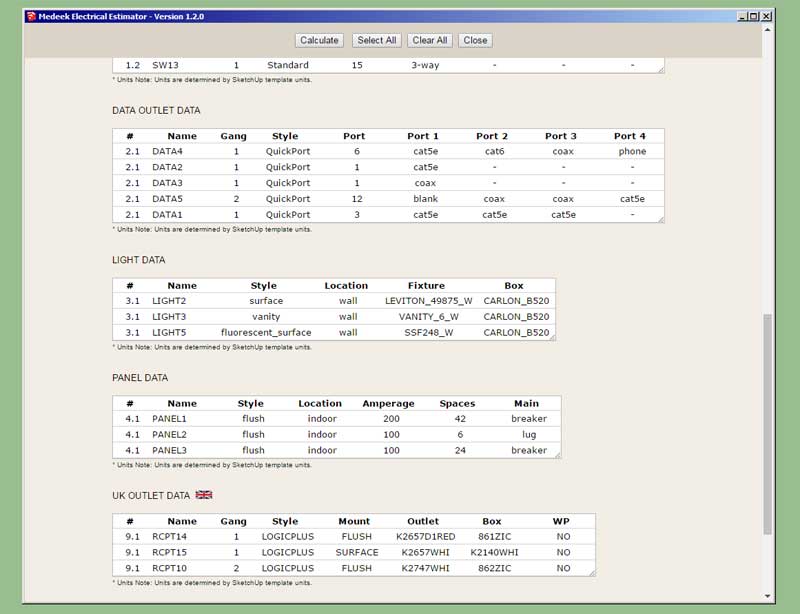
There are a lot of little details with regards to different electrical components (ie. outlets, switches, panels etc…) Each type of electrical component has unique characteristics, all of this data needs to be output by the Electrical Estimator, it will probably take me a few days to assemble this new module.
Once it is complete it will make this plugin a much more useful tool.
P.S. I think it would be also quite useful at some point to incorporate a price database that works with the estimating module. This separate database would be referenced to determine the price, vendor etc… for a given electrical component. Additionally, the list of materials could then be conveniently broken into separate purchase orders for each vendor. I’m probably getting a bit ahead of myself here but with the ability to program just about anything with the API and the Ruby back end its conceivable that one could generate PO’s that could then easily be imported into Quickbooks or any other accounting software. I’ve done a bit of Quickbooks API programming in the past where I integrated my own customer billing system and expense database with the software, its really not that hard to do.
When I ran my web hosting company back in the early 2000’s I got really sick of having to manually enter in customer orders and business expenses into Quickbooks, the problem was my billing system and Quickbooks (my accounting system) were completely two different ecosystems. I would usually have to devote one entire day out of the month for this tedious task. I finally got smart one day and decided it would be really nice if I could somehow automate this process. After about two days of programming I had fully automated the manual entry problem and set it up as Chron job that would run nightly, it would even shoot me out an automatic email every morning letting me know how the process went and if there were any issues.
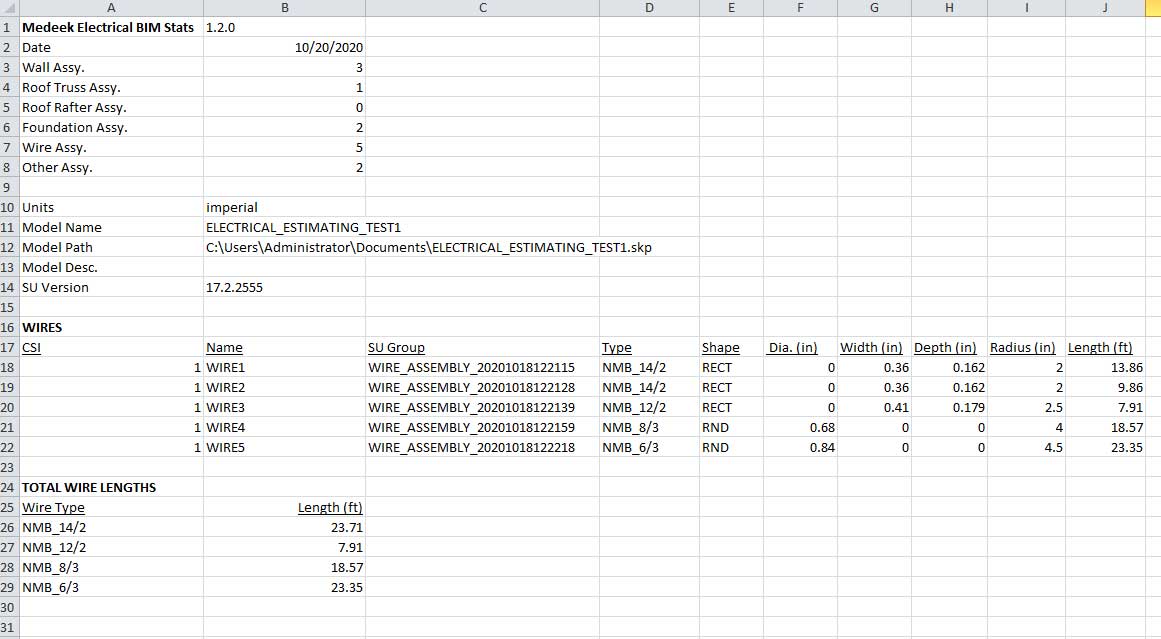
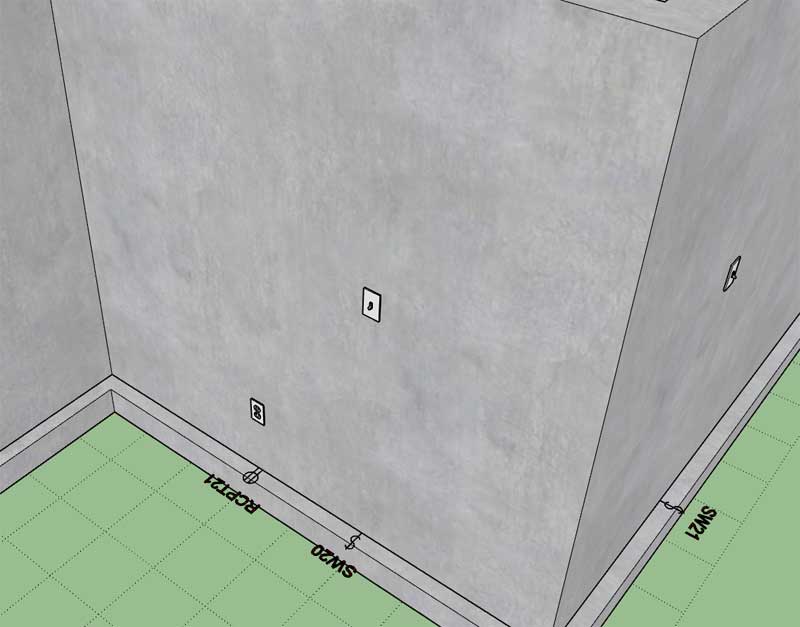
Note that the Wire Name can be customized by the user. The default is to assign a prefix and then a number that is auto incremented within the model, however one could easily use the name to define the location of the wire run (ie. Master Bath Light, Hall Chandelier etc…)
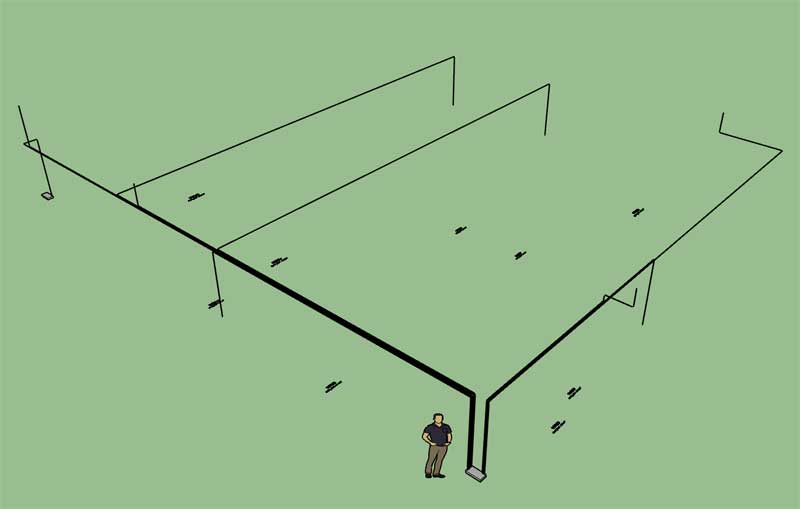
Besides regular power wires this could be useful for routing and planning network cable runs for a project. In this scenario all of the cables my be CAT6 or CAT7 but one could define a number of cable types and differentiate them by color. Then it would easy to categorize certain parts of the network by color of the network cables and also figure out how much cabling is required for specific parts of the network.
In the example shown below I’ve color coded my network cables based on whether they service the first or second floor of the building. The red cable is the designated switch-to-switch or router-switch cabling:
Note that the totals allows me to determine my cable amounts for each floor. I’m also able to determine that each cable run does not exceed a max. length.
View model here:
Once I created all of my cable paths I dropped them onto a separate layer so I could easily hide them (and keep them around for future use if needed) once my wires were created.
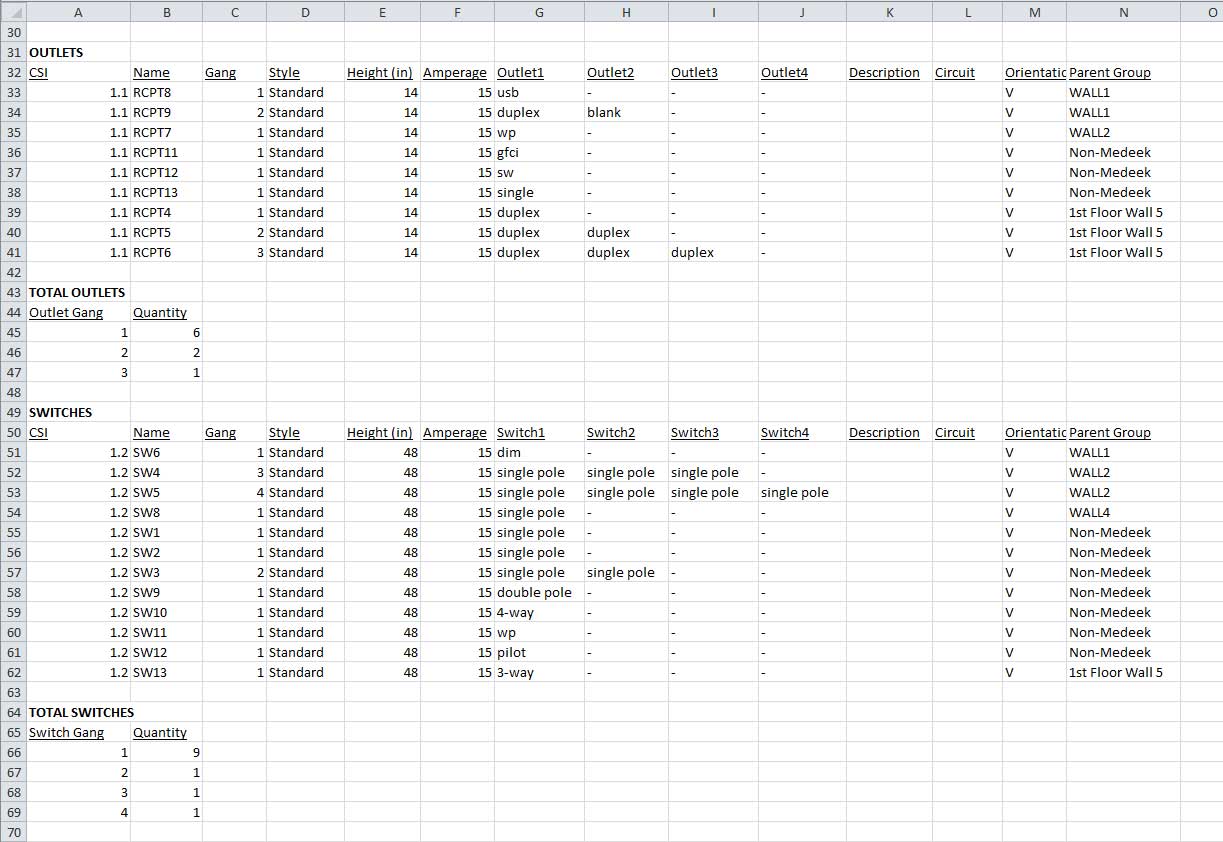
Added Safety Devices, Heaters, Vents, Floor Outlets, Low Voltage Panels and Misc. Fixtures to the Medeek Electrical Estimator.
The Electrical Estimator is now complete. I still need to change up the CSI numbers for the various components but for now I’ve just used my own default numbering system. I will need to get with some electrical contractors on what are the appropriate numbers to use.
I will now turn my attention to more pressing matters involving the Truss plugin.
Forgive me if this has been addressed, but I didn’t see it in my browsing. I love that I can assign circuits to each device in the plugin, but I see no way to use that information in terms of the 2D layer. I’m guessing a label box could access it in Layout, but I don’t relish the idea of hand labeling everything if it could be automated. Is there an easy way to use that field as is, or could it be set as a label option instead of “SW20” for example?
Personally, I would want to have the circuit information above the device symbol. The labels aren’t as helpful for what I do. If the label text and circuit info could be separately toggled (via gui or tags), that would be ideal.
@medeek I know you are busy as heck but has there been an interest or any progress on the plumbing portion of the plug in?
I am trying to maybe grab and use some of either the electrical plug in or maybe a plumbing plug in for my refrigeration piping, low and high voltage for my HVAC units is why I am asking.
I am interested in doing a plumbing plugin but I just haven’t gotten that far yet. As you stated I’ve been too busy lately to really start any new plugins, but I will add it to my list.
If I may, it would be ideal for that since you don’t have fittings except at the equipment ends on the soft copper. That’s really the only thing separating his wiring script from plumbing and ducting applications. Also, I’ve found the electrical extension to be super helpful in general. I’ve put my own metal electrical boxes in with mixed results, but that’s another story.
@OldManPatterson1979 I agree…looks like I am going to purchase the Electrical plug in as well then… @medeek has got quite the little software suite going on here…impressive…