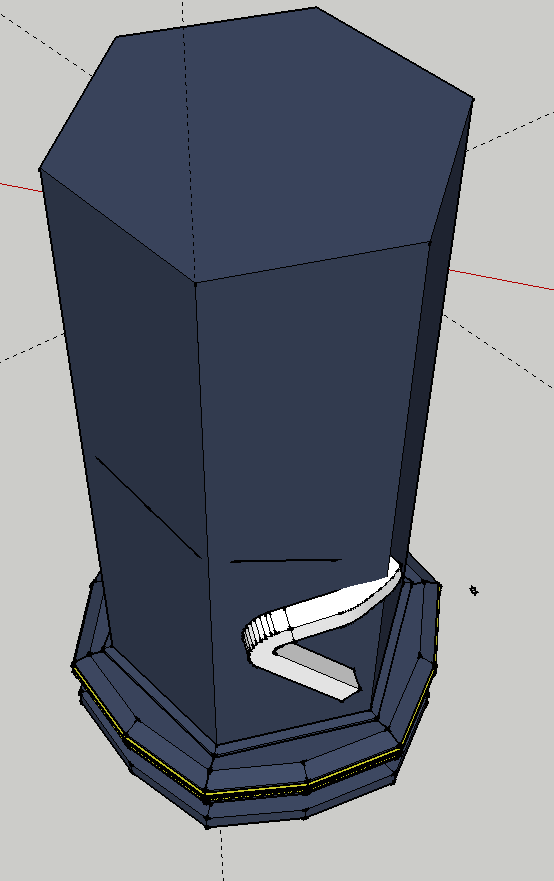
I am building a dragon swirled around a pilar. This is how it will look once done, hopefully.
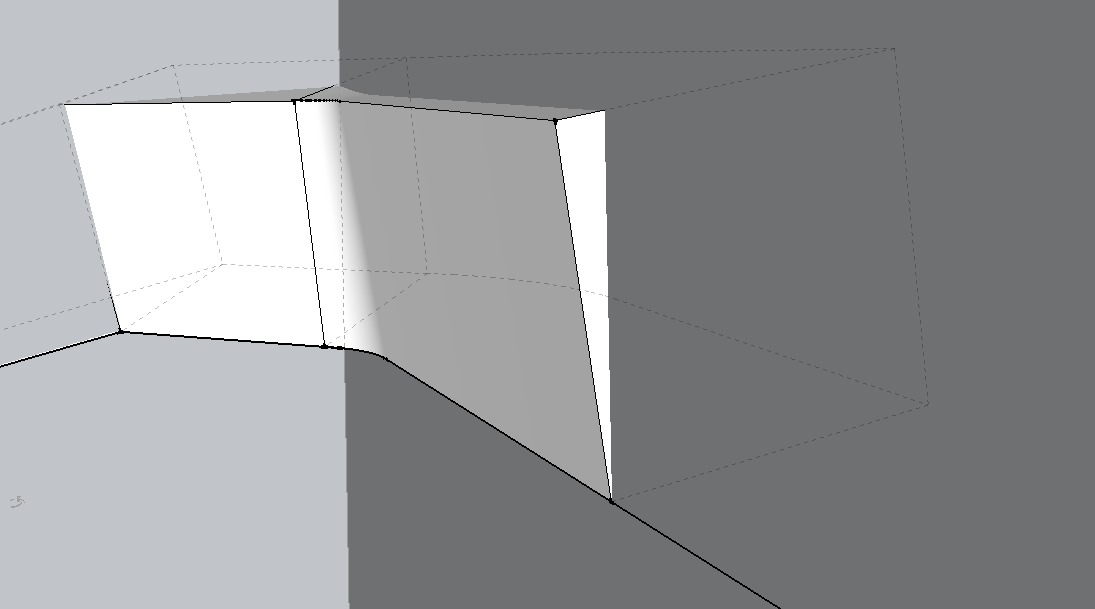
Along my path I have come across a few problems. Many if them went away with hours of wasted time. My first one never went away though. The follow-me-toll. Great tool but it twists around the corner which is unwanted. Don’t get me wrong, it should turn in a bend, but while my figure turns, it tilts slightly away from the surface of the pilar. Is there a way to keep the figure straight in a 90’ on blue axis? If not i’ll have to draw it manually. Maybe this tool isn’t ment for my lines 15’ tilt and the curve too simultaneously.
Follow Me is doing what it was designed to do although in your situation, not what you want it to do. Try using Eneroth Upright Extruder instead. I think you’ll get the results you want.
Expanding on @DaveR’s reply, the built-in follow-me was designed for planar curves. The algorithm it uses to extrude the profile causes it to twist when the path isn’t planar. As he suggested, eneroth3’s upright extruder was written expressly to address this situation.
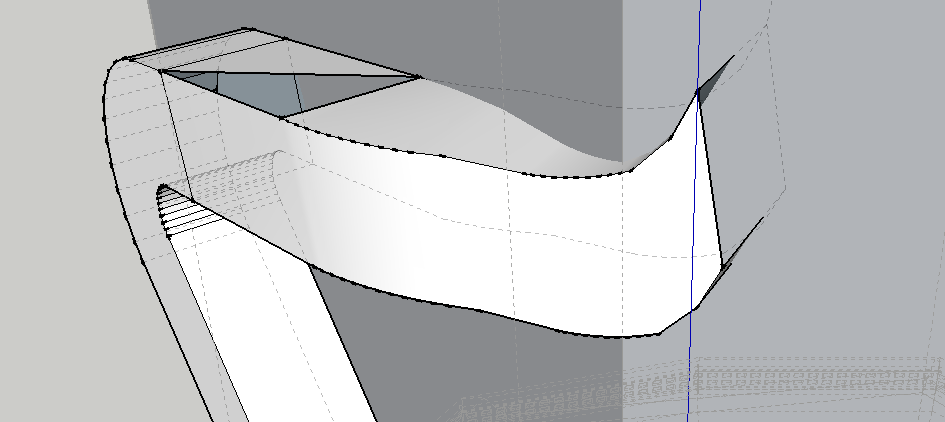
The extension installment worked fine. Now I’m wondering if the curves turn is too tight. Looks like it has a problem there. Also a warning message pops up everytime I try to take all lines at once. There are no gaps in my lines though. As a bonus question: could I use scaletool if some parts of the body should be thicker?
I think @Cotty is asking to see the actual model including the specific part of the model in your image. The reason being that it sort of gives you problems with both follow me and upright extruder.
It is a rather complex shape and we could advise better if we have the geometry to work with…
Seeing a screen shot is one thing, but being able to look at the model itself will let us help you.
So can you attach the model rather than just another image.
Ohhh… Okay. I could use upright extruder for the spiral (seems to work), then use follow-me for the neck. I wasn’t using follow-me because I wanted to extrude some upright edges to make the dragon’s spine. Kinda like this…
I can’t quite follow what you are trying to do in the model, your path doesn’t really make much sense.
But I had a thought on a way to structure this type of thing.
Does this look like the basics of what you are trying to achieve?
I have simply drawn the shape on the hexagonal pole as a series of straight lines on the faces, I’ve then copied that set of lines down and added in the join lines to form a series of faces which allowed me to use Joint Pushpull to pull it out into a 3d shape. I then used SUbD to smooth it. And Quad Face tools to select the ‘fin’ and pull it up with JPP.
Doing it this way builds the geometry in such a way that your edges follow the shape without twisting, so you can pull them up or out or use them as a path for copy along path etc, which would allow you to copy a series of fins along the spine. How detailed you want it is up to you.
It has taken longer to type this than to do it.
A quick example showing how you can select the geometry and drag it up.
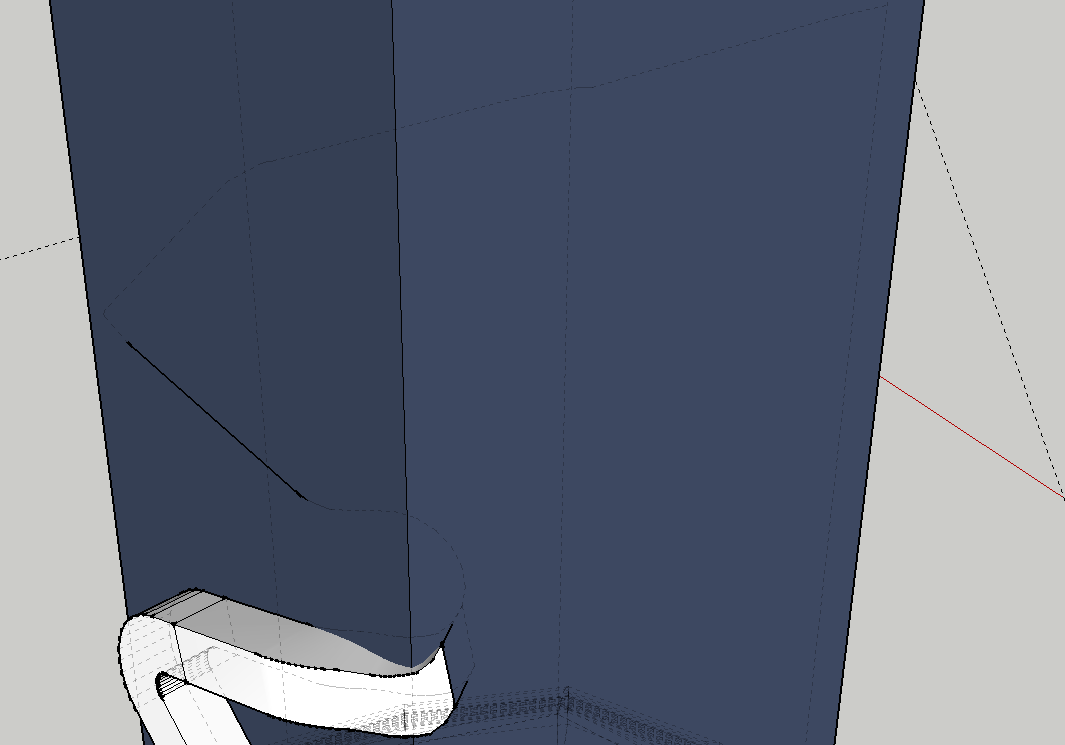
I really don’t know anymore. The follow-me-tool doesn’t work for this I’m sure of it, and the eneroth-upright-extruder is even worse. I have tried to draw it just like you on the structure in a circle likethis. At the top of my figure it starts to turn. I have no idea what’s going on, but it’s probably time to shut this post down, since I can’t resolve this no matter what. Just too hard for me. Nice videos though.
This is as far as I have come. Maybe I’ll come back to this. Your technique will be put to test tomorrow.