Hello, I worked with an interior designer in the past who created technical drawings for my bathroom. Now I am trying to learn how to do this myself, I don’t know what tool he used but I am hoping SketchUp and Layout have the same capability.
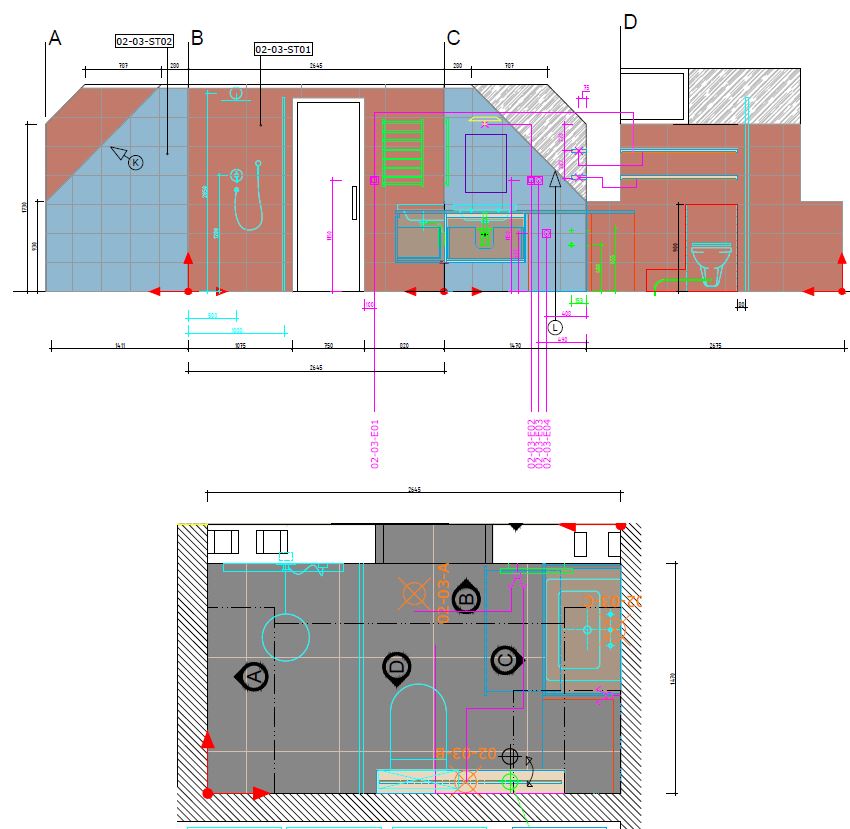
How can I create one continuous wall elevation that covers walls A, B, C and D of a room floor plan (instead of creating four separate scenes and ending up with four separate elevations/scenes for one room)?
How do I go about adding 2D items to wall elevations: shower head, washbasin, radiator, plumbing etc? Where could I find them?
You could copy the geometry for each wall, move it and rotate it to make a single continuous elevation however that might create more work than it’s worth, especially if you need to make changes in the 3D model at some point. Instead I think I would opt for the four separate elevations as scenes in SketchUp and then just place the viewports in a row across the page in LayOut.
You can place them pretty much in the same way as you’d place 3D objects. It would be best to float them off the walls a bit to avoid having them disappear into the walls. You could look in the 3D Warehouse for 2D components. Or you could just use the 3D components. They’ll look 2D with the camera set to Parallel Projection.
Yes. If the 2D objects consist only of edges, you would need to apply the color to the edges and in the Styles Edit panel set edge color to By Material.
I don’t have a model of a room to use as an example but this should give you an idea. Four elevations of the desk shown in four scenes in SketchUp and the viewports aligned in LayOut.
Thanks for your response Dave, I’ll follow your advice to create separate scenes for each wall in Sketchup and then join them in Layout with viewports. I’ll let you know how I got on
Good luck with it. FWIW you can use the little gizmo thing to aid in aligning the viewports. If you set up the first viewport with the desired scale, you can then copy it, paste it, change the scene for the pasted viewport, and move it into place. Rinse and repeat for the other viewports.
Thank you. I wish I could take credit for the design of the desk. It’s something I modeled up from photos to create shop drawings for. I thought I might build it. Change of plans, though.