I have Sketchup Pro and while a use it a lot, I am still a very basic user. I need to print out some of my drawings. So far, I have been cutting and pasting into Word. The Problem is that Word then prints the entire background (uses Ink Unnecessarily). I watched a video showing how to print directly from Sketchup, seems quite simple for sure. However, when I go to Camera and scroll down to find Print (as it shows in the video) it is not there. This is a problem. Can you offer any suggestions???
I wonder what video shows Print in the Camera menu. Like most programs, Print is in the File menu.
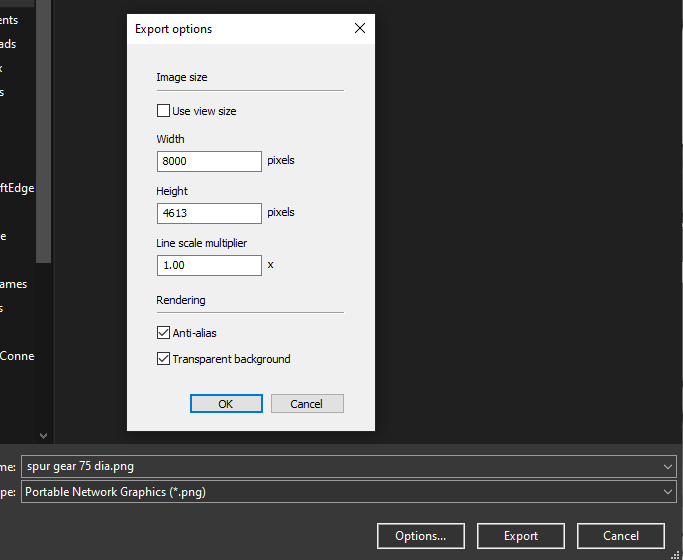
If you want a transparent background you would want to export (also in the File menu) a PNG file and select Transparent background in the Export Options window.

If you are simply printing from SketchUp and you want no background, edit the style so there’s no ground or sky and the background color is white.

Depending on what you want to accomplish you might find it better to use LayOut.
Thanks this is very helpful. I agree I thought it was weird for Print to be under Camera, but I watched it 3 times to be sure. It was a video done by one of the Sketchup team guys. He does lots of them and the video showed exactly that.
I know very little about styles. I looked for where I would change the style and I cannot find that choice. I wonder if somehow my Sketchup is not set up properly.
When I try to export as you suggest, I do not have a choice of a PGN extension. Is there something I need to do to have that option?
That would be under Styles in the Default tray. If the Styles panel isn’t showing in the Default tray go to Window>Default Tray and put a check mark by Styles.

It’s PNG. Make sure you are going to File>Export>2D Graphic.

I am getting there thanks to your assistance. I just can’t see where I edit the style to get rid of the background stuff.
Under the Edit tab in the Styles panel.

Is there a way that I can save the short videos that you sent me? You have been very helpful for sure. Thanks so much.
You should be able to right click on them and choose Save Image.
I don’t know if this the correct way to do this, so if it is not then please tell me.
I do drawings of cabinets, and I know there is a way to Open and Close Doors or Pull-out Drawers etc. I try to watch videos on the topic, but they almost always assume that I know a lot of stuff that I do not know. Therefore, I am lost before I get started.
You did such a remarkable job of explaining the printing issue, so I again ask for your help.
I have the same issue with being able to draw a cabinet and then explode the part, so they are all shown individually.
I expect you are referring to creating Dynamic Components where you can click on them to have them open or close. It is an option but more work than they are worth in this case and won’t really work for your applications. It’s simpler to make a couple of copies of the components and then use tags to show or hide one set of them for a given scene. As an example, here’s a model I did for plans for a project from the Nov/Dec 2022 issue of Fine Woodworking Magazine. A photo of the piece is on the cover.
For one scene I show the chest with the lid and drawer closed.

And another with those open.

There are two lids, two drawers, and two copies of the upper hinge leaves. It’s a simple matter of hiding some tags and showing others.
When I am creating models for plans I make a copy of the entire project over to one side and behind the main model. This copy gets pulled apart to make the exploded view or views. I also set out copies of the components for the 2- or 3-views for dimensioning. Another example, this time a plate rack designed by Nancy Hiller (RIP) again for plans for Fine Woodworking Magazine. You can see the main model at the origin, the exploded copy over to the right and above, the components set out for the 2D view.

The exploded view by itself:

And the parts for the dimensioned views:

Some people like to create individual scenes for each part but that’s way more work than I want to do. It’s easy enough to set up the parts like I show above. In LayOut it is then a simple matter of creating the viewports for the different parts to distribute them on the page or across multiple pages. So this shows how I’ve used the one scene a bunch of times to show the parts for dimensioning. Of course the dimensions and labels layers are turned off in LayOut for this screenshot.
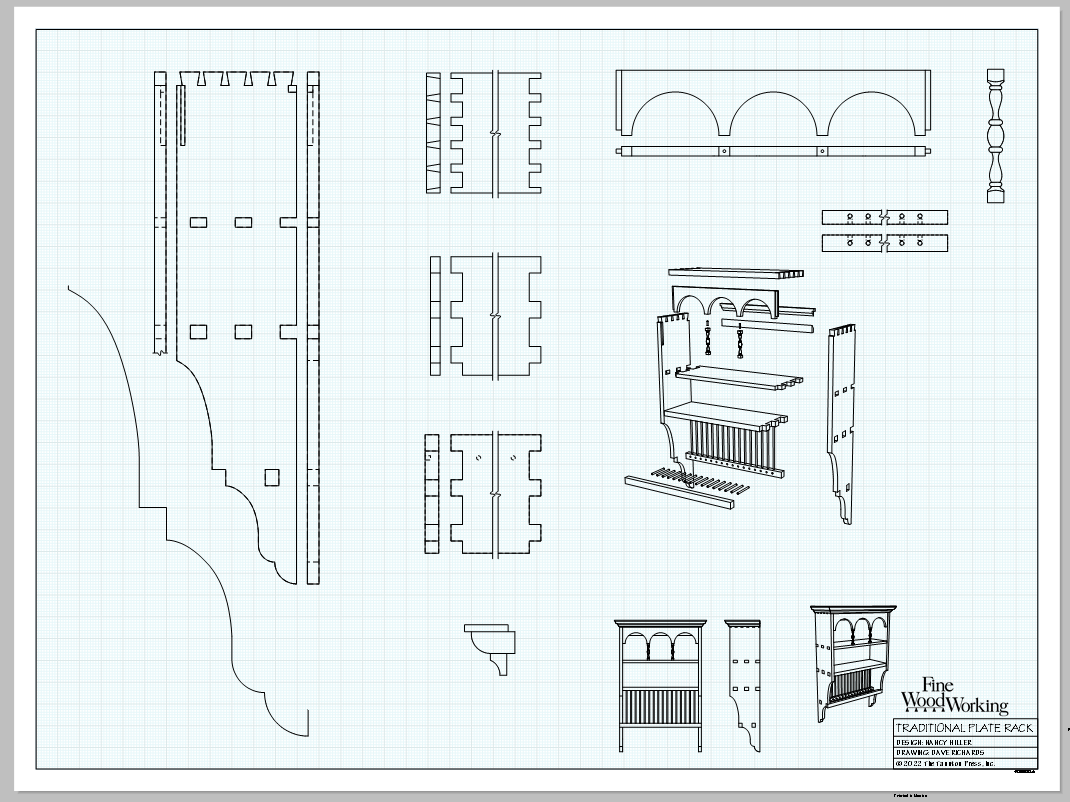
Most of the parts are shown with a scale of 1:2. The spindle, molding, and the side profile curve are shown at 1:1. It takes a little practice to get it all organized but there’s nothing extremely difficult or complex.
Thanks again for the information. I guess I am going to need lessons in using Tags and Scenes, if that is not too much trouble. The more I use Sketchup the more I realize I do not know much about it.
One option would be to go through the tutorials at learn.sketchup.com
Check your PMs though.
PMs??? I am just so far behind, but I love the program and use it for everything.
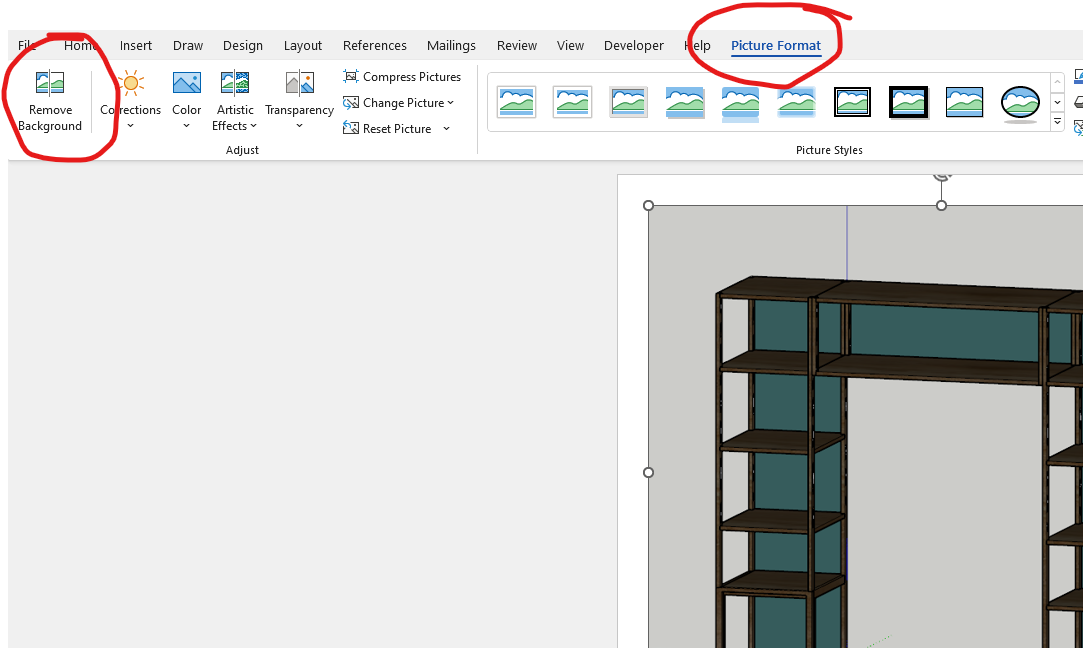
The other option, from the other end of your original method, is to remove the background in word. Insert / paste your picture, then go to picture format on the toolbar, and then click on remove background. Then just choose the bits you want removed, and that should work. (Just in case you can’t get sketchup to do it for you). Styles in sketchup is the option I’d choose.
But this is where the option to remove background is in word:
Why not remove the background during exporting the image from Sketchup?
That is the optimal way to do it, certainly… I’m just providing another option. ![]()