Also I did have a look at the code - I believe I understand the basic steps, but would not have been able to do it myself.
How can I now add the greater context (2700000,1265000 to 2755000,1235000) and achieve that this very exact alti model embeds smoothly with the less exact data from google (this should still work as the discontinuation should not happen before End of May)?
Or if this is easier: I received today the houses (this should bring the super exact built environment). How can I add now the houses from the purchased .kmz /.kml file to the above alti model. Is the easiest solution again a script?
And at the end I will add the my project model into the built environment with correct altidata.
I would then be able to go into the model and check from where I see what.
Also I believe I found in the meantime a good walk around solution: Add the extension Sketchfab and upload your model there.
If you are interested see here: [model MRB removed]
Update: In settings, you need to switch from Orbit to First Person mode: Arrows, Mouse left and Mouse wheel (to set speed) make a pretty good job.
For me its very clear that the standard walk around function in SU does have room for improvement.
Not solved, but I am working on, is how to embed the Mühle model to the Terrain that resulted of the help of jimhami42 and then how to embed these two combined elements to the greater context.
How did you bring the orthophoto to the detailed terrain we produced with your script and how can I after import the model you see in Sketchfab (I have this available in .skp format)?
I tried to just import to the terrain model - no success
I tried to with open - no success
Also, how can I add a specific XYZ referencing point to the building model in order I get some basic alignment with the terrain?
I started by converting your coordinates from CH1903+ to decimal degrees:
Lower Left Corner (SW)
2720921,1256201 = 47.445483N 9.041927E
Upper Right Corner (NE)
2721919,1257199 = 47.454272N 9.055430E
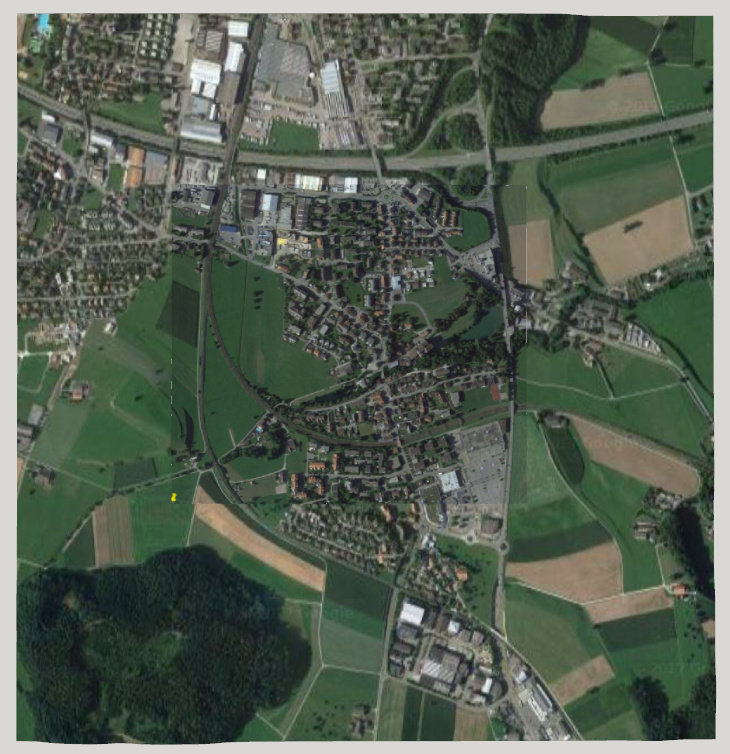
Then I added placemarks in Google Earth:
I took a screenshot and imported it into SketchUp. Using the pins to align it to the previously imported surface allowed me to then project it. There are some discrepancies, but overall, it aligns pretty well. Not sure about Google’s licensing for something like this, however.
Step 2: I used the average decimal degrees of the mid-point to geo-locate the model:
Navigating to Wil-Rickenbach, I grabbed the terrain and imported it into SketchUp. I first aligned the Location Snapshot layer to the XYZ surface and then used that to align the Location Terrain to the modified snapshot (using the move and scale tools). The previously imported terrain and texture I left un-scaled:
I was able to redo the coordinates conversion, minor diffs, not material
I imported the printscreen and got to the following problem:
Selecting “Image” option (in import function) I was not able to fix the upper right corner in order to match to the terrain.
Selecting “Texture” option it did not allow me to fix lower left nor upper right.
Also, the picture did not align to the topography as the printscreen shows.
What did I wrong? Did I start wrong by importing the picture to the terrain model? - did you mean something different when you say “Using the pins to align it to the previously imported surface”.
Yes, I meant the placemark pins I added in Google Earth. Not the texture alignment pins in SketchUp. Bad choice of words on my part ;(
I imported the screenshot as an image, not a texture. Using parallel view in xray mode, I used the move and scale tools to align and size the image in plan (top) view. Then I exploded the image, used the materials eye-dropper to sample the image. Opening the terrain for editing, I used “Control A” to select the faces and pasted the image onto them (takes a moment due to the number of faces). This gif should help clarify things:
I had to ad a simple face (as a helping step), whereon I added the photo - like this I was able to match it neet and nice. But I was not able to transfer the texture down to the model.
A) Is this because I added the simple face whereon I added the photo or cant this be the reason why its not working?
B) Researching, I found another guidance I believe is on the same subject: Sticking a Photo or Texture to a Face | SketchUp Help - starting from title “projecting textures onto a curved surface”. In point 4. in this guidance it is mentioned “select Texture > Projected.” - in my SU this does not appear when I right click on the photo imported - is this something that got lost in SU17 or what am I doing wrong?
C) how can I make my model looks nice grey as yours, jimhami42, an not as mine (polygon-mesh-style)?
Import the photo as an image, not a texture. You can scale and resize it to align with the terrain. When it’s in position, right click and explode it. Then you can select the texture with the eye-dropper. Watch the GIF again.
You do not need to do anything other than to select the texture using the eye-dropper. The paint bucket will automatically project the photo when used.
I turned off View >> Edge Style >> Edges (when you later wonder why you can’t select an edge, turn them back on again).
jimhami42 - I can reperform the procedure on a normal white rectangle that I place next to the model - it perfectly works according to your instructions. Please refer to printscreen.
I believe the problem is that I can not select the terrain and make the terrain blue-dotted after I selected the texture with the eye dropper (bucket tool + Alt) from the printscreen imported.
This is the only difference I have by applying the procedure to the terrain-model compared to the procedure I reperformed on the normal white rectangle (printscreen).
So how can I select the terrain in order it becomes blue-dotted? I studied this article Selezione della geometria | SketchUp Help - no success. Could it be some settings I missed? Thank you
When you turn off edges, you can no longer select them by clicking. However, if you open the terrain for editing and use Control-A, that will select All and you will see the blue dots. When you use the paint bucket, it will project the image onto all of the faces.
I believe its very accurate. Thats very cool. Thank you very much.
How can I know tag the Mühle Modell with I guess 2 XY (in order the model has the correct W-E orientation and one Z information? and merge the model into the existing terrain?
And, how can I bring the example of built environment model in the following link to the model (from the given KML format)? I believe it should already have the information in that data where it should be placed, is that correct? There is an additional problem that only a couple of buildings are in the perimeter of my terrain - does each building have a specific reference or do I just import everything and delete out what is not needed?
@thomas.engel - I’m sorry I didn’t get back to you sooner. Every so often, my day job interferes with my hobby
It looks outstanding. I believe that you’ve got the hang of it.
I’m not really sure where your model is located and what scale you’re using. While you can locate the XYZ imported terrain where it is natively imported with my plugin, SketchUp sometimes has problems with geometry that is several million meters away from the origin. If you leave it in place, however, and open the terrain group for editing, you can use the Text Tool to select a node on the grid and get xyz coordinates that match your original CH1903+ data:
OR you could move it to the origin and subract the xyz offsets for the rest of your locations. OR you could rescale everything to be in LatLong degrees from the origin. It’s hard to say what might be the best approach for you.
The KML file doesn’t have the /models/model_nn.dae files included. You can open it for editing in notepad++ or some-such and see xml tags like this:
I suspect that these are your houses … if you zip the kml file and the models directory into a zipfile and rename it as a KMZ file, I believe it will import correctly. Here’s an example error when importing the KML file into Google Earth:
I can’t tell from what I can see, so far. However, I generally import more than I need and delete what I don’t need.