I use Sketchup to model projects for a small, high-end, custom woodworking company. We do mainly cabinets that are all variations on a common type of box, but we also get some really random projects.
We just got our first CNC and are trying to figure out the best method to go from Sketchup model to CNC cut parts.
We got VCarve Pro because that allows you to import a Sketchup model, and it gives you a 2D layout of the parts. However this doesn’t tell you what the depth of rabbets / dados / pockets should be. Also the layers in VCarve are weird and not easy to work with.
I’m hearing about programs like Mozaik and Cabinetsense. I started working with Cabinetsense and it creates a ton of layers and seems like more than we need.
I most recently started learning about dynamic components as a way to make parametric parts, which I can use to create a library of parts that I can draw from. I think I like this option the best because it gives me total control over the layers etc with none of the extra functions that I will never use. I was almost thinking about writing my own program that would allow me to create my own variables (like cabinet height, cabinet depth, linking drawer box depth etc…). But I’m sure a ton of people have already encountered this situation and probably come up with good solutions.
It seems like Mozaik will cut my CNC programming time in half, but I don’t know if it’s worth it to get over the steep learning curve if we don’t do ONLY cabinets
Does anyone have experience with any of these things and can share your insights? Thanks in advance!
-Nate
ps attached are some images of a few of our projects!
Hey @nate2 I may have a solution for you. I was the one who actually helped design the original SketchUp importer for Vectric, and I’ve gone on to make some additional software to help SketchUp users get their parts in to CNC a lot better.
I’ve also built cabinets using Dynamic Components and I have some deep thoughts about that as well. I’m happy to answer some stuff here, but if you’re up for it we can connect offline and I can dig really deep if you want to. Just shoot me a PM here and we can setup a call.
Hi Nate,
I design in S.U. and import directly to Cut 2D pro (the little brother of VCarve Pro - but it essentially works the same way). I originally encountered the same problems as you. It took several months of trial and error to structure my sketchup models in such a way that they would transfer to Cut2D pro.
I have learned a great deal in this process and I can say now that we have a pretty seamless workflow.
The easiest way to begin helping you would be for you to download the attached model of a drawer. You will see the layer naming and hierarchy I use.
One must do away with the basic Sketchup law which states that elemental geometry must exist on Layer0. The reason is that VCarve and Cut2D pro deal with geometry on S.U. layers in a different manner. This is one of the hardest pills to swallow and it sucks. The attached model has rabbet joints and plunge holes of varying depths but if you click down through the components and groups you will notice that all basic geometry (edges and faces etc) are not on Layer0.
I still manually setup tool paths in Cut2D Pro based on Sketchup layer structure. For example, in my S.U model, plunge holes of a common diameter and depth are placed on their own layer. This layer might be named something like: ‘HOLE_3mm_dia_9mm_deep’. I can then isolate all entities on this layer in Cut2D pro and setup the tool appropriately.
I do not 3D model rabbet joints or holes. The reason is it creates a messy cut profile in Cut2D Pro when the model is imported. Instead, I simply draw a 2D ‘outline’ of the rebate and place it on its own layer named something like: ‘rebate_9mm_deep’. The rabate is a component nested into the panel component. All other rebates of common depth in the model are placed on the same layer. When the model is imported into Cut2D pro, once again it is easy to isolate and setup the path. In the same way, holes of any depth are simply 2D circle entities in the model which are placed onto a specific layer.
Make components out of your holes, rabbets and pockets and nest them with the panel component as per the instructions under the heading: ‘Keep components starting with two underscores (__) together’. in this doc: SketchUp Files - Cut2D Pro V9.0 User Manual
Dynamic components may work for you in terms of quickly resizing parts but I have found that setting up my fixings as ‘glue to’ components works just fine too.
You should try importing the attached file into VCarve. Make sure that you select ‘orient by material’ and choose ‘Top_Face1’ from the pull down list.
@nate2 pretty tough to beat CabMaker plugin and CutMaster for price and functionality. For large complex projects Components are cumbersome. CabMaker uses groups which helps speed up SU on larger projects. Also CabMaker\CutMaster output works great with Aspire Vcarve.
CutMaster generates router optimized patterns in DXF format so you are not as reliant on Vcarve Pro nesting optimization.
Thank you so much for your response here! Your solution seems like a perfect fit for a job where someone makes parts more than once. There might be a way to integrate it into what I need, but at the moment I think another solution might be better - whatever that ends up being.
Thanks MPoole! I’m going to download the trial of this software today. I can’t seem to find a general tutorial of this - is there any way you recommend I go about learning the ins and outs?
I would like to say that faber still seems to be the holy grail of the sketchup to cnc workflow especially because of the way it is able to handle pockets and fixings as 3D components. It also utilizes the component axis in orientating parts in the CAM software. This is something the Vectric VCarve/Cut2Dpro does not do.
However, faber is difficult to integrate into a metric based system at the moment but I believe that is all about to change…
Interested in this because I have recently been getting my head round the same issues - importing a complex 3D model into vectric - my original idea was that the sketchup model should exactly represent the 3D end product. But I had the same problem as you regarding doubled up outlines and other problems on the vectric import - and just like you I settled on represent grooves etc with separately grouped and layered shapes on the sketchup model.
Howdy!
I realize this is old… but I have been reading and rereading your instructions here. I downloaded the file to use as a model for my own but for whatever reason cant seem to connect the dots. I am able to export to vcarve and see the individual layers, but when I ungroup them - expecting them to be grouped to the original tags that they were in sketchup - instead they are all still just layer0. I might not understand the fundamental differences between components and groups…? not exactly sure what I’m doing wrong. Any help would be appreciated dado holes wall underscore parent.skp (51.3 KB)
!
Hi, I’m not sure what exactly you’re looking for help with? I opened the file you attached and it looks like everything is on a tag, nothing is on Layer 0…
Upon import, check the option ‘orientate by material’ and select 'this_face_up’ from the drop down list. This will ensure the parts are imported with the correct surface facing up with respect to the machine bed. Note this is achieved by a special component I have embedded in your model.
Here’s a list of things I fixed in your model.
Named the parent component beginning with a double underscore. All other sub components and groups do not require the underscore. You had all the Sketchup tags beginning with an underscore which is not necessary.
Assigned the raw circle geometry (lines, faces) which represent your drill holes to an array of Sketchup tags. Not the group in which the circles live. (This is contra to standard Sketchup best practice but necessary for Vectric CAM software)
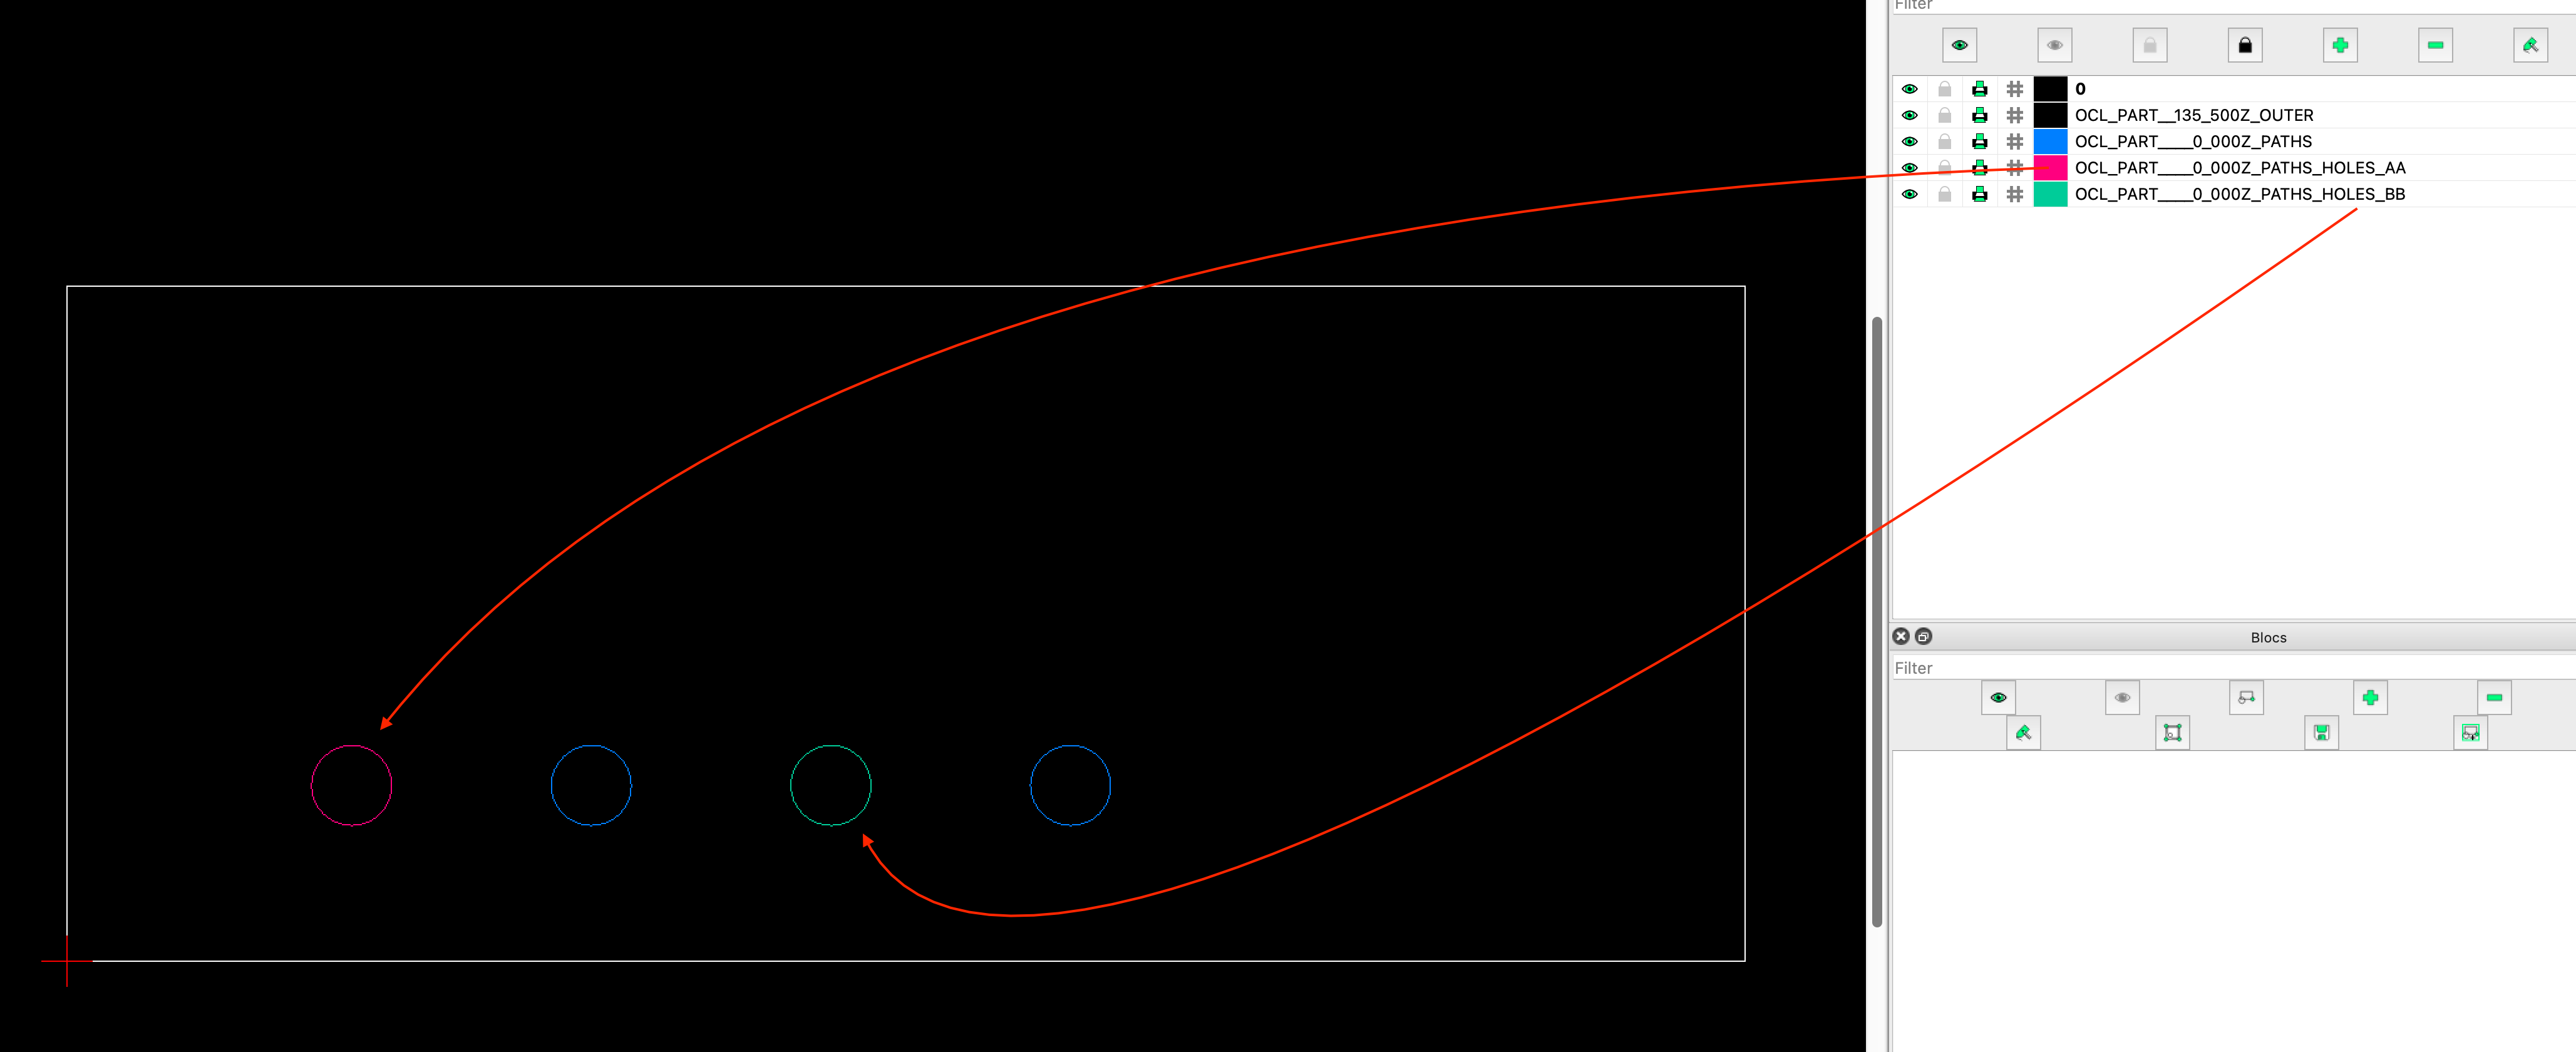
I’ve placed all circle geometry on it’s own tag according to hole diameter. 1/4, 1/8, 1/16" etc.
This way the tag will show up as a layer in Vectric CAM software - see image #2.
As with the circles, the rebate raw geometry (lines, faces) is now on a special tag called ‘Rebate_Dado’. It’s parent group can be on a tag whose name is completely arbitrary. Again, its the raw geometry’s tag which matters to Vectric.
Created a separate 2D (flat) version of the part and placed it’s raw geometry on a tag called ‘cut_profile’. Grouped and nested it within the parent component. This is the actual geometry Vectric will import. I do this because Vectric sometimes doubles up the vectors (especially on parts with curves) which appear to me to be artifacts of the importation of a 3D object. You get nice clean vectors when importing 2D parts.
Added two scenes: ‘For Machine’ - hides the 3D version of your part which is not necessary for CAM. This scene shows the 2D part on tag ‘cut_profile’.
‘For Modelling’ - shows the 3D part and the 2D part.
NOTE! the file will only import correctly to Vectric if it’s current saved state is with the ‘For Machine’ scene recalled.
There are other small changes so best inspect the model for the fine detail.
Dude. It’s been over a year… I finally understand what you were saying… lol
I ended up stumbling onto this thread by accident while searching for importing dynamic components into vcarve. Thank you!
Follow up questions-
any discreet ways to keep the up face up? we starting coloring it, which works, but it’s ugly. Also, any tips about labeling mass quantities of nested parts with their SU name?
We’ve been using Open Cutlist, which is amazing, but now that we’re transitioned to Dynamic Components, OCL wont recognize the holes as DXF…
Also, I checked out your site… very cool stuff dude!!! Nice work!!
Yes, in the .skp file above there is a 2D text component ‘this_face_up’ which is nested within the main part component. This has a transparent material applied to it which I’ve also named ‘this_face_up’. This component can be copied around your model and placed into every part which requires machining. In the Vectric import dialogue, you need only to select ‘this_face_up’ from the ‘orientate by material’ menu and all your parts will be imported the correct side up. You can then simply delete the Vectric Layer on which the text ‘this_face_up’ lives.
There’s no way to auto generate machinable labels from component names with Sketchup native tools that I’m aware of. I label parts with a library of 2D vector text components which are really just simple polylines as far as Vectric is concerned. I set this toolpath up as a 2mm deep engraving of the part. But, put simply, its a very boring, laborious, manual task, but it works.
DM me if you’d like the library of numbers and text. Happy to share.


