Hello everybody , i am trying many hours to close this object bit it is imposible for me!. I am using follow me tool but i canot.
CAR.skp (189.3 KB)
Hello everybody , i am trying many hours to close this object bit it is imposible for me!. I am using follow me tool but i canot.
CAR.skp (189.3 KB)
Try scaling the model by 100 to make it larger and repeat your efforts. When you’re done, shrink the model by .01 to get it back to original size. SketchUp will not create edges that are smaller than the internal limit (about 0.0254mm). Once created in the large size, SketchUp will allow geometry much smaller than the creation limit.
As far as I can tell, the thing is just carelessly drawn. Sorry to be blunt, but there’s no single issue. The spacing of your endpoints is uneven, the corner radii are poorly drawn with too many segments and conspicuous lack of tangency at the ends, and they’re not concentric. Ugly. You’ve got a bunch of unincorporated endpoints going around the radii, which therefore don’t form faces.
I was able to reconstruct half the thing pretty quickly. Just keep the endpoints uniformly spaced and be sure to involve every single endpoint around the curves into the mesh.
Pretend you’re Michaelangelo and pay exquisite attention to the details of your geometry. Do not accept anything that looks remotely ill-formed or sloppy. If that happens, do it over until it’s neat and regular.
-Gully
i don’t blame you ,you are right , i try to learn skech up , i need 3 hours to make this thing.
Can you please sent me this thing ready because i will not manage this. It would be great to so me how you do this
What good would that do? You still need to create the outside surface. If you really want it, you can have the model I started, but it isn’t necessarily to your dimensions, and I faked the parabola. What is needed is for you to keep working at refining your skills. You need to raise your standards, and you need a couple of successes to motivate you and improve your self-confidence.
Use the Divide tool to split the straight edges into uniform segments to match (numerically) those of the curves.
Concentric radii means they use the same center, and their tangent points line up.
If this were easy, then anyone could do it. Oh wait. It is, and they can.
CAR_gully.skp (189.3 KB)
-Gully
i really thank you , i will try it and i will come back
Teaching a man how to ![]() , Gully?
, Gully? ![]()
It seems fitting, @mmorao, that you would spot the nautical angle in this discussion. While we’re on the subject, would you care to explain the story behind your sea captain avatar?
-Gully
hI , i did as you told me ,all from the begging , but i have stuck again , i cannot manage it. There are too many lines and when i connect those everything goes to hell
CAR.skp (167.2 KB)
Sorry, friend, but the geometry is still not great. Clean up the corners as shown, try to reduce the number of points you’re using–especially around those corners–and turn off the display of endpoints, which is incredibly distracting (Style > Edit > Edge Settings > Endpoints (uncheck)). Keep at it. Michaelangelo.
-Gully
Edit: In the picture, “tancencies” should be “tangencies.”
Alfa, you’ve moved your goal posts, in your first design the “ribs” were straight whereas now they’re curved, which does makes the problem more complicated may well but not impossibly, I already have an idea but I’d like to know what the purpose is. Is it an abstract object or is it a real object?
GF, Captain Haddock is an old favourite of mine, with whom I share a lot of personal characteristics, including the appreciation of fine whisky even if my drinking habits are rather more moderate, to say the least. Another of his personal traits which I share is his proficiency at employing “emphatic” language, but per the forum rules I should really not use this, which to me is a ******* shame ![]()
Are you trying to do a sort of layer cake or contour map? Not impossible, but a can of worms. Nothing that a block of blue foam and a bread knife won’t solve ![]()
Is this a trick question?
Well, I should tell you that Fredo6’s Curviloft could stitch that surface for you in a hurry, but still, if the underlying geometry is squirrelly, the surface will also be squirrelly.
-Gully
No, not a trick question, rather it would be a brute force approach I might try with an irregular guide set like this. Your technique is of course much more elegant, but please have some patience with the stupid rookie that I am ![]()
SU is a different culture and there’s a lot I have to unlearn before I begin to take advantage of its features and methods in an efficient way.
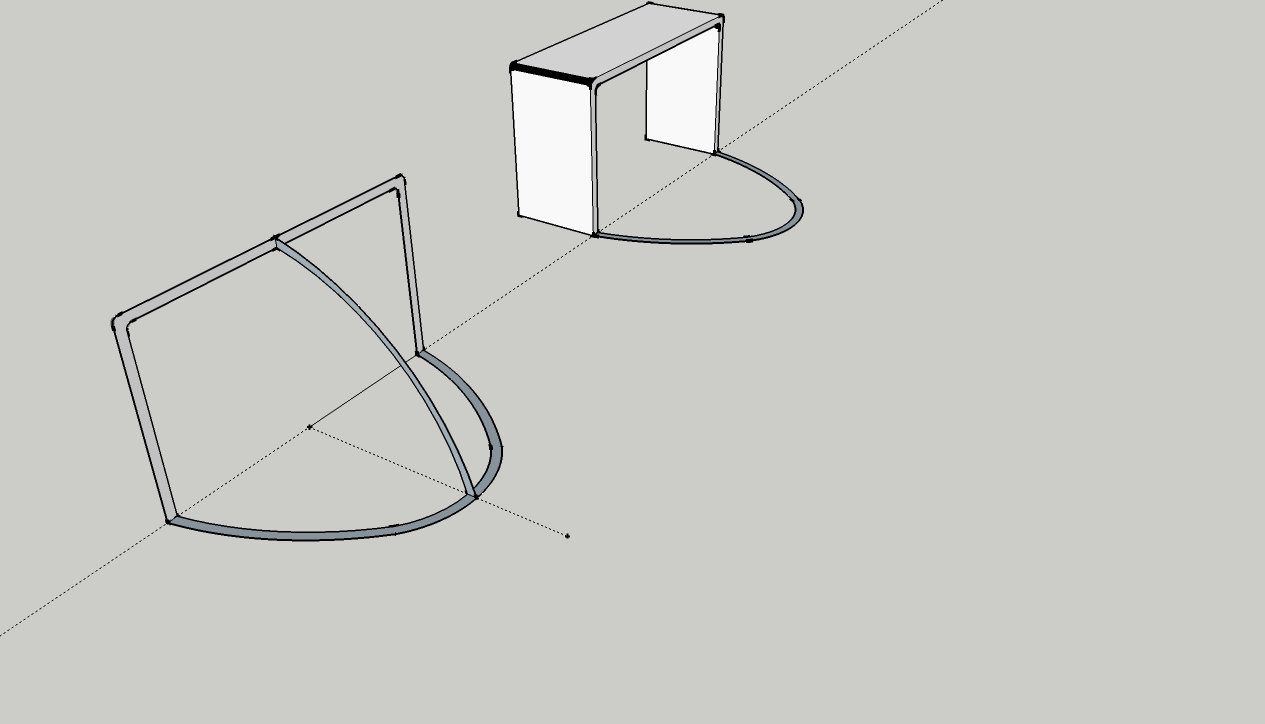
Gully is absolutely right about cleaning up the model and simplifying the geometry. You can create the shape you want with the Follow Me tool. Here’s the basic procedure:
Okay, sorry, but I’m not trying to do anything except help the OP get a surface. It’s really a fairly extreme transition surface, and it’s never going to be completely smooth and regular, but it’s possible at least to eliminate gaps and minimize major irregularities.
Generally surfaces in SU do not take the stepped layer cake approach but approximate the surface itself with a network of flat faces. These faces are usually triangular (three points always form a face; four may not), and the resulting surface is often referred to as a triangulated irregular network (TIN).
-Gully
I’m not quite sure what this shape is supposed to be or what the various cross-sections should look like. However, here’s another approach …
I started with a grid of 0.05" squares and used it to lay out the rectangular shape (I used a 1" x 1-1/2" rectangle):
I then used this grid to create a rectangular contour around the outside and stretched an ellipse to form the “parabola”:
Using the Spirix module, I generated a 90 degree revolution with morphing between the two shapes:
Reorienting the shape:
With smoothing and shadows:
Parameters used:
A side view shows that the linear interpolation yields a bulge at the top … using a sine interpolation for the morphing gives a better result at the ends, but humps up higher in the middle:
[NOTE: all geometry was done at 1000x scale]
Holy smokes. Apparently this is a plugin you have written, and it’s astounding.
Jim, you are rather modest about this, but I wish you’d tell us more about this excellent gadget and your plans for it (them?).
-Gully
@davidheim1, I’d sure like to see a picture of the result from your method.
-Gully
Thanks for the kind words, Gully ![]()
I used one more feature of Spirix that creates offset surfaces to turn this surface into a “solid”:
I uploaded it to a 3D print shop and this is their rendering:
I’ve attached the model in SketchUp 8 format: cowling_s.skp (1.1 MB)