I’d like to be able follow the workflow below (or some other workflow or feature) that would allow a copy of a model containing grouped or component geometry to be completely disconnected from the original to facilitate the exploration of different materials within the duplicated groups or components.
The following may occur as a result of various scenarios, but the desired outcome is to do the following:
Copy some grouped or component geometry from one model file (model file 1) to a separate model file (model file 2)
Modify the attributes of a given material (color, texture, name) applied to the geometry within a given group or component in ‘model file 2’ that was duplicated (copied and pasted) from ‘model file 1’
Copy the grouped or component geometry from ‘model file 2’ (with the modified material attributes) back to the original ‘model file 1’, with the expectation that the modified material attributes will remain intact in the modified version pasted from ‘model file 2’.
The goal of the exercise is to create a duplicate ‘option’ of the same model geometry with different material attributes in order to explore multiple material options. An example might be a window component. I might have several window components with different materials for the glass, exterior frame, and interior frame, etc. I may have a house model with numerous window components of various size and shape, all with the same material attributes. I may want to explore more than one material option for the exterior window frame, for example. Rather than making every window component ‘unique’ within a copied or duplicate version, clicking into each window component and painting a new material, I though it SHOULD be possible to follow the workflow above to ‘disconnect’ the model to effectively have new components and materials that could be modified independently from the original. Instead, when following the workflow above, the modified material in ‘model file 2’ is reverted back to the original attributes when copied back to ‘model file 1’, including any changes to color, texture, and even the name of the material!!
The only way for the changes in ‘model file 2’ to remain when copied back to ‘model file 1’ is if the components or groups in question are completely exploded in ‘model file 2’ before being copied back to ‘model file 1’.
I’ve made a few other random attempts at forcing this ‘disconnect’ between copied model geometry including saving ‘model file 2’ to an earlier version, closing the file, opening the file back up and copy-pasting the duplicate geometry back to ‘model file 1’. The result is always that the material attributes (name, color, texture) revert back to the original.
Your described workflow sounds like a lot of unnecessary work to me. I would make a copy of the model in the original file and use Make Unique to break the relationship of the components in the copy from the first. Then apply the new textures to the copy. No need to go to a second file and no need to explode anything.
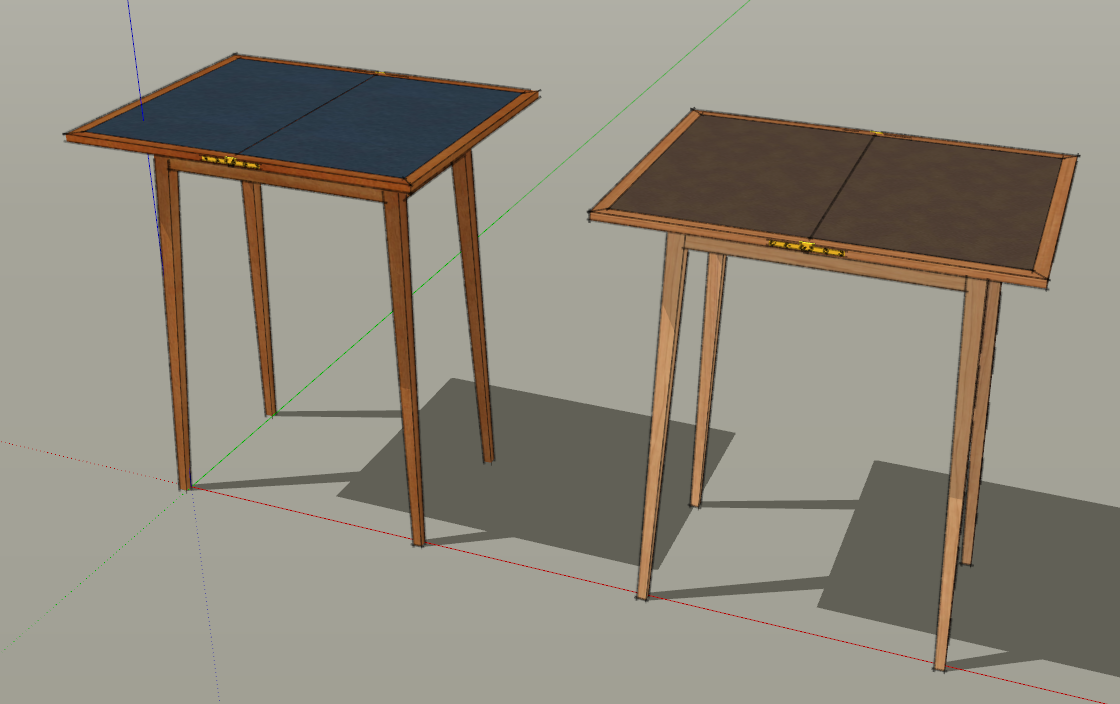
Here’s a quick example. Mahogany with blue leather and cherry with brown leather. No exploding and no need copy int another SketchUp session.
Thank you Dave,
Here’s an example: I’ve got a house model with many window components that all have the same material attributes (color of window frame, for example). I don’t want to make each component unique, click into each one, and paint a new material if I want to exhibit an option with a lighter window frame. If I copy the entire house model into another file, I can change the color of the window frames all at once using material edit which is super-efficient! However, if I want to bring that back into the original file to show a client for comparison, the color and even the name of the material (if changed) will revert back to the original.
If you’re going to change the colors of the faces in the components they’ll need to be made unique. You don’t need to select them one at a time, though. Select all of them in the second copy of the house (or just the windows) and make them all unique is one swell foop. If you are going to just edit the color you’ll need to change its name after editing so it’s a different material.
Since you are just using colors, you could apply the glass material to the glass faces but apply the frame color to the component instead of the faces. (No material on the frame faces). Then you could apply a different color to all of the windows in a selectin in one step. No need to even make them unique.
Again, this could all be done in a single SketchUp session and without exploding anything.
If you want to show options, then, assign different tags to each color version. So I’d have a tag for the brown windows and another tag for the green ones. Copying using Paste in place would make it quite simple, then, to switch between window options.
Thank you again for your input, Dave. These are all very helpful and ‘good practice’ solutions.
I’m sure I’ll get a collective ‘groan’, however, when I fess-up that the components in question are imported .dwg models from Revit resulting in ‘components within components’. I can select all the window components and make them unique, but the components within them remain ‘un-unique’.
I am, however, intrigued by the idea of deleting the frame material from the palette which makes it the default material. This should allow me to paint a material to the outside of the window components to explore different material options.
Thank you again for your suggestions!