Sure!
-
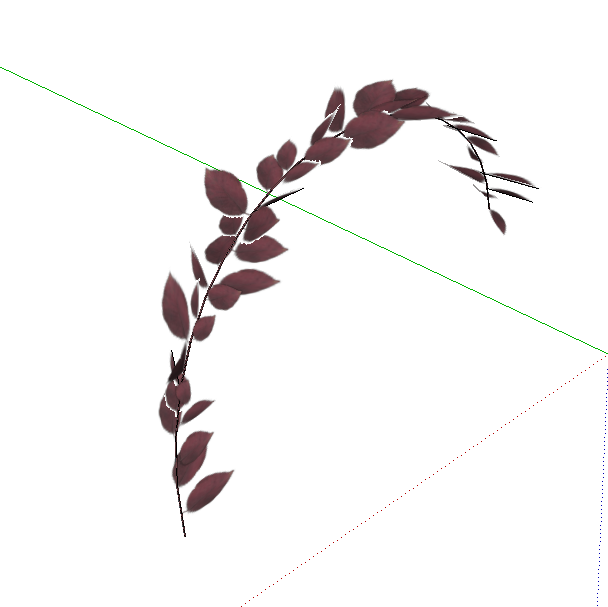
Import leaf image. Explode. Make it into a “leaf” component. Divide the leaf in half hot dog style to bend it.
-
Draw a hexagon the diameter of your stem, then explode the curve & delete the top and bottom lines.

-
Create a bezier curve similar to the arc of the branch. Use follow me on both diamond faces, then soften/smooth until the side faces are selectable (not the inner faces).
-
Scale the branch to around 70’ tall. Scale the leaf component’s raw geometry to be relatively proportional to the stem. Move the stem to the origin of the component and position the leaves along the blue axis. You need to download the “Make Fur” extension from SketchUcation for this part. Select one side of the branch, then use the “Make Crowd” tool on it to randomly place the leaves. Select your leaf component in the list and turn off “stand up”.
-
In the leaf component, position the leaves similar to how they appear on the branch in your reference photo. Some will still be off rotation. Rotate the odd leaves to a normal position. Mirror the leaves to the other side of the branch, then move each leaf up the branch to create an alternating leaf pattern. Retrieve the bezier path, then delete the old branch & extrude a square along the path to make a new branch. Color it a solid color by using the eye dropper tool on the stem color. Make the branch & leaves into a component.


- Make 2 copies of the branch and rotate and scale them, so the bush will look full. You want one of the branches to be rotated close to the ground, a high one, and a medium level one.

-
Use follow me to create a circular surface to randomize the branches onto.
-
Use “Make Fur’s” “Crowd Maker” tool again. Then delete the circular surface because you don’t need it anymore. Using the vertical grips, scale the plant component to a random scale while shift is held down (click, release shift), then type in 36" (or whatever) to scale the plant to that height. Hit enter. And there you have it!

