Awesome! After the last basecamp in 2018, I watched this exact car rip around Laguna Seca at Rennsport Reunion.
2 Likes

Union Jack and different paint shop on the sides of the rear hood added.
Now back to the internal work - adding tubes and pipes…
5 Likes
More details added on the engine: spark plugs, nuts and bolts to fix the cam shaft boxes on the pistons…

Piston redrawed according to new details pics.

Cheers
Torsten
7 Likes

Starting with wires - first wires for the spark plugs build with some guide-lines, BZ-Toolbar for bezier curves and followMe for the final wire geometry.
7 Likes

my workflow to “draw” wires
8 wires per cylinder bank - porsche uses 2 sparks per cylinder for a better performance.
I did it also for the exhaust pipes…
3 Likes
What does the BZ-Toolbar provide in this situation beyond what native Follow-Me could produce? I’m just curious; I’m not familiar with BZ-Toolbar.
1 Like
Its Fredos BezierSpline Plugin - it helps to draw different bezier curves and you can adjust the curves.
Then the FollowMe-Tool make the wire from a circle.

3 Likes
Ahh, I see. Thanks for the explanation. I have used the Bezier extension provided by SketchUp (as I recall it’s origin), which has been useful despite its limited capabilities.
1 Like
Hi there! just wanted to thank you for sharing the project, is really amazing.
1 Like
A work of love. Great results!
1 Like
Thanks for the comments, much appreciated.
I’m not thinking to go away from sketchup as long as sketchup 2017 make is working.
I made the shock absorber and the spring:

The spring is made according to some examples presented here in the forum.
Most of the parts already quads:

Regards
Torsten
7 Likes
50 years ago: Porsche wins the first time the 24h race at lemans with the incredible Porsche 917k. Air-cooled 12 cylinders with 4,5 liters capacity and 560 horse power.
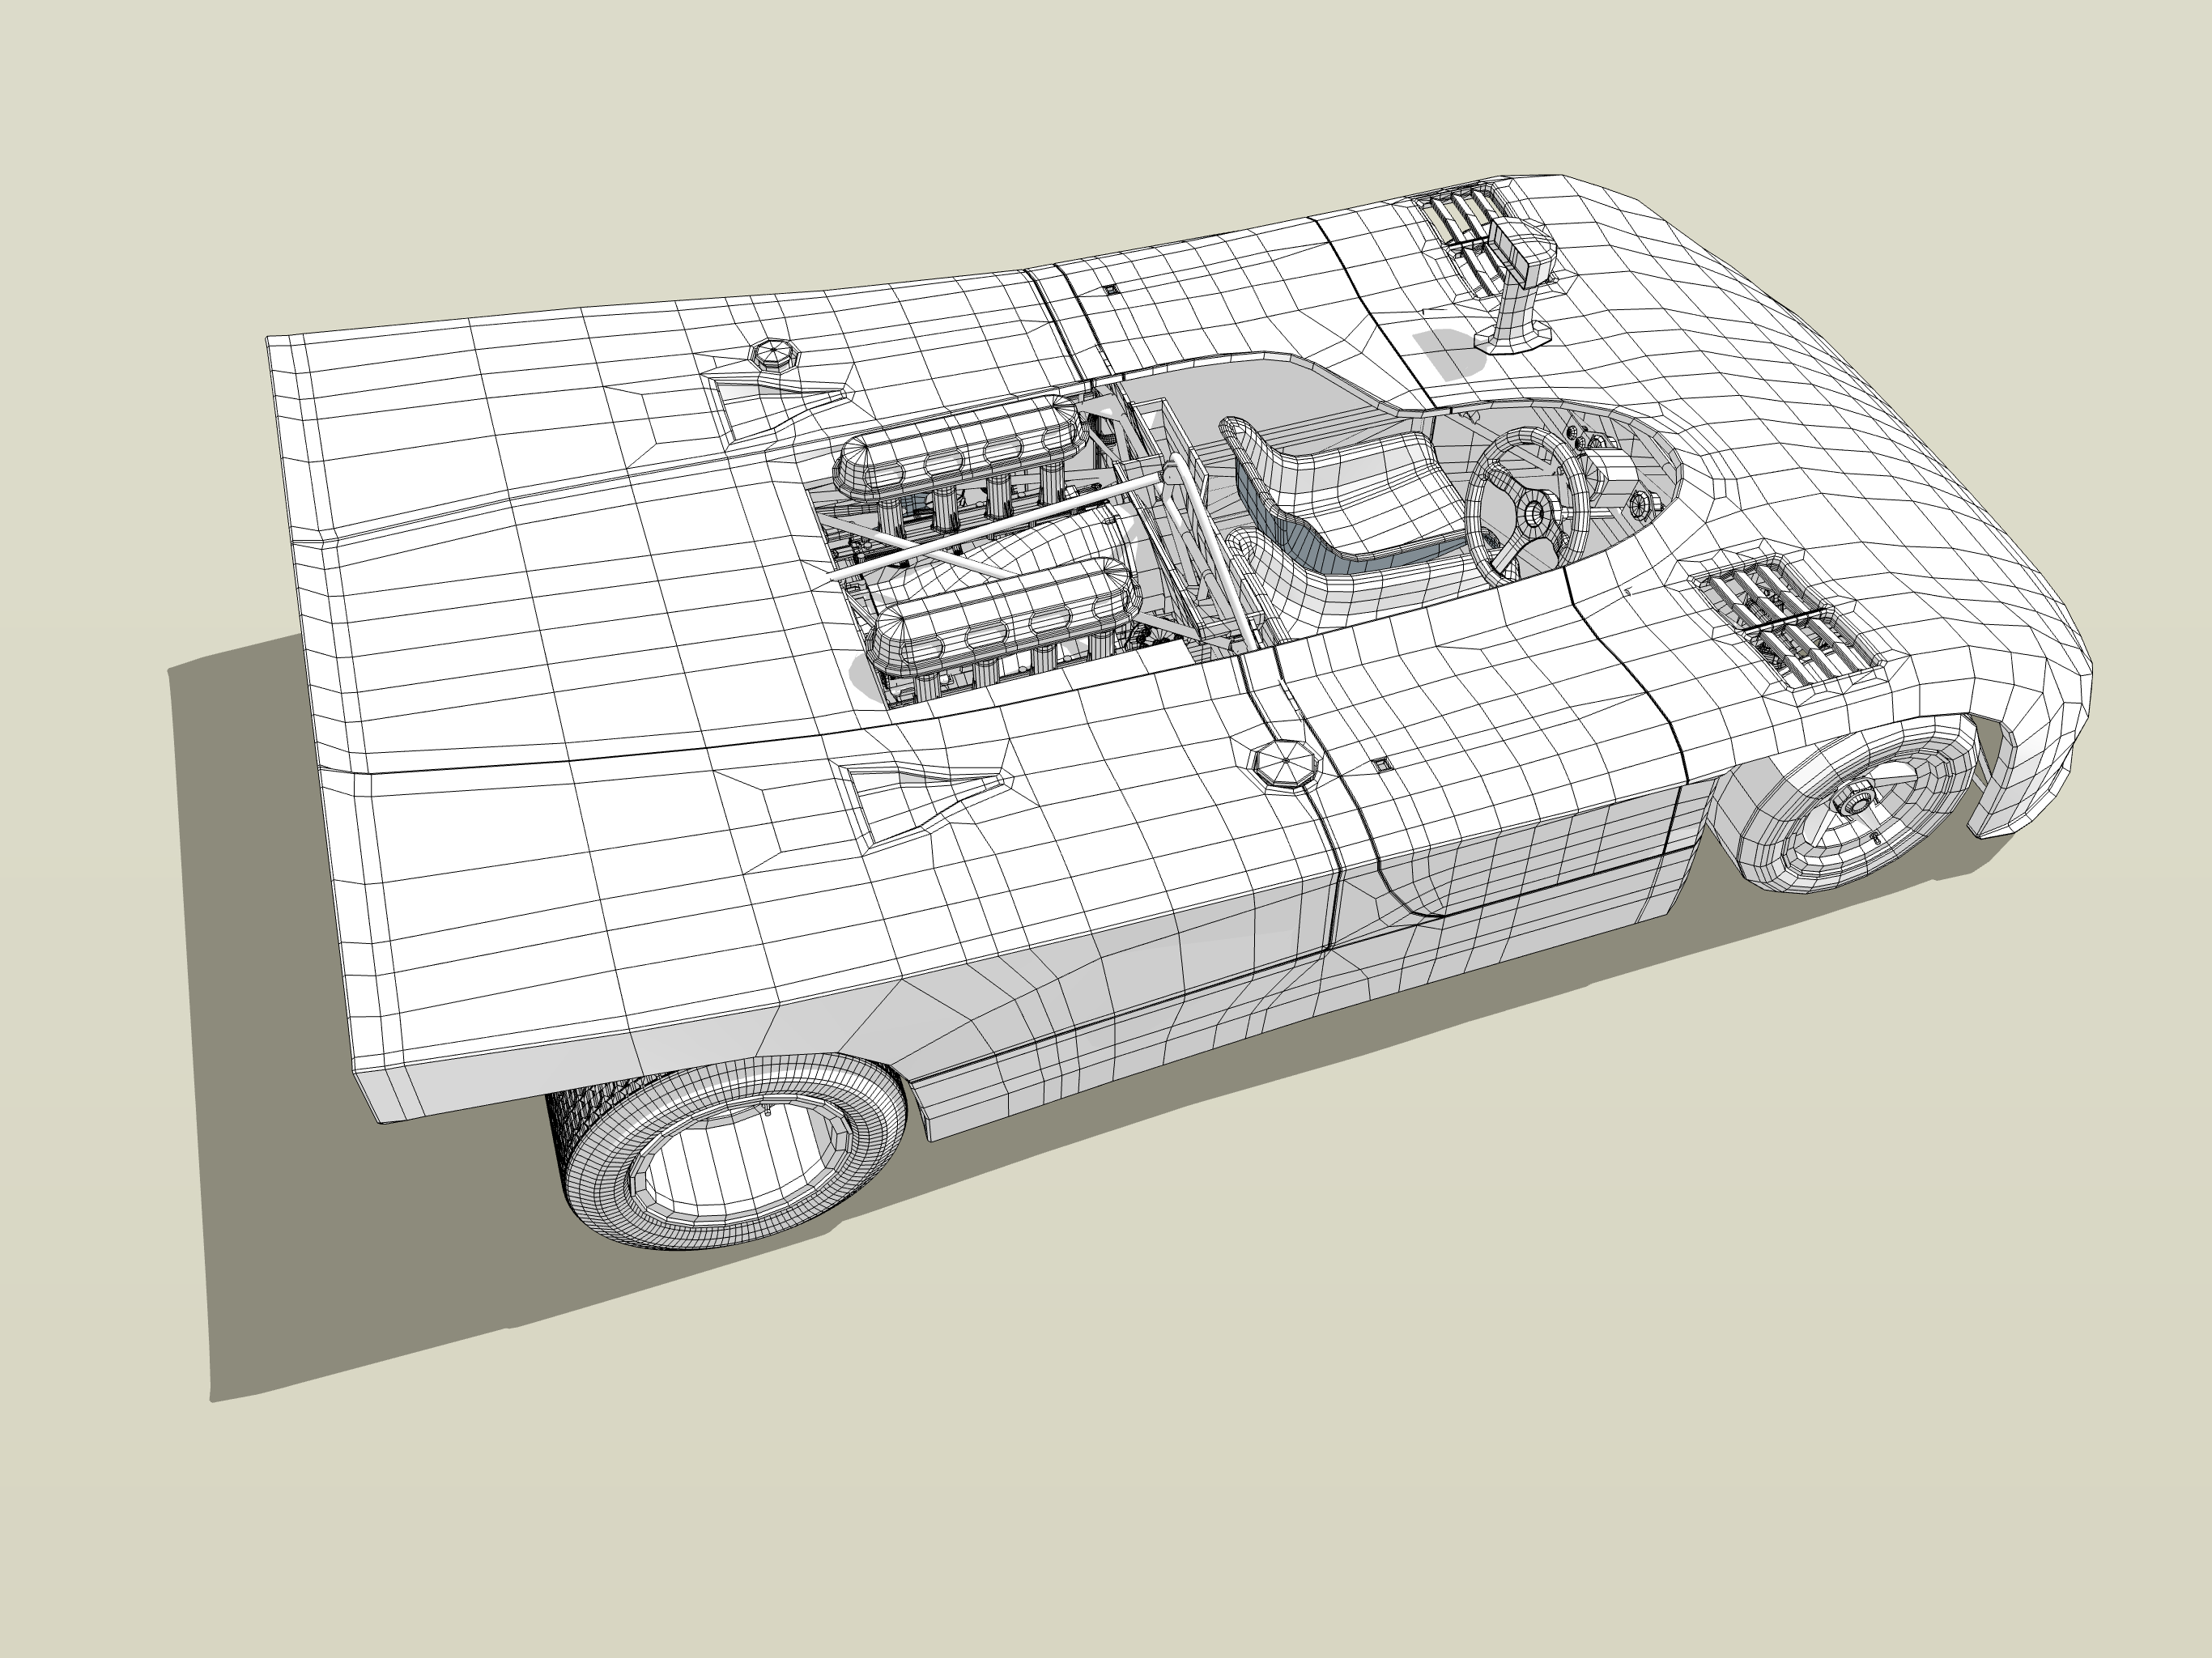
I did the design of the body according to some drawings from a book about the 917, it shows a large range of cuts through the body shape and i could made the main work with curviloft. I use a model kit to adjust the shape and details. Tyres taken from my 908 design.
No interior details done yet.
Wrap-R is used for UV.Mapping - its a great tool for texture sketchup models.


11 Likes
Still straightforward and pur sketchup…
Rear tyre thread done, made with components.
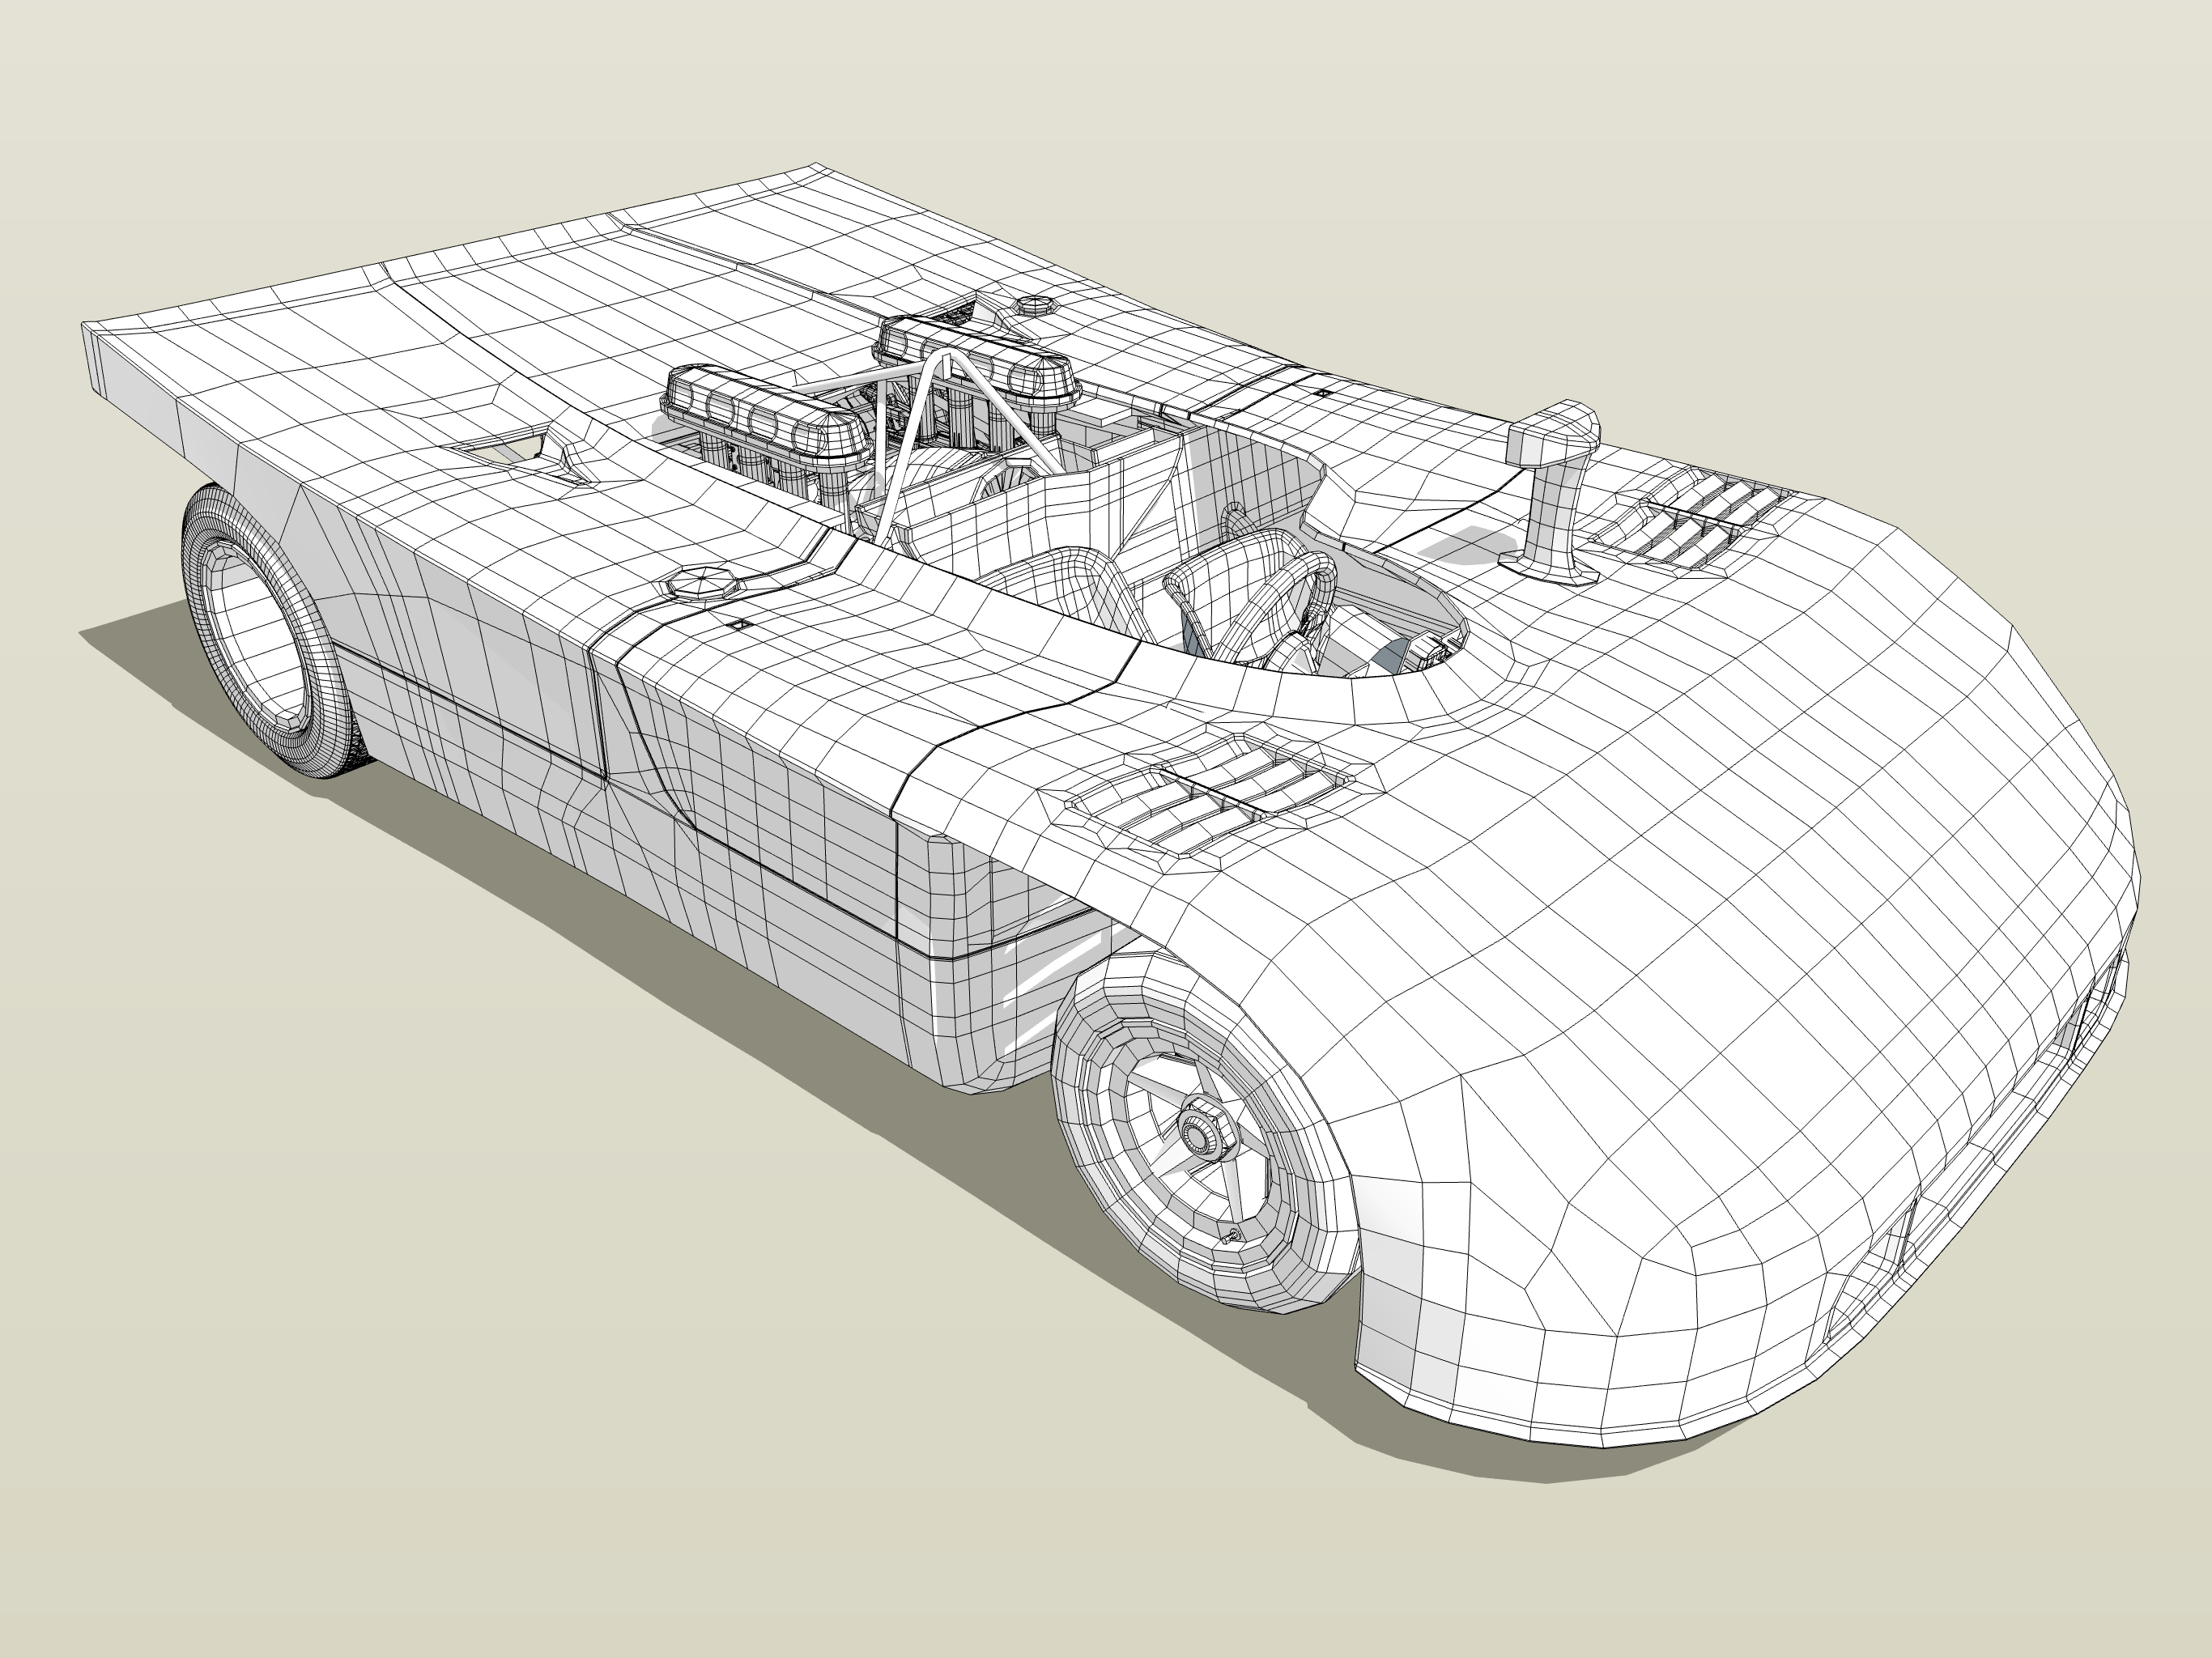
Body work adjusted and thickness for 3d printing added.
Tyre is made with 120 segments, each segment is a component and has a component for the tyre shape (2x), a component for the thread (6x) and a component for the small thread on the outside (2x). I need only to subd the components of one segement and get the whole tyre subd in faster time instead to subd the complete tyre mesh.
10 Likes
Progress so far,
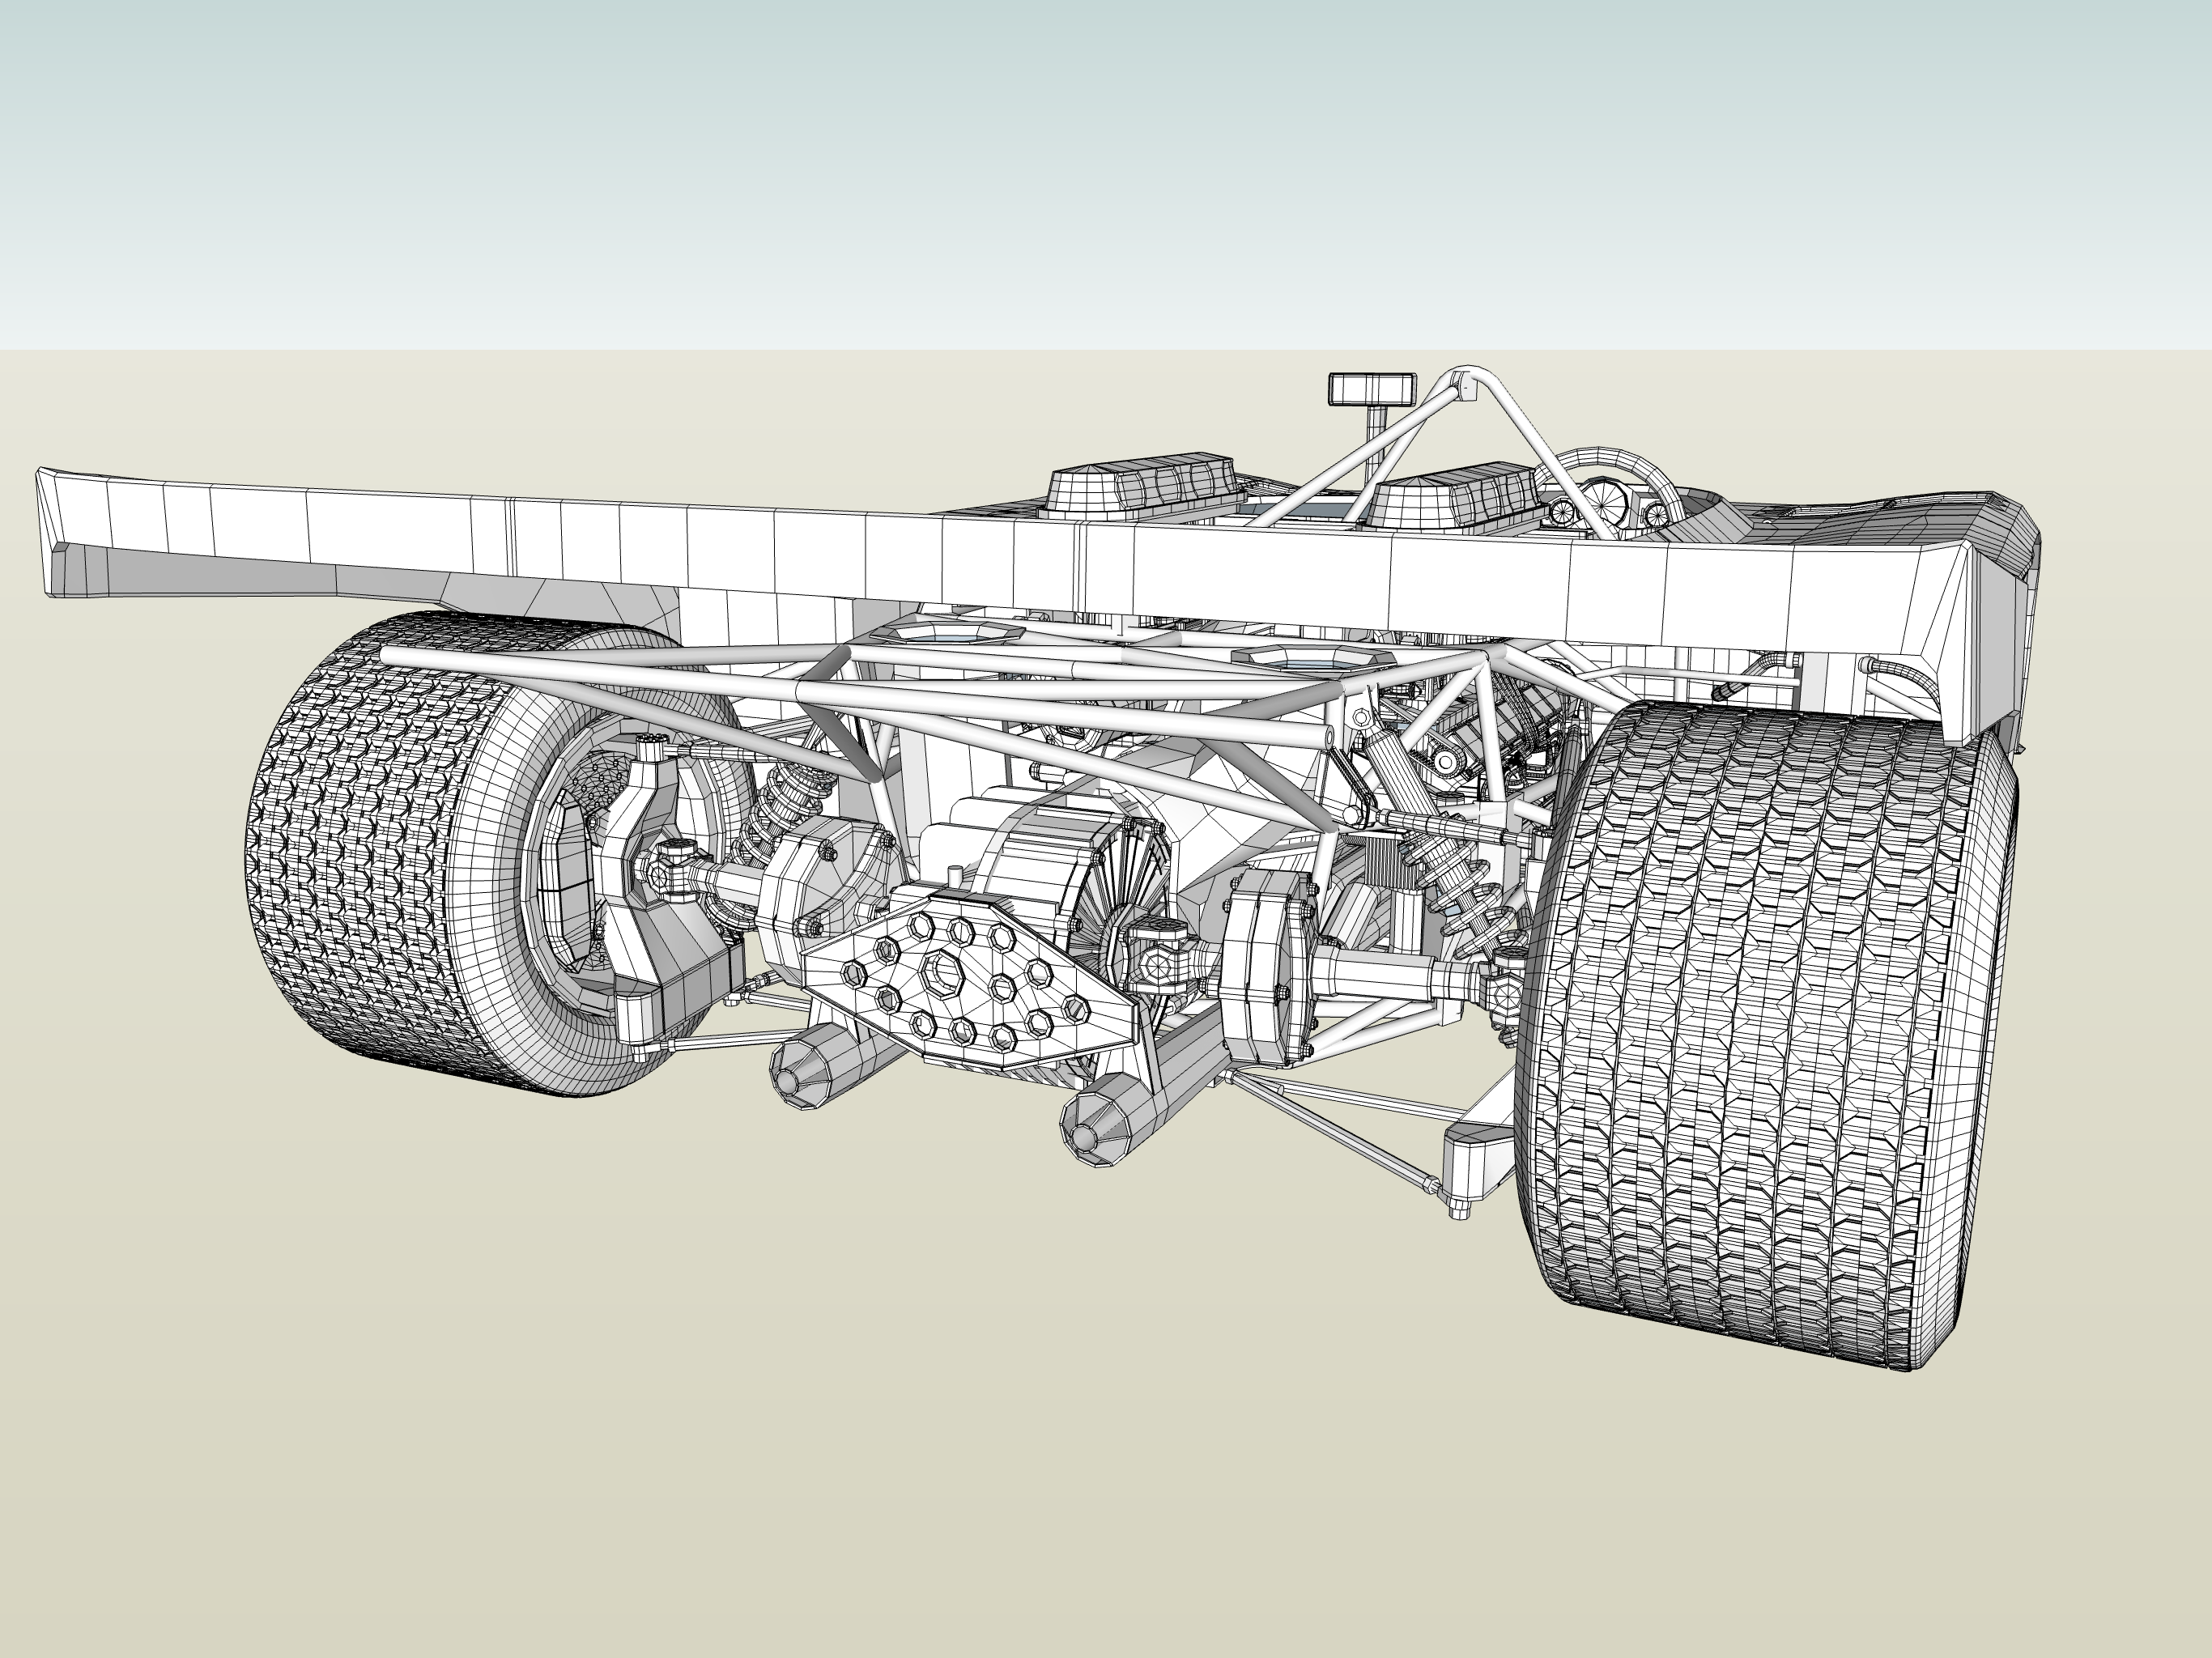
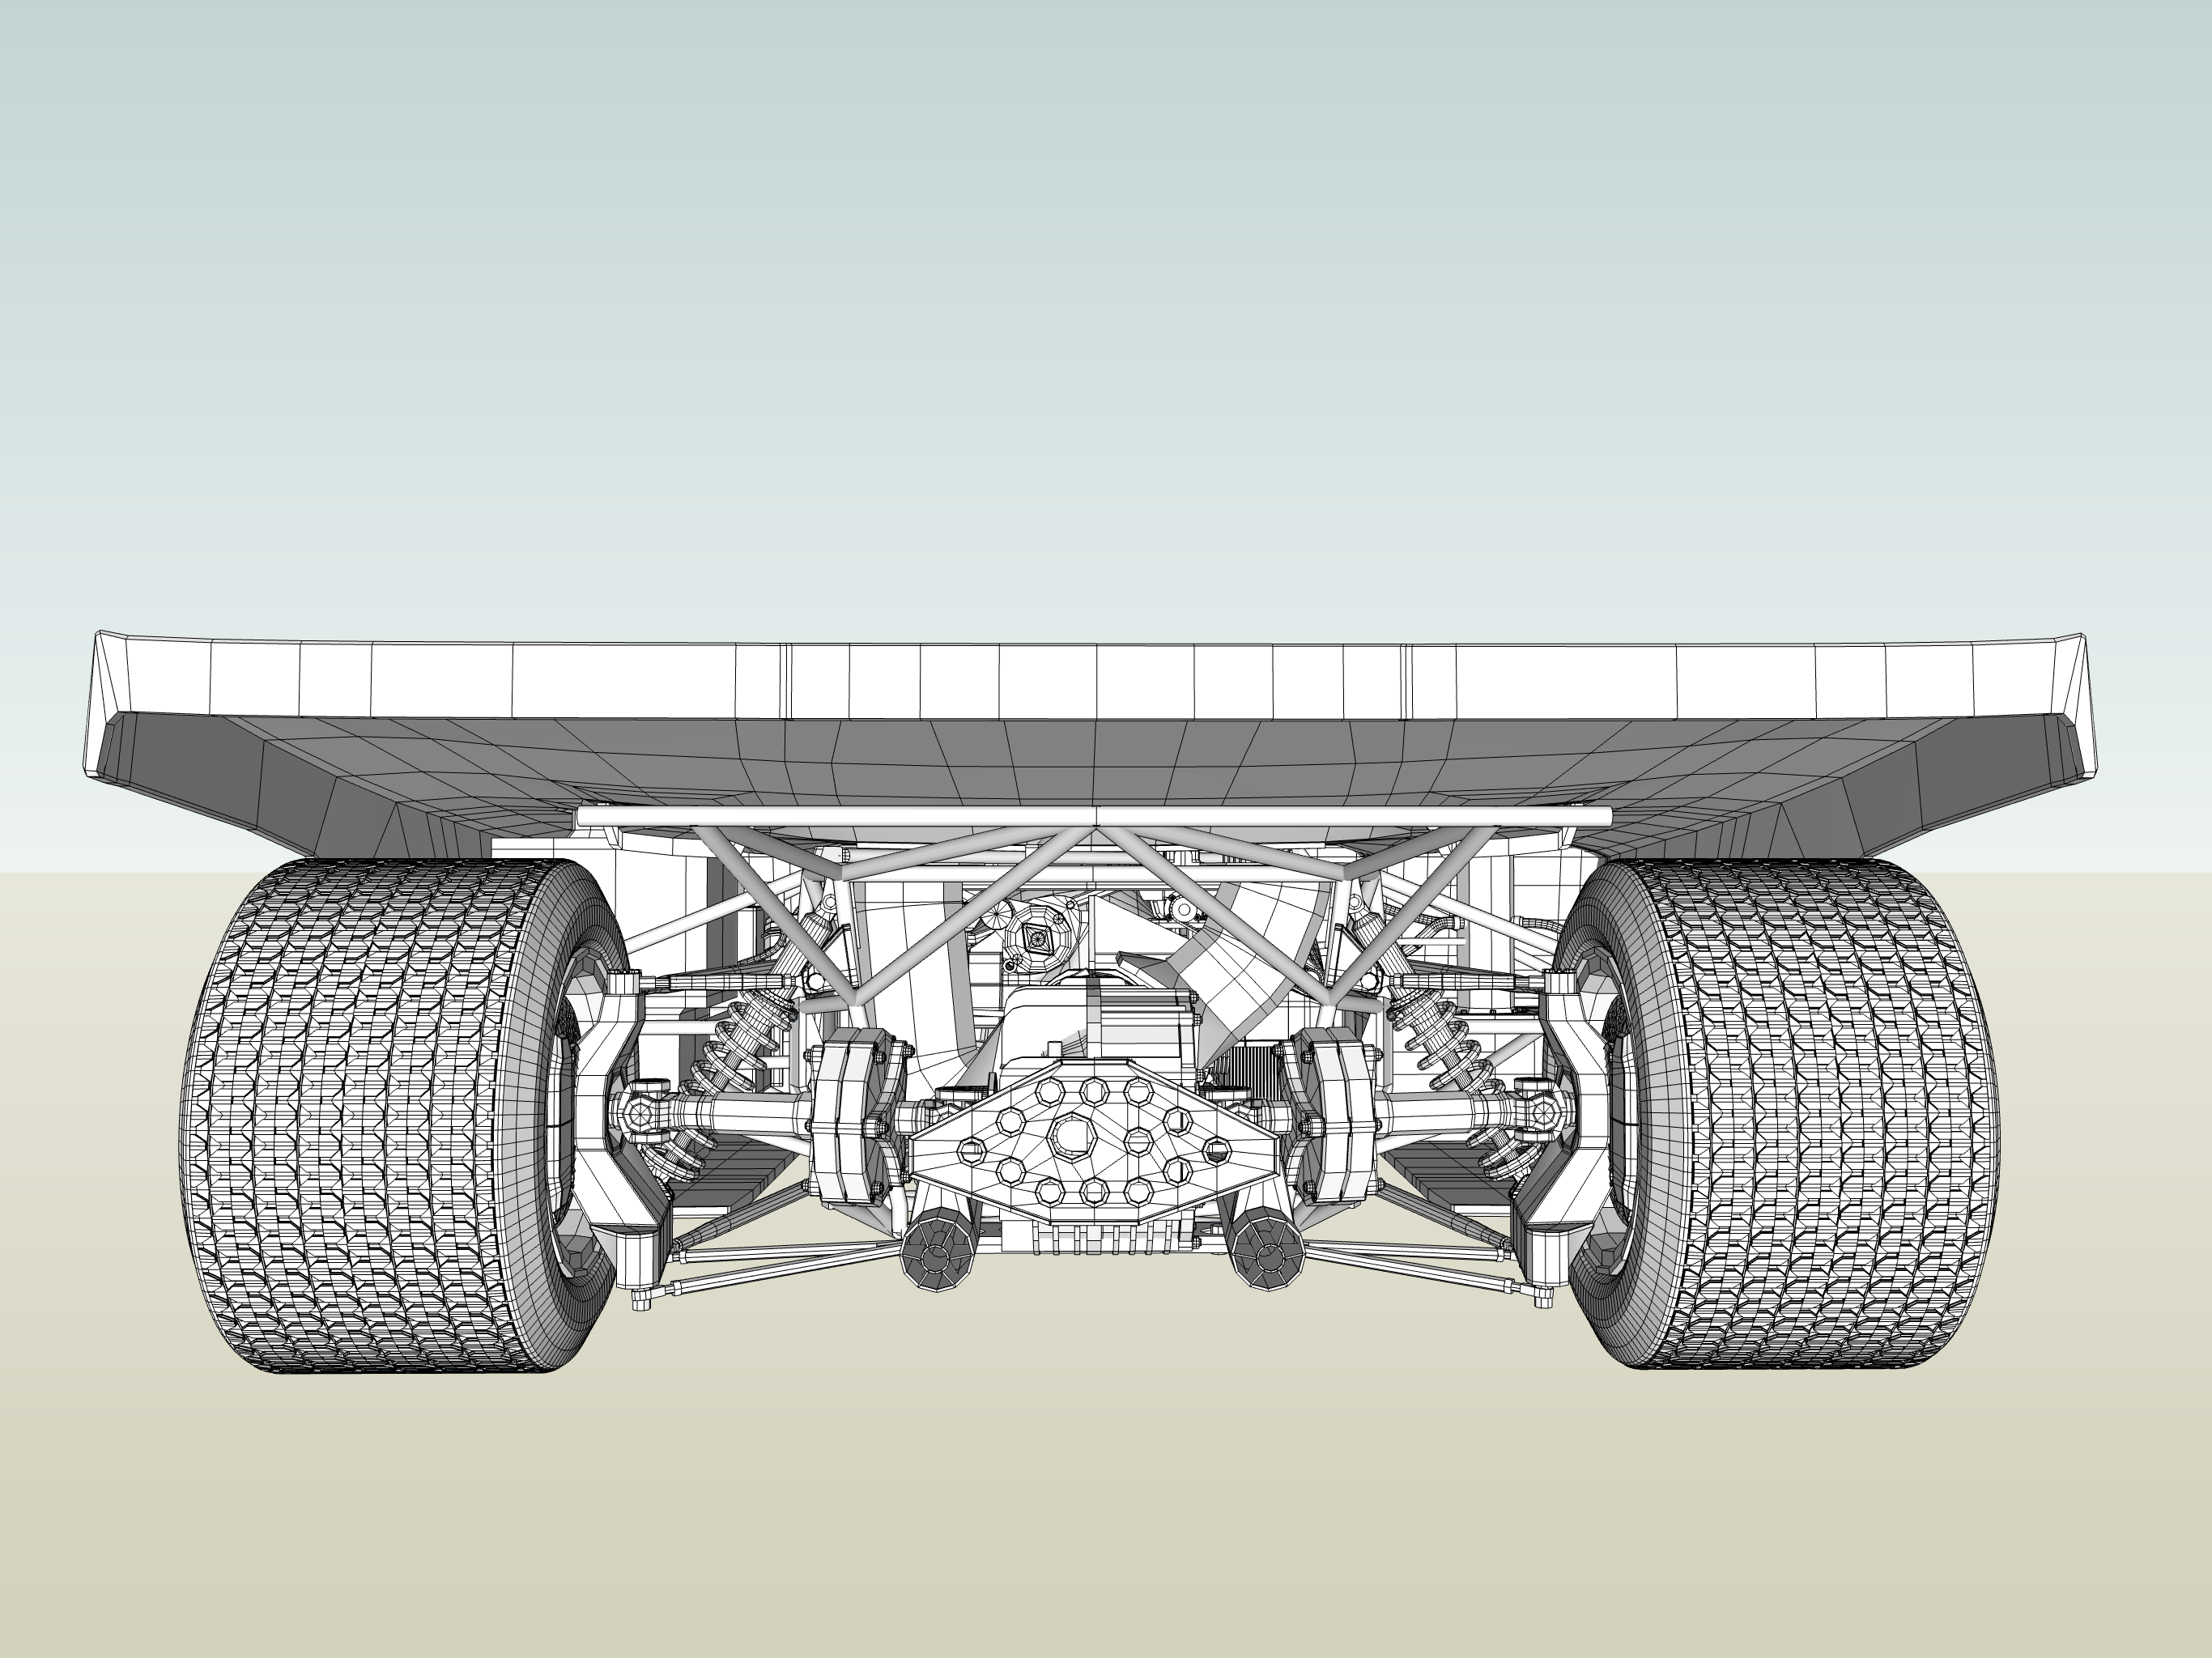
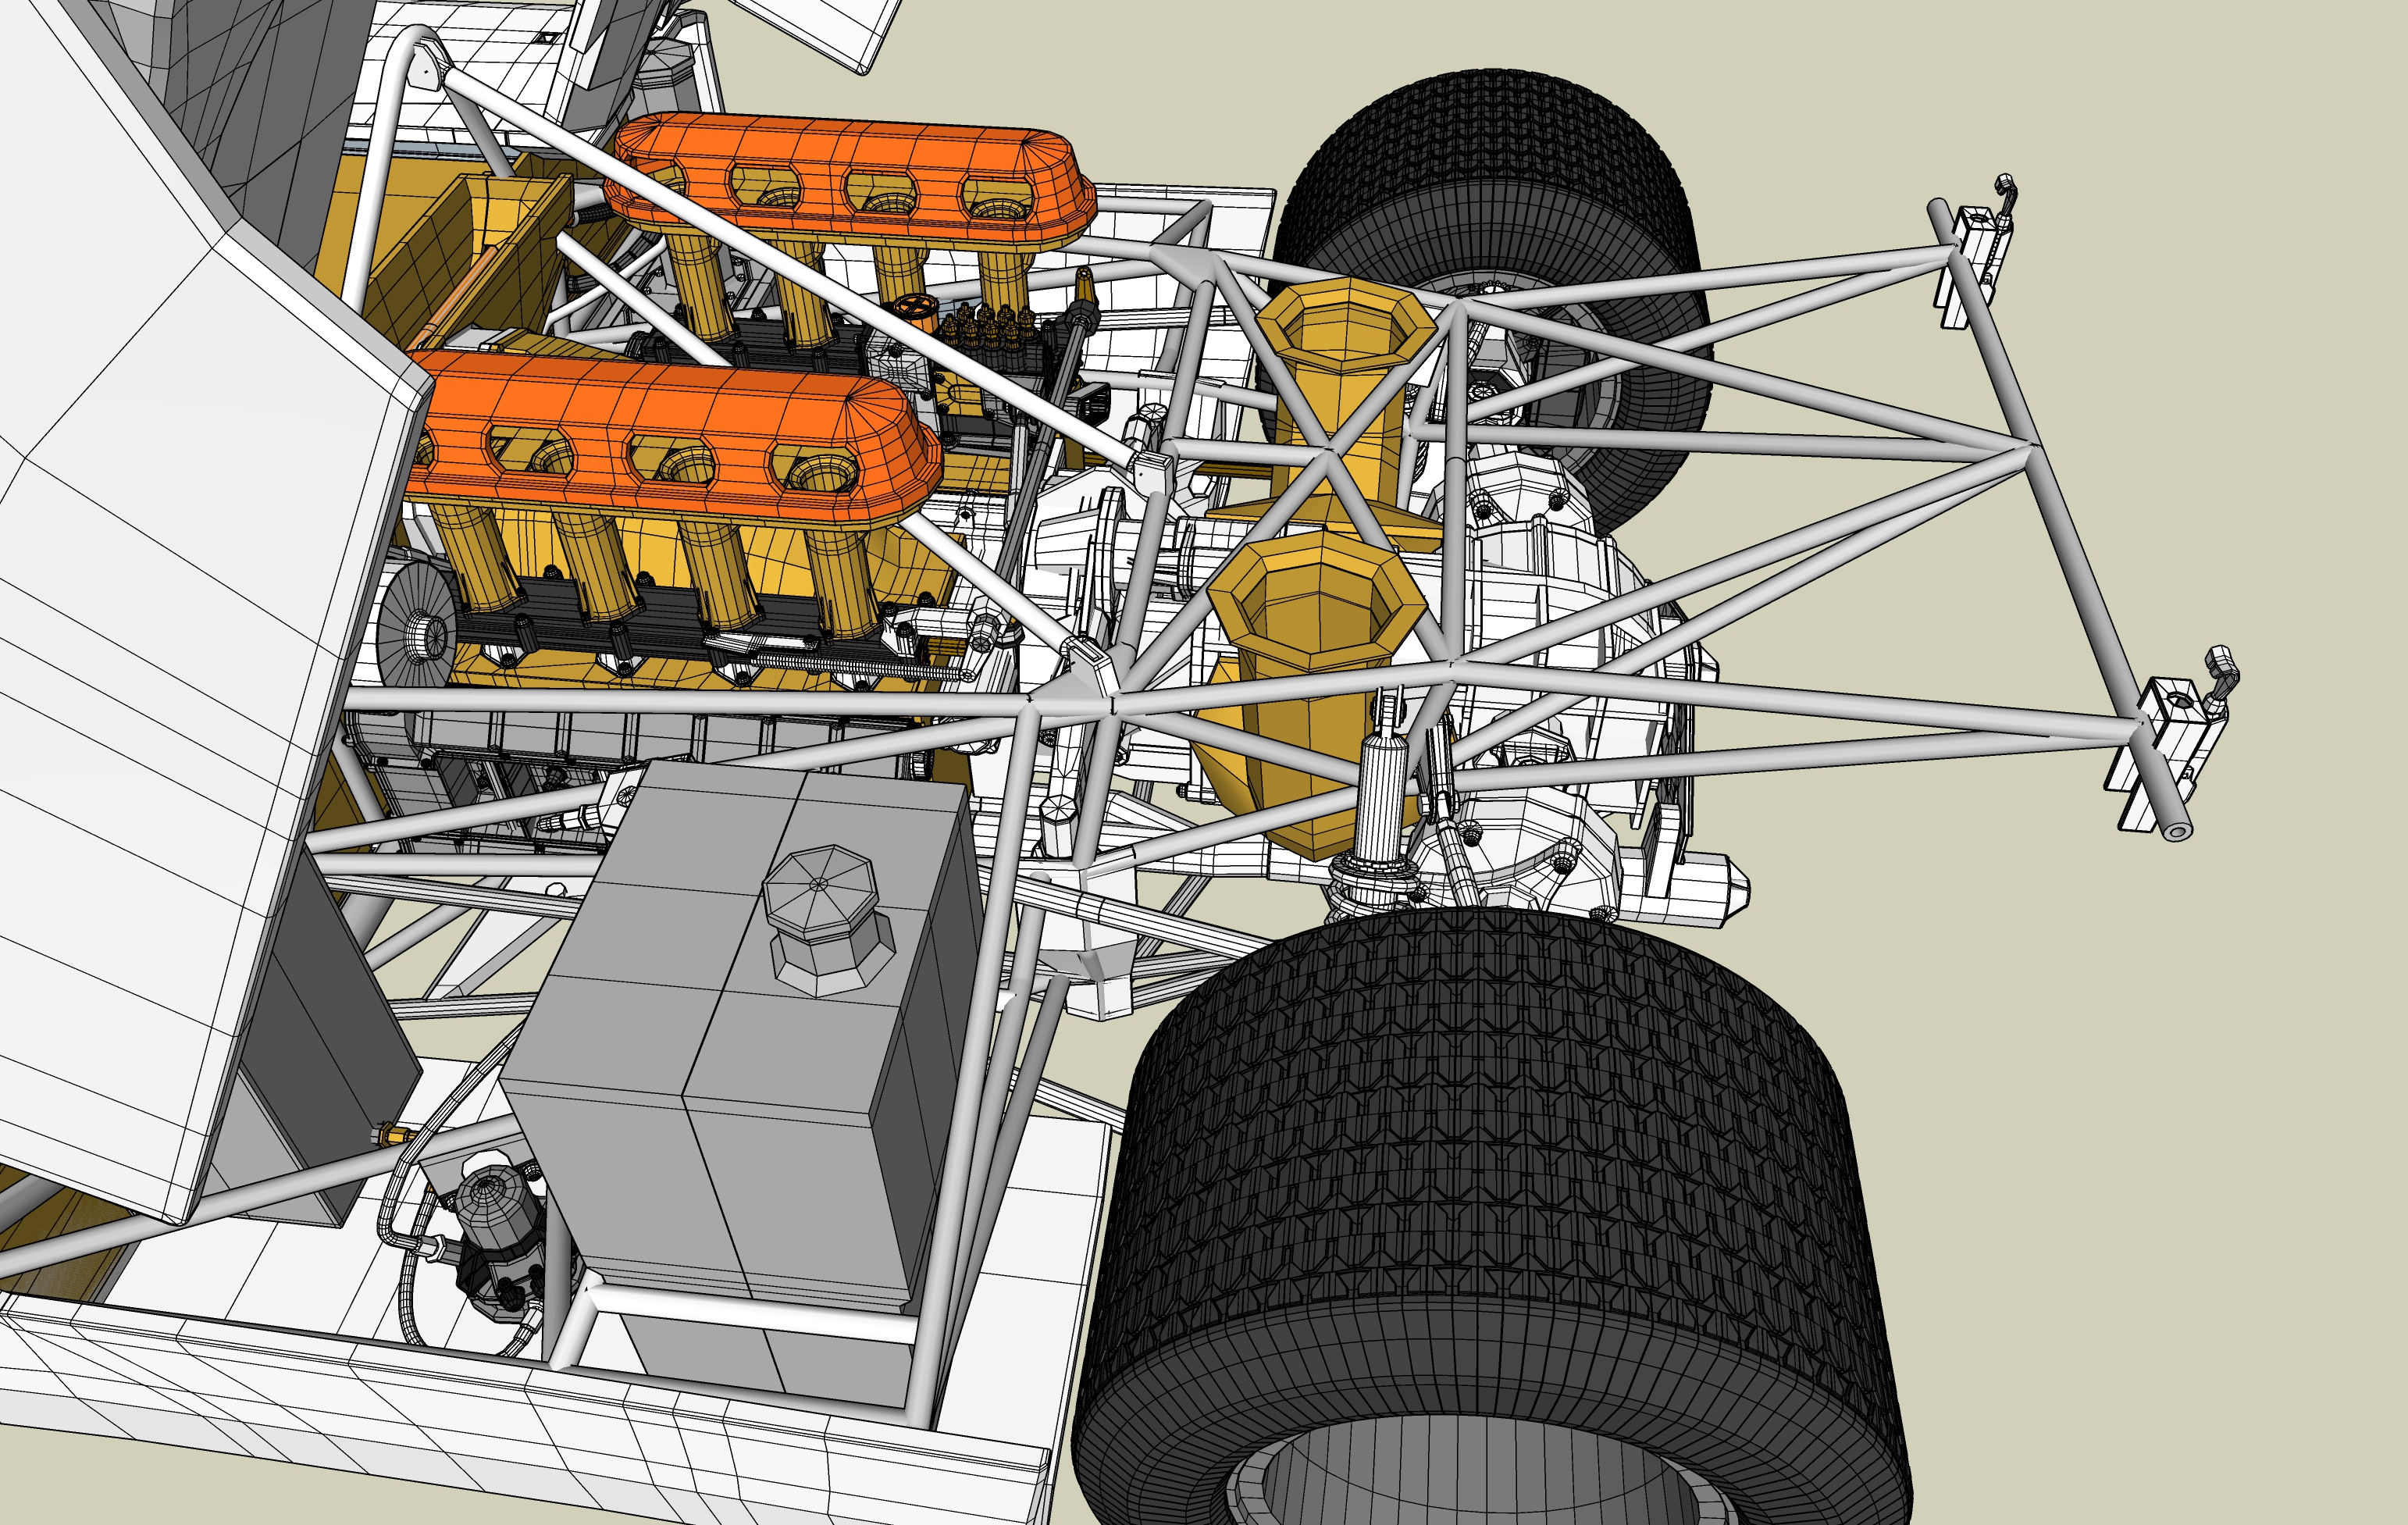
The front and rear supension system is done and fitted into the frame.

General views


9 Likes
Render shots from the engine…


Some detail render shots:
Crankcase with air cooled pistons

Fan, Fanhousing and belt drive for the air cooling of the engine

Mechanical fuel injection pump

9 Likes
I can’t imagine how you put all this together, combining the accurate information with your modeling skills. And the renderings look great as well. KUDOS!
1 Like
Generator design done and “mounted” on the engine. Only the belt drive is left ![]()
![]()
![]()


The generator is made like the fuel pump according to a drawing found on the internet.

8 Likes

Some more progress - lots of details made according reference pics - like hood lock on the bonnett, cockpit instruments and lights,…
9 Likes
Thank you for sharing the in-progress updates. It is fun to see the car gradually come together.
1 Like
