Happily the current recycling and safety regulations have forced the sites to be much safer and neater than they used to be. I just stumbled on a photo I had taken from a construction site as a teenager more than 50 years ago. Practically the whole ground was covered in all kinds of debris.
This is Connecticut coast on Long Island Sound. It’s probably only because of the legacy houses that are/were here that people can build back in roughly the same place. The previous house that was here was wiped out in Super Storm Sandy, while two houses to the left had been wiped out in Hurricane Irene. The house to the right survived but was recently elevated with a new foundation under it - quite a construction process to watch.
Here’s a model of the site and neighbors with the design conditions for flood waters that we’re required to design for. Two houses over to the west is not up to code yet.

In last Friday’s live modeling with @TheOnlyAaron, @jody asked in chat, “What are you working on?” and I replied “kitchen cabinets.” Here’s what I was referring to.
Isolated:

In place:

Kludgy corner, but it works:

This cabinet manufacturer/vendor is so a vertically integrated they have their own 3D design and rendering software that looks a lot like the results of Enscape or Twinmotion, but they don’t share any form of drawing, models or CAD symbols with anyone, so I had to make all this from scratch. A bit of a pain, but also an interesting exercise.
I still have the install.exe for UPFRONT on my PC here and lic no… copied it of my 3.5" install floppy… could not bear to loose it… I built the entire Sydney and North Sydney city Skylines in it including the Bridge and Opera House… tried to install it on later windows installs but no luck!
Just stick a counter top on there, nobody will ever know.
This looks awesome Robert, is this for your house? a client? will you be installing once you’re done drawing, or handing it off to someone else?
True! At least it’s not totally wasted space. The issues was that the company’s own software wouldn’t allow the designer put a corner cabinet in at all. In SketchUp I can model anything imaginable, so I modeled what could be done, and it helped. This is for a client, not me. It looks like the GC’s crew will do installation especially since there’s a much shorter lead time that way.

They have these and in fact the other corner is getting one, but their software says it won’t fit in this corner. I’ll bet Haefele has something we could install into this.

I’ve seen a couple versions of this as well, you’re losing a small bit of real-estate no matter what but this feels like an easy to use solution to reach the back. This is a top drawer, I was looking for one of the deep drawers as well but didn’t have an image. You could basically have the same sized drawer stack as anywhere else along the counter.
Our kitchen has a double hinged door and lazy susan.
I’ve seen these too, but dealing with a big main stream vendor here the question is what could be done with their limited menu of options and “no substitutions” - kind of like Jack Nicholson in Five Easy Pieces.
Apologies in advance for such a long post, but it’s taken over two years to go from initial design in SketchUp to seeing the result in reality.
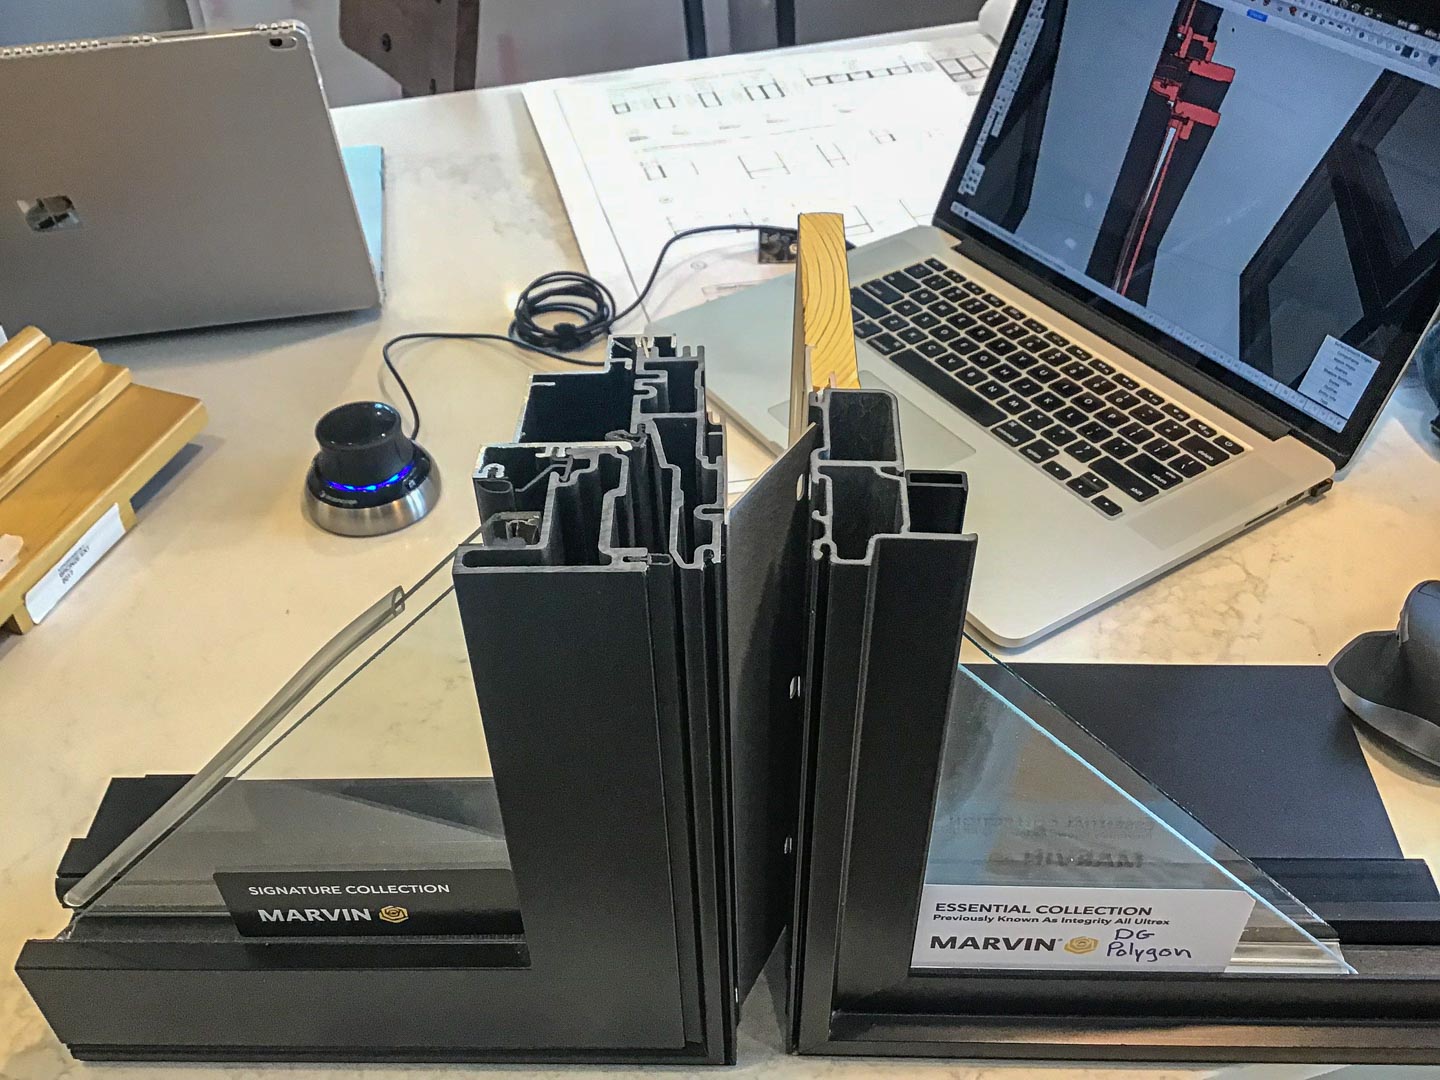
The biggest part of design is exploring and evaluating alternative ideas and choices. Here’s a progression of window products explored for our window wall using SketchUp:

A Steel: Hopes, Crittall, and other similar including Arcadia
B Marvin Essentials
C Marvin Elevate
D Marvin Modern
E Marvin Ultimate
F Marvin Ultimate Coastal w/ Structural Reinforcement
Some of those came from 3D Warehouse, some I had to make from scratch.
Here’s what some of these look like in real life. (Notice my MacBook Pro and Spacemouse in the background)
A (Crittal & Arcadia):

C (Marvin Elevate casement-direct glaze mull):

D and B (Marvin Modern casement left, Marvin Essential direct glaze right):
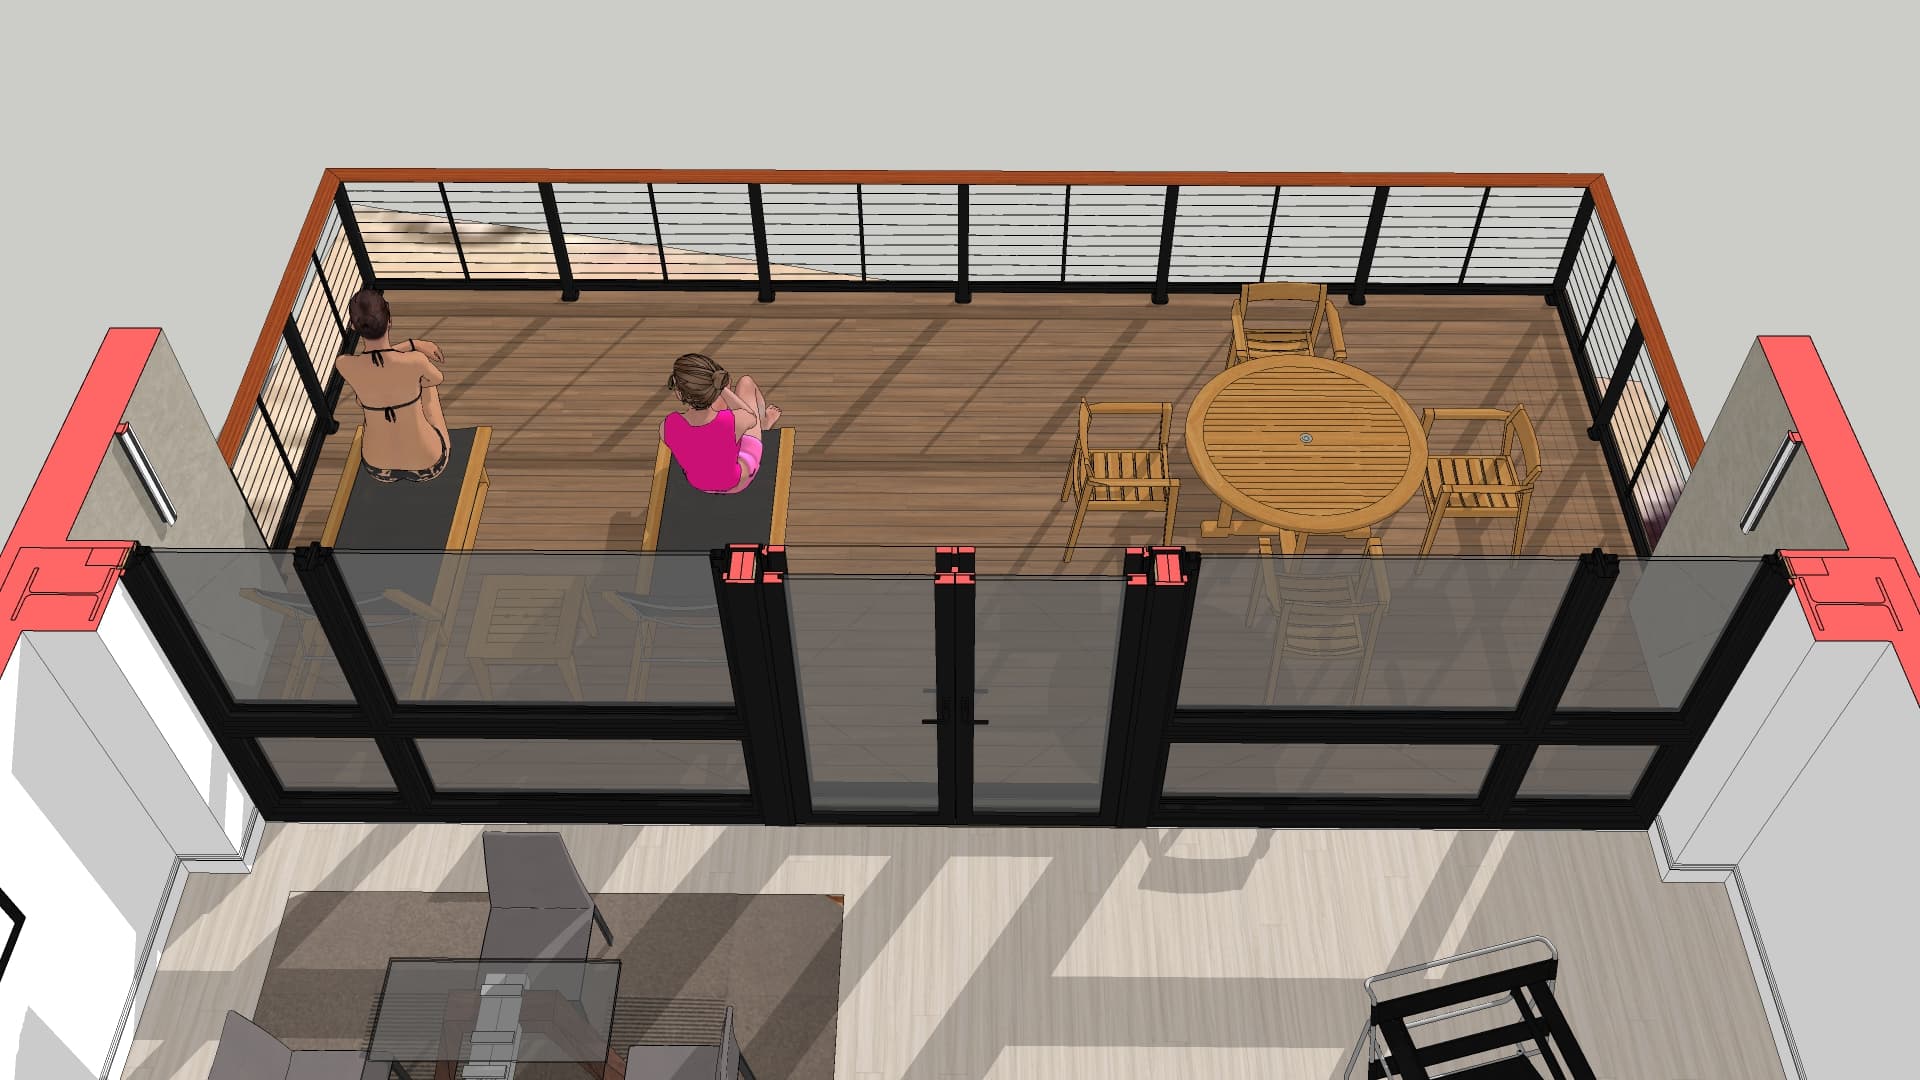
Final version (F) in SketchUp model:
Construction Document sheet in PowerCADD with SketchUp import:

Finally, months after being ordered they arrive and are installed.
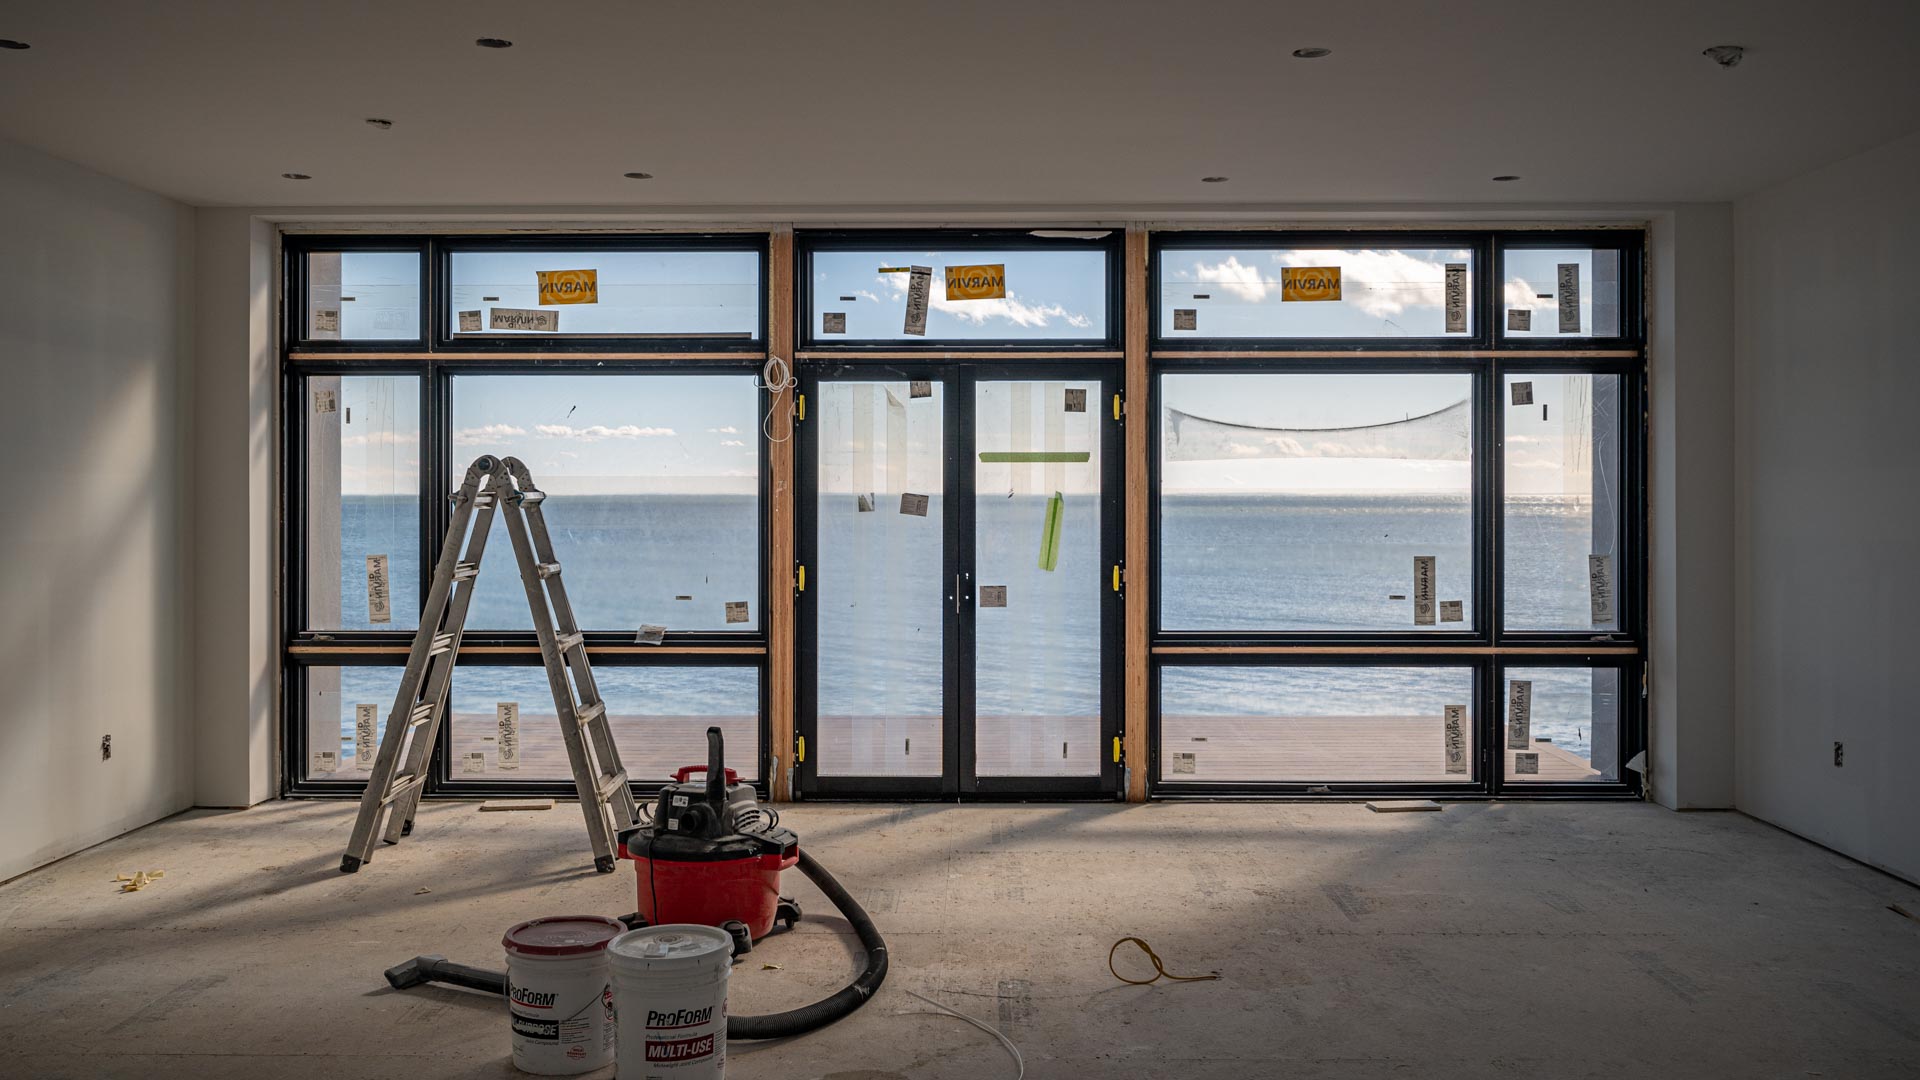
The end results are truly deceptive of the massive amount of work it took to make them happen, but very gratifying to see it finally come together.
Excellent job! Those extrusions can have some pretty complex profiles ![]()
This is the part that stays in the memory and guarantees lasting satisfaction. Great result!
(Except for the fact that the third pane in the windows is missing, but that’s probably going to be a climate zone thing?!)
Messing about trying to reproduce a light fixture on a project based on a photo and a couple dimensions. I’m still quite a novice with V-Ray.


Nice lights They have a mid century feel to them ![]()
Client found them here. The inner cone can be rotated relative to the outer one, so make a component, and I if I need one different from the other, Make Unique, enter the component and rotate that part. I must say, I’m finding the SketchUp color representing a V-Ray texture rather far from the mark in this case.
More light fixtures. I’ve never gone this deep on interiors stuff before. Sure bloats a model, but GIGO is what it is: if you want SU to produce it, you have to put all that stuff in.


I sorta disagree. @DaveR once compared SketchUp to scene set design: It is right if it looks right to the viewer at a normal viewing distance, even if it is made of cardboard, paper and chicken wire mesh. Especially for products you get from manufacturers. Something that gets made from your design might need more detail.
“To a man with a hammer, everything looks like a nail.”
…and by that token, to a photographer with SketchUp, everything looks like a prospect for Match Photo.
This is no doubt my strangest use of SketchUp’s Match Photo because I’m not even going to model anything. I just want to know: Can I determine conclusively what lens I used to take this picture 40 years ago?

Looking at the background, I see just enough of a building to create a Match Photo scene.

There are a couple potential pitfalls to watch out for though, and that’s the teaching moment here:
- I reported before and in my 3D Basecamp talk that what SketchUp reports for focal length under normal conditions is incorrect. It’s off by a factor of 1.5.
- On the other hand, like the adage that “even a broken clock is right twice a day,” what SketchUp reports as a focal length is correct for a vertically formatted 35mm photo, which happens to be what we have here. Because this is vertical and not horizontal, the 1.5 factor doesn’t apply.
SketchUp reports a focal length of 40mm, but it’s a scan from a mounted slide and is slightly cropped. (Cropping is OK if it’s symetrical) That means the actual lens is slightly wider and points conclusively to what I suspected: The 35mm f/2 AI Nikkor that I had back then. So, with that, I can pull out and dust off the complete setup used to take that picture 40 years ago complete with the original boxes.

OK, ok, enough geeky distraction, back to real work with SketchUp.
TLDR Photo Backstory
The picture is one I took of my sister, Martha, just prior to the release of her first commercial Hollywood feature film, Valley Girl, on April 29th, 1983 - 40 years ago this Saturday. This picture has found it’s way on the internet, and I see it spread around now without credit, of course like this:

For a good telling of her career, the Connecticut Women’s Hall of Fame made a nice little tribute film on YouTube. I’m interviewed in it, but don’t blink, I’m only on for a few seconds. A bunch of my stills are used in it though.
BTW, besides Matchphoto, that background building combined with my foggy memory and Google Maps helped me pin down the exact location as well: 8225 Sunset Blvd now Pink Taco restaurant. The building in the background is in fact Chateau Marmont. This is right where the long straight stretch of Sunset in Hollywood makes it’s first turn heading west.

The FOV/focal length of a film camera is measured from the diagonal of the image frame, or the diameter of the circular image the lens projects on the focal plane. SketchUp measures the FOV from the vertical dimension of your SketchUp application window. Thus, the more horizontal your window shape is, the bigger the discrepancy between the SketchUp FOV value and the FOV of the lens you need to take the same image.