I was watching an old Inkscape tutorial from Logos by Nick, in which he walked us through how to create this stylized, ouroboros-like cube that bears a striking resemblance to the old Silicon Graphics logo.
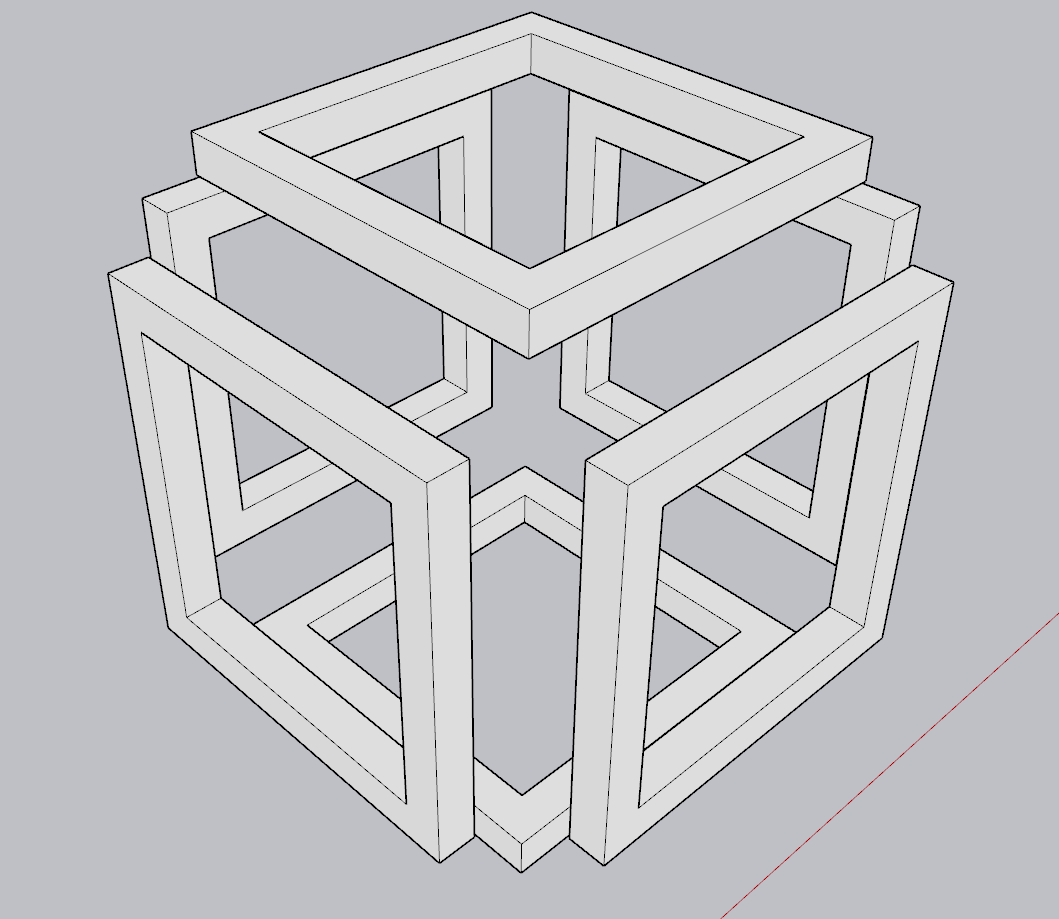
Haven’t quite nailed down the colors yet. I want to try to replicate this in SketchUp. They won’t be an exact match (unless I try to use photo match, maybe), but the basic overall shape will be the same, and I’ll try to match the colors as best I can. I have an idea of how to make this, but I can’t help but feel like I’m missing something, something fundamental, and creating more work for myself than necessary.
I started with a square of 360 x 360 (just to make the math a little easier), cut out a square of 120 x 120, then added a pair of legs 360 in length. The rest was simply a matter of duplicating and rotating. At first I welded the edges before using Follow Me, but the results looked a bit odd.
The ratio was definitely the part I was having trouble getting my head around while making the path. There’s a kind of optical illusion quality to the shape, so while I knew something had to be shorter than what was facing the viewer, I overdid it and wound up just making a cube with a bite taken out of it.
yeah, after a few measurements in illustrator, the ratio is about that.
to make a 10x10 cube, about 2,564 - 4,872 - 2,564
I was on a 2,5 - 5 - 2,5 , not that far from it.
for the follow me, the square wasn’t centred on the trajectory, but cornered inside. it’s about 0,8