Next project. I am just going to go on here and have Dave show what to do. ![]()
2 Likes
@pbacot, you do hard stuff, though. ![]()
How did you get that wood material to look so realistic?
My copy of Sketchup Pro 2017 theoretically has materials that look like wood but only in theory.
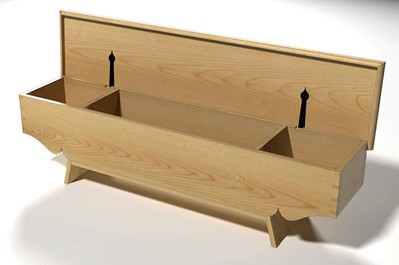
On that door? Those are actually hand drawn materials. Usually I use images of boards that I import into SketchUp to make my own textures. This is something you can do yourself. The key thing for me with wood grain is that the textures are larger than the surfaces to be textured. The textures on the pine bench, below are about 13 feet long and somewhere in the neighborhood of 14 inches wide and I have four or five from the same log. It was a big pine tree! I don’t have time for those little square wood grain textures you commonly find out there. Best bet is to make your own.
2 Likes
So you created these patterns with a camera then imported them.
I wonder if there are any similar images available to download online.
Yes. The images are created with a camera. The key is to shoot square to the board and to evenly light it. Although they don’t tend to offer textures that are as long as the ones I use, you could look at Arroway. They have some that are fairly respectable, especially for plywood panels.
The Guy is a wizard.
I don’t know about that. I do have a wizard’s hat with moons and stars on it, though. Kinda like Mickey’s in The Sorcerer’s Apprentice. ![]()
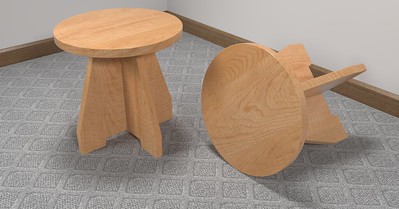
To add another point about the long textures I use, they allow me to pick out different parts to avoid repetition. These stools were textured using two separate red oak textures. You can see seam lines in places because the “boards” aren’t wide enough. It makes it look like the parts are glued up from multiple pieces. With the typical small square textures the grain pattern would repeat across the width of the board. With the long texture I can pick out different parts of the same board just like I’d do in the shop.I don’t mind the seam lines. that’s more realistic than a seamless texture repeating grain.
1 Like
Is the argument for photographing boards that are longer than the piece you would build in SketchUp so as to be able to not have tiling repeats in the patterns?
Yes. Basically. It also lets me pick and choose which parts of the textures I want to use on different parts in the model. going back to the textured model of the door, notice the rails and stiles don’t look exactly the same. They are close but since they are “cut” out of different parts of the “board” they appear more like they would if they were made out of real cherry.
I am going to have to give that a try. We’re pretty well set up for photography. I have a tilt shift lens that will let us get pretty close to the lumber and still stretch out the image.
FWIW: The new version of Lightroom CC has a new tool in the Presence Panel called Texture. This tool really makes things like woodgrain pop out.
1 Like
Dave, I chased those stools all the way out to a flicker account that showed some amazing renderings of a trestle table. I can not tell for sure if what I am seeing is a rendering or a photograph of the real deal.
It is a most impressive design. Did you actually build this table?
Do you mean this one?

I haven’t built that one for real. At least yet.
And thank you.
1 Like
That makes some interesting reading on materials. I would be looking to make my own library too, I didn’t want to ask too much to take in at once on how to or my brain may explode😜
Out of interest what render engine is this with and is a good one for interiors?
Yeah. That makes a mess that’s hard to explain. ![]()
I use Kerkythea which is older but works very well for me. If you ask 10 people which renderer is best, you’ll likely get 8 or 10 different answers. Most any of them can do good interiors. It’s computer stuff so it depends on what you put in.
Food for thought, I guess most people stick with what they know. I’m hearing of Blender a lot at the moment.
Yes. There are certain people who like Blender. Others think Vray is the way to go. There are lots of choices. When you get to that point, try different ones and see which ones you are most comfortable with.
As you are modeling, keep in mind that a clean, properly made model will be easier to work with in rendering. Keep face orientations correct, make sure there no extraneous stuff and so on. And in the rendering end of things, I find it useful to think like a photographer (which I was, in a former life.) for setting up lights and environment.
In the food for thought department: Rendering is a complex and technical task. It takes time, practice, and some artistic ability to get good results from any renderer. The GUI’s tend to be complicated, with lots of variables you can twiddle. As a result, people tend to stick with the one in which they have invested the effort to become proficient. All discussions of “best” are therefore biased ![]()
2 Likes
Steve makes a good point. Also consider the value of the rendering to the customer and the final project. Do you really need photo-realistic images to present to customers? Will there be a return on the investment? I’m not saying you shouldn’t do the rendering, but decide if there’s value in it before you do.