5" 38 Twin Turret Cutaway DONE!

Thanks for the input. I’m using the acrylic adhesive that they sell at the plastics house. It appears to work like other acrylic cements with very low viscosity and the ability to be attracted by static charge.

The replacements were available today. I picked them up in the early afternoon and got the case built by 4:30. I’m getting better at building these things, but I’m still not great. This one has a minimum of glue where it’s not supposed to go. For that I am thankful.

Before I retrieved it, I did more detail work on the model. I installed 3/16" square stock edge thickeners on the upper superstructure to provide more glue surface when I glue it down tomorrow. I also added a corner brace to square up that external 90º corner. I then started to paint it and realized I hadn’t installed the “eyebrows” over the portholes. It’s a little detail, but I wanted to include it. I was using a very forgiving paint (Life Color), wiped it off and made the eyebrows out some very small styrene strip. I got them on and painted the part. To fully cure it takes overnight.

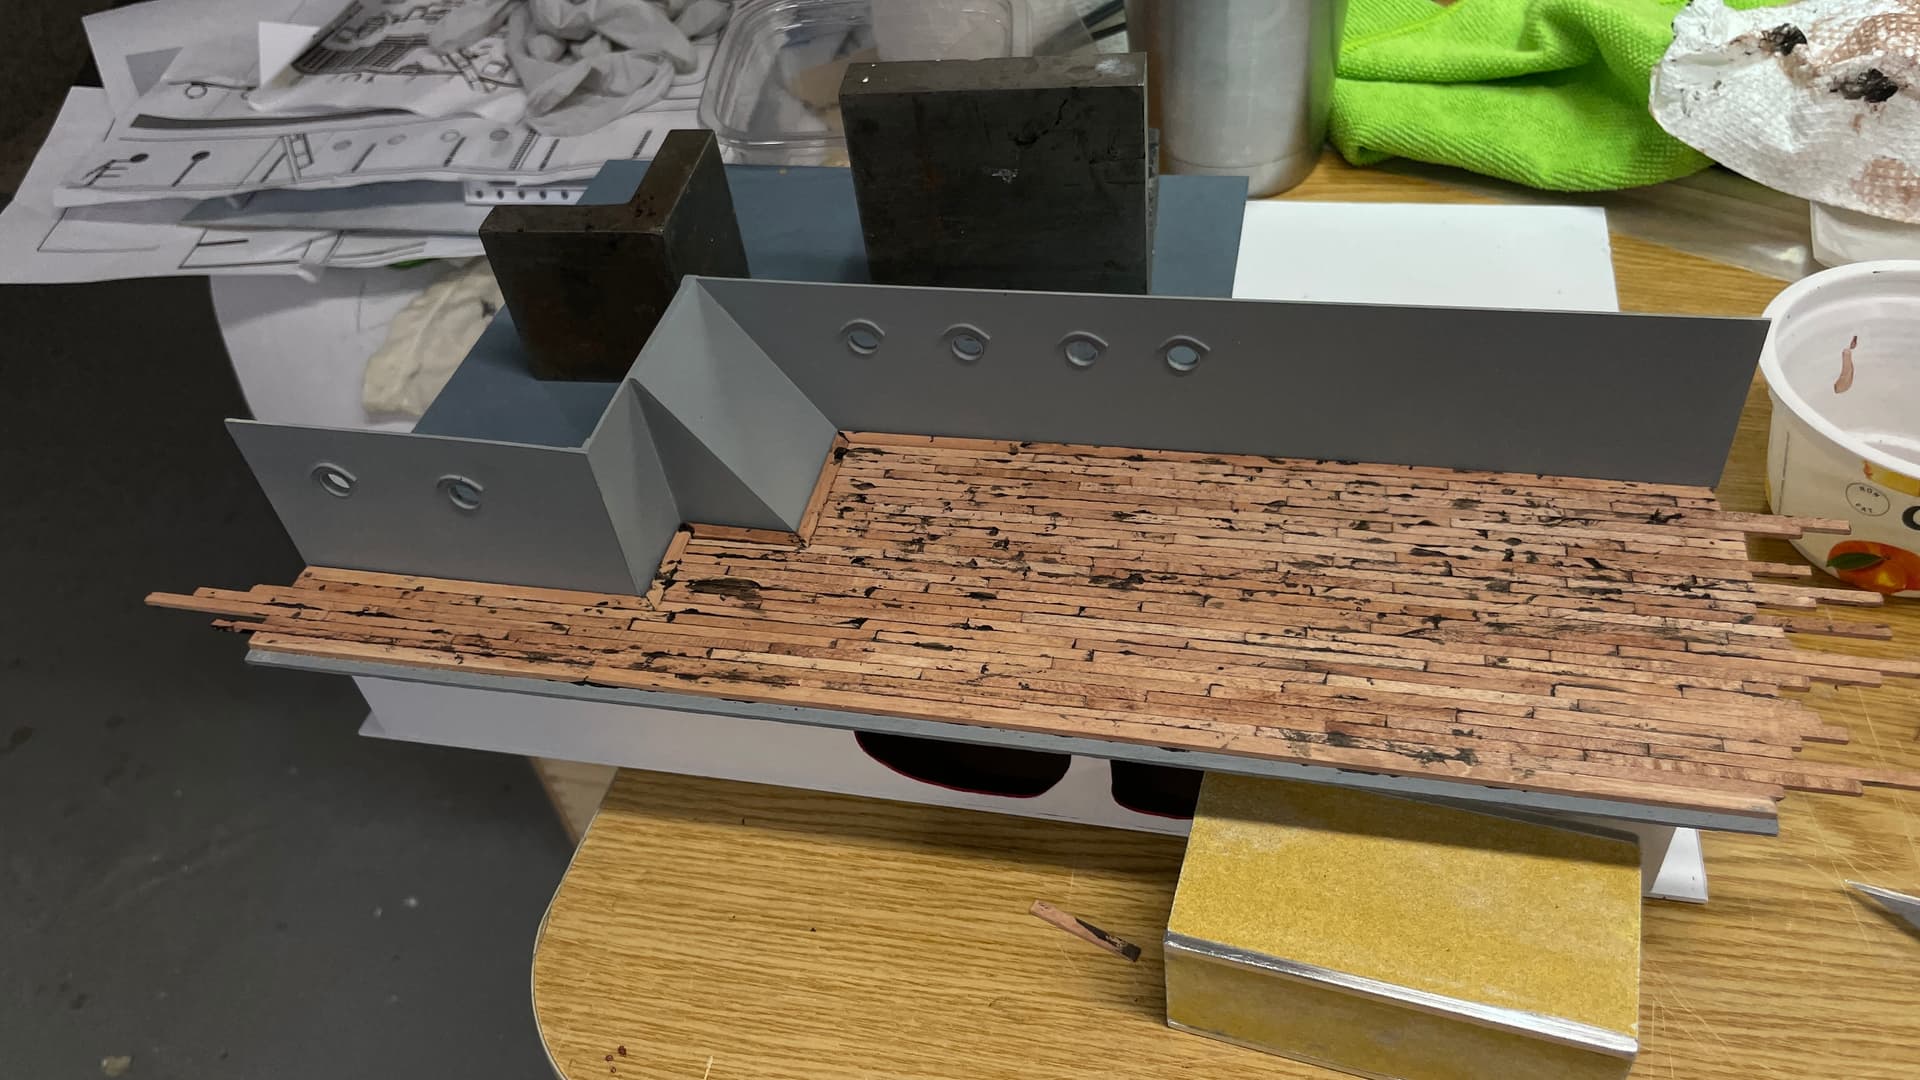
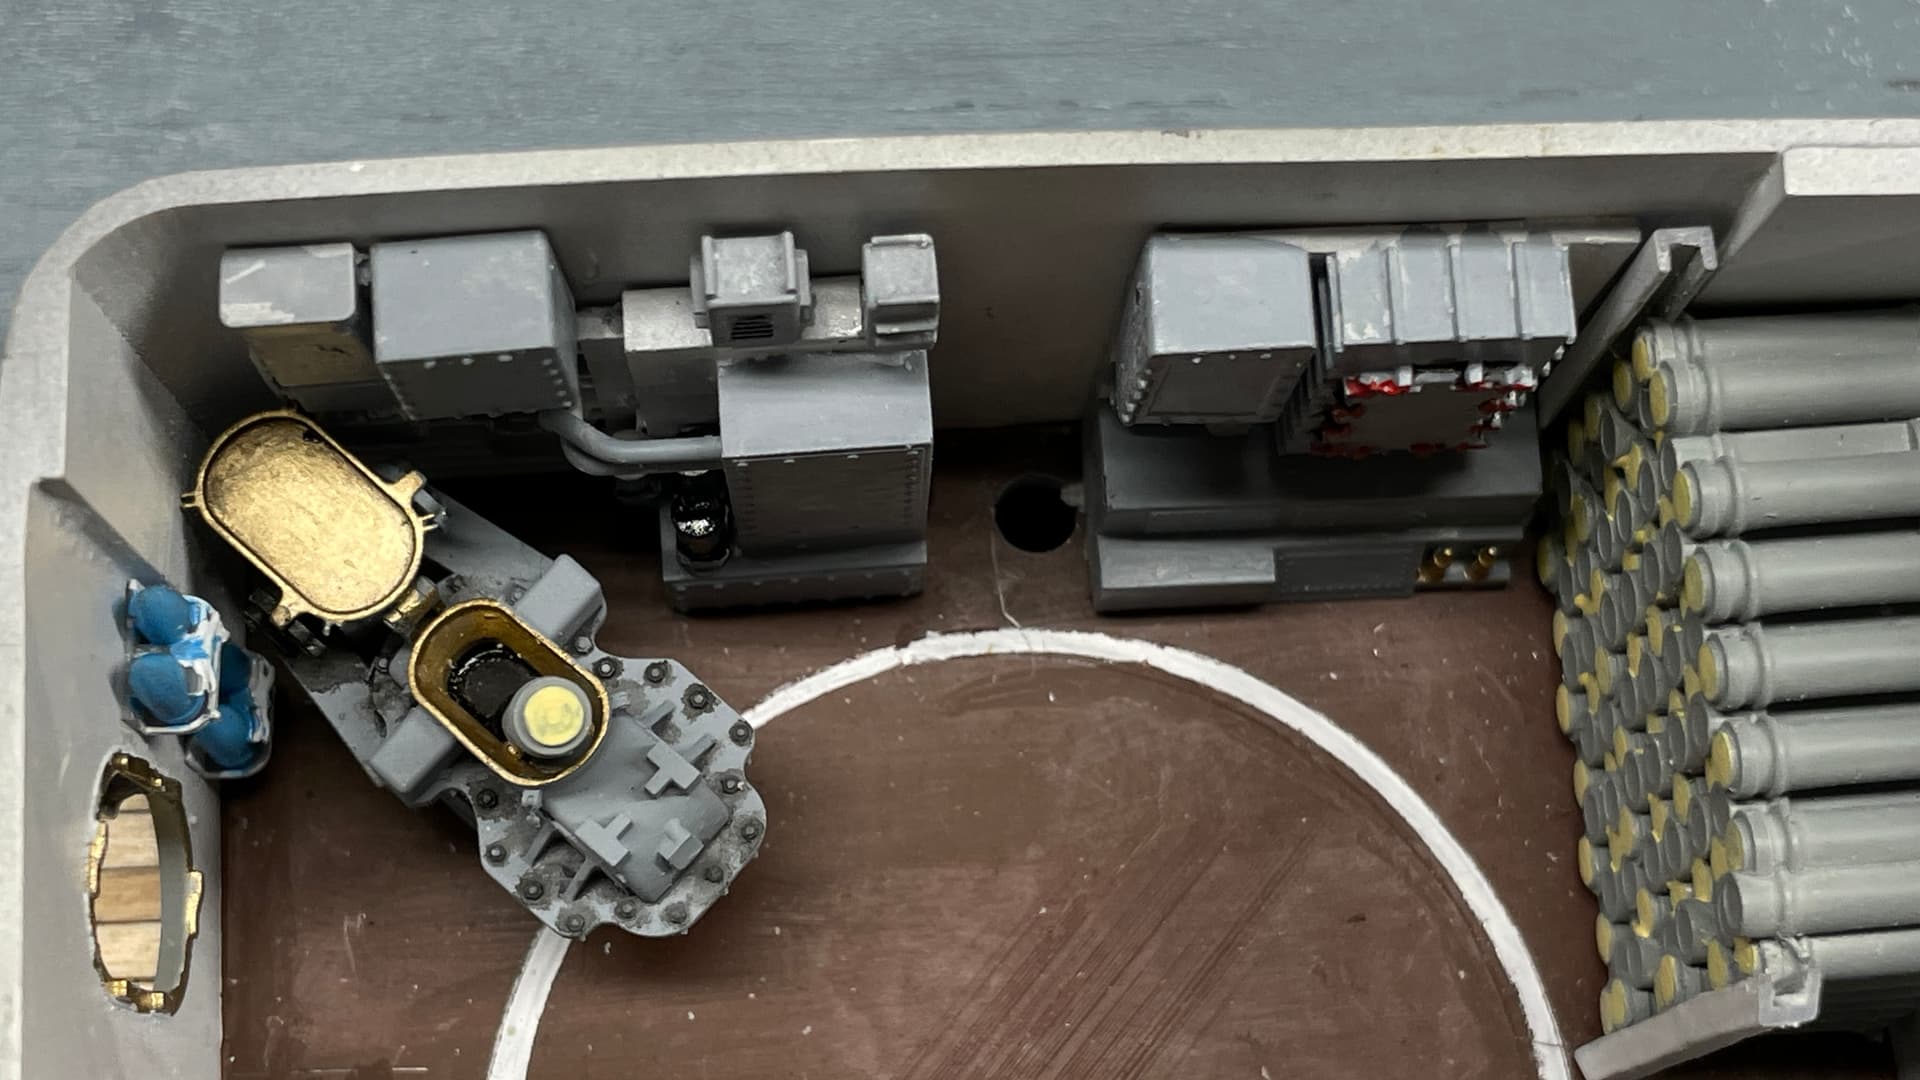
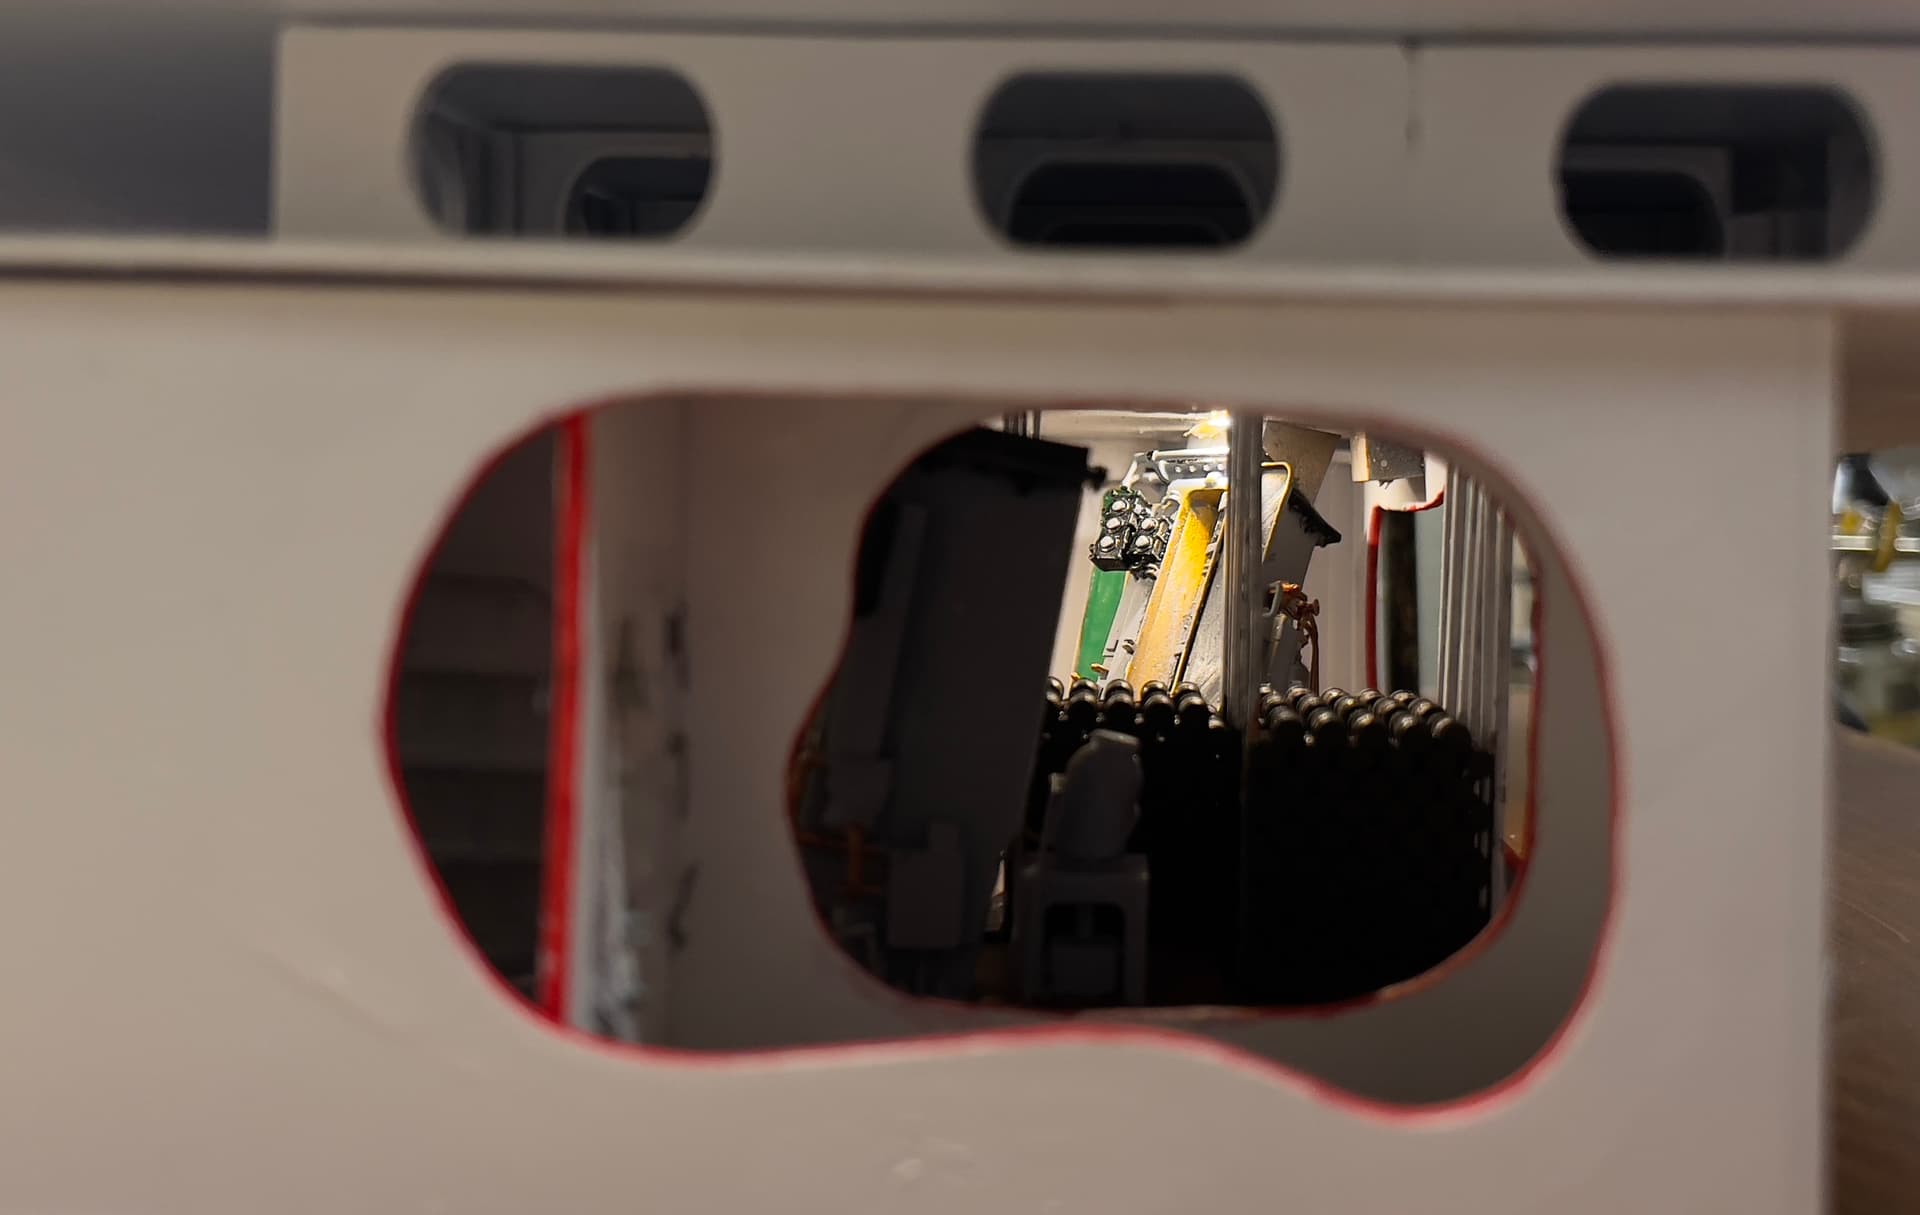
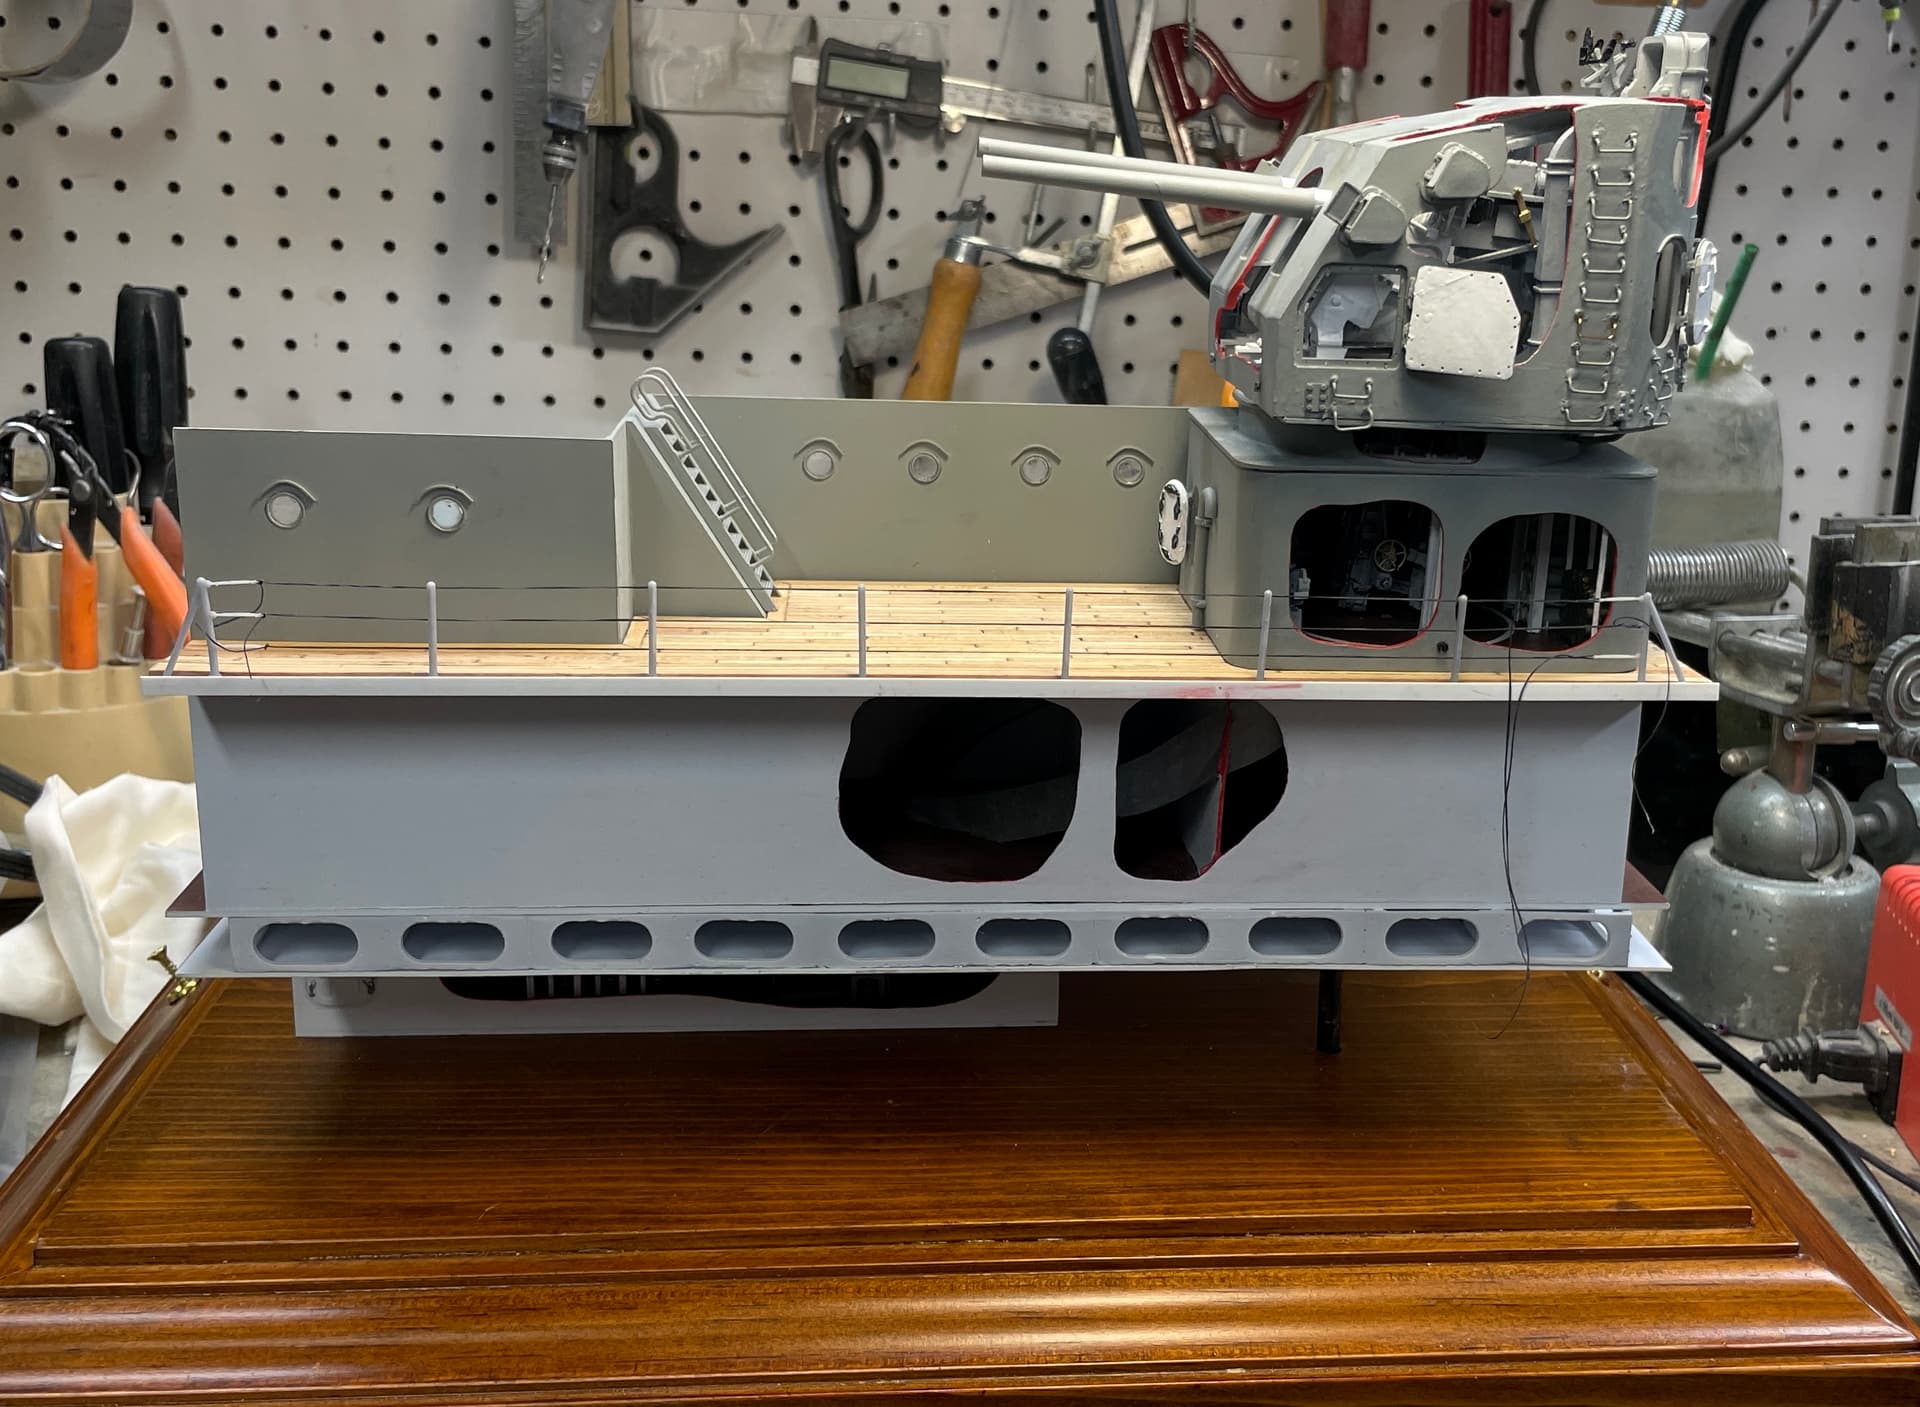
I also finally painted all the cutaway edges of the magazine and 2nd Deck compartment openings, and final touch up on the gun house and UHR. They’re all ready for final assembly. I used Vallejo Crimson Red, and then back painted all the red that got on the outer surfaces with Vallejo White. Both paints have good hiding qualities and the final looks very neat and trim. I’m still worried about doing the planked deck. It could take a lot of time which I no longer have. I have two days!

Then I got the case parts. I was disappointed that the replacement parts were saw-cut and not CNC milled. They were much rougher and had some chipping. I’m not complaining. They turned the job over in less than two days. They’ll suffice.

To clean up the edges some… I have a edge sanding contraption that I built when gluing up balsa skins making a very large RC aircraft 13 years ago. It’s a 1X3 screwed to a 1X4 capturing the sandpaper in between. It provides a long, square edged surface with abrasive and works pretty well. The saw marks were deeper than it was reasonable to expect their removal via hand sanding.

After cleaning up the edges as good as I could get, I determined the edge that were going to get glued and created a very slight chamfer on the inside glue edge with a sanding block. The chamfer is very small, but enough to help guide the needle applicator and promote capilary flow. Speaking of capilary flow, I was also told to use a Q-tip and coat the glue edges with cement before taping together. It helps flow into the joint.

The fellow at the plastics house also recommended removing ALL the protective film. It just gets in the way. Acrylic has a lot of static charge. It’s a problem because it will draw cement off the applicator and deposit it where you don’t want it. Another trick he told me last time was to do all the work with the assembly sitting on a damp towel to reduce static charge.

I then used two micro-fiber cloths to clean off any dirt and sanding debris. One was damp followed by a clean dry one. These cloths are fabulous! I bought a stack of 100 of them from Amazon for something around $12.00. They’re washable and worked great on the stove, cleaning leather car upholstery, mirrors, etc. And they worked great on acrylic!

I started taping it all together using Tamiya wide tape, but it didn’t have enough grip strength to hold it together. I switched to 3M Blue Tape. I put the sides together first sitting on the top piece, and then errored thinking that I had to turn it over to get the top fitted. That attempt loosened a lot of the tape forcing me to reconsider. I replaced the taped-together-walls back on the top, slide it off the table a bit and so I could apply tape to its underside, rotated it off the edge and did the rest of the sides in order.

Tomorrow starts the full-court press. If I don’t get it done, I can’t blame the Plexiglass.

I applied the glue using the last tip I received; squeeze the air out of the bottle applicator and then release as you rotate the tip into position. This way you don’t get that “spurt” when you tip the bottle oveer to apply the cement. This tip really helps making clean job.

I made a measurement error too. I made the height measure for the new long pieces 1/16" too tall. It shows up here…

The effect is to raise the ends a little off the wood base, but it’s well supported by the long sides. Oh well…

After gluing, letting it set up about 1/2 hour, I was able to lift it, put it on the base and clean off any tape residue. It came out very clean and better than my past attempts.

7 Likes

The end is nigh! I got the main deck planked in a little over two hours. I woke worried that I didn’t have enough scale wood, but I had way more than I needed. I gang cut the wood in my modified Chopper 2. I built a depth stop on this useful tool, that lacked it. I makes it much more useful. I cut the scale 3 X 2s to scale 8’ lengths. I don’t really know how long the deck planks are, but they don’t look very long.

I laid the 16" long strips on the deck to estimate how many planks I would need.

In the past when I planked a deck that had dark caulking, I laid strips of black construction paper edge-on, and then shaved the excess off with a razor. I didn’t have the paper so I tried another approach. I mixed Aleen’s Tacky Glue with black India Ink to make a jet black PVA glue. I pre-stained the planks, but after sanding most of the color was removed. The black glue make the joints dark and looks pretty good.

When first applied it looked like a mess.

And when fully planked really didn’t impress me very much.

But, after sanding, it looked pretty good. When I started gluing I brushed the glue onto each piece individually. It was slow and let to the sloppiness. Later, I realized it was neater to brush the glue onto the substrate. Not only cleaner, but at least two times faster.

And with a coat of clear Urethane, it looks pretty nice indeed.

I laid out and drilled for the railings. The end stanchions have faux turnbuckles. They look good, but are very, very fragile. I’m going to rig with E-Z Line and will wait until I’m ready to put the case on before doing it so I won’t be reaching over it to do anything else. Tomorrow I’ll glue down the superstructure. Right now it’s just sitting there looking pretty.

I got the power system all button up and made a brass plate to hold the power switch. I’m not turning on the primary. Instead, I’m turning off the secondary. Everything is waiting for the wiring to come down from the model.

So… what’s left. Everything is painted and staged. I have to asssemble the layers together. Before doing that I have to populate the magazine with all of it’s appliances. I have to paint one exposed deck, that’s now white, but I want it linoleum color. I have to install the chunks of the hoist trunks during the stacking process. Lastly, I have to make the locking system for the showcase like i did with the big gun.

Meanwhile, we’re going to early vote tomorrow since we’ll be gone on primary day and I have a cardiology checkup at 1:00. Still, I’m optimitic that I can bring it all together. I was worried about the case and the planking and both are done and no longer an issue. The rest should go together pretty well. (Famous last words!)

8 Likes

My optismism was not well-placed. I came very close to finishing today, but, as usual, something in the final assembly proved much more challenging that it would have appeared. That said, I did get much done. I got the magazine finished, mounted on the base and fastened it’s roof on with the wiring led below. I got the splinter deck glued to this roof and then actually glued the second deck in place. I got the gun house and UHR joined and decided on the simplest of conduits for the rest of the wiring. But what got me was trying to install those segregated pieces of hoist trunk through the cutaway openings in the 2nd deck cabins. It was very difficult… it was getting messy… I was running out of time and I envisioned bad things happening. I gave up and will pick it up after we return. Besides, Ryan has his hands full right now and it might not have been such a good tie to bring it.

I you look closely at this image, you might pick up that I installed that first row of powder canisters backwards. I know it’s backwards because I spent a lot of time painting the yellow on the openning end of the canister and they’re not seen here. Would anyone care? No! But, it’s an indication that I was rushing. Things don’t go well when I do.

I got the little steps laind in at the base of the powder room doors and painted the mechanism steel color. I used 3M transfer tape to hold the hoists down. All the rest is held by the J-B Weld construction adhesive.

I pre-fit the stack with a couple of small screws holding the magazine ceiling and reckoned where the UHR wiring was going to penetrate the main deck. I marked this and drilled all the way through the stack with a 1/4" plastic drill bit. I then used a transfer punch to mark the location of this hole on the base. For the uninitiated, a transfer punch is a specifically-sized piece of tool steel with a center-punch point on it. They come in a set that matches a full set of drills and they’re used to mark locations using a hole as the datum. (harder to describe than used).

I drilled the base with the 1/4" brad point drill and now had a straight path for the wiring to go below through a brass 1/4" tube. The tube will be visible, but not obtrusive and will help support that very cantilvered from of the model. It also greatly simplified getting the wring done.

Here’s the punch before running it all the way down and tapping lightly with a jeweler’s hammer.

The conduit top opening fits directly under the openning in the UHR 's rear floor next to the back support.

Here’s the lead opening in the UHR floor.

I’m going to chemically treat the brass tube so it will be very dark and in the background.

My arrangement varies slightly from my original design bringing the splinter deck and cabin all the wasy forward. This changed the trajectory of the hoist trunks.

I used the plans to find the location of the Splinter Deck lattice and then to remove any interfering lattice so the hoist trunks can pass through. If you remember, I originally drew and printed openings. This all went out the window since I had slightly changed the geometry.

I made small drill marks at the corners of the rectangles that represent the hoist trunks at that posiition. After gluing down the lattic and the hoist trunk parts, they didn’t align well with the hoists themseleve and I had to position them back and to the left about a 1/4". I then removed any interfering lattice.

After assemblng and gluing the whole stack, In my agression fitting the rest of the hoist trunks the glue fell apart, but it was good it did. I was having trouble getting the middle to settle in properly. The reason was the hoist parts were about 3/32" too high and well keeping the whole center from gluing.

I broke them loose (they were CA’d) and ground off the excess on the belt sander. So when I finally glue it back together it should nestle down much better.

I glued a thin strip of styrene on the front deck edge as a scupper gutter. Needs to be painted.

This was the clamping scheme.

I finally put the gun house and UHR together with four small screws. I dont like the roof fit, but it was a 3D Printed affair and not a styrene part. I also don’t like that the UHR hoists are tipped forward and not centered in the space. Can’t be fixed now. That ship has left the dock.

As much as I wanted to finish it for this trip, we’ll be making other trips and, as I noted, messing with the hoist pieces was getting messier after each attempt and leading to something bad to happen.

So what’s left? I have to get the hoist trunks in and clean up the mess inside those spaces. I have to connect the field wiring. The railing needs to be built as the last thing. I have to mount the name plate and the one graphic on the rear case wall, and make the lock clamps for same. Instead of the construction glue, I’m going to use the J-B Epoxy designed for plastics. It needs to be secure. I screws the magazine to base with self-tapping screws so it’s not going anywhere.

Everyone have a nice Memorial Day and I’ll be back after that.

7 Likes

The wood deck looks fantastic!

1 Like

Thanks. Saw the ship’s under belly today and it did not disappoint. We had a private 2.5 hour tour. The weather changed just in time. Here’s a taste.


I’ll give more details when we return after the holiday.

7 Likes

beutifil

Back in the shop. Finally got those trunks installed. I’m not happy with the little chunk on the right. I had to do major surgery on that one to get it to fit. Reason… the trunks are too far forward and the curve would take it out of the structure. In retrospect, I should have installed the trunks before the main deck was screwed down. It was very difficult to position and glue them through those cutaways. Water over the dam!

I cleaned up the mess I made of the decking and paint within those openings, and then re-glued the assembly together. With the adjusted lower trunk parts, the deck nestled down much tighter. Tomorrow I will install the gun house and UHR and run the wiring to the underneath. Last thing before putting on the case will be to install the delicate railing.

I still have to finish the case with flame polishing the edges and mounting the plaque and graphics. I need to build the case lock. That doesn’t take too long. Ideally, the model will be done by the end of the week. Then I have to plan another trip Back East to deliver it. The ship will be back at the Camden Waterfront in mid-June.

Some more images from the trip…

The ship has a keel that extends many feet under the tunnel between the skegs in the aft. This is the end of the true keel of the ship, and IS NOT represented in any model I’ve seen or drawing. It’s buried fairly deeply in the tunnel, but it’s not small. It tapers to a knife edge at the rear.

Here’s a section view down the center of the ship and that keel is not shown.

The bow profile is stunning!

The ship is sitting on 292, 4ft sq concrete blocks. They’re on wheels so they can be moved into position. The ship’s current weight is 47,000 tons. That comes to 322,000 pounds on each block. It’s a bit sobering when crawling underneath that 100,000,000 pounds are sitting above your head. The ship was in remarkable condition considering it’s 81 years old.

When it leaves the dry dock, the dock will be de-commissioned and filled. It’s 100 years old and has served well. The New Jersey and Wisonsin were outfitted in this dock during their construction in 1943 and 44. There are 75 steps down from street level to get to the bottom. The water is held at bay with a floating wall… a casson… that is floated into position, filled with water and then sunk down the taped groove on the dock’s end. While it leaks a bit, there are pumps scavenging the water. To refloat the ship, the dock is filled, the casson is emptied, it floats up and then is towed away by a tug.

8 Likes

Very detailed work! Good info on your experiments with supports. Is this all on a resin printer? Have ever tried using a FDM printer? Some of the core x y models have gotten very good (and surprisingly fast) at precision stuff, especially with the smaller nozzles.

Thanks! It’s all resin. I’ve kept away from FDM’s, probably due to old information. Resin machines continue to improve rapidly. My first gen was 2019. They’re already in 4th generation. I’m itching to get a bigger machine, but haven’t pulled the trigger yet.

I woke up thinking about other ways I could have set up the model including printing 1/2 of the gun house shield as a single part eliminating all the alignment and fit problems. Instead of a cutaway resembling Swiss cheese, it would be 1/2 housing and 1/2 wide open. That’s if I ever have to make another one of these.

I’m a bit over one more day until completion. Did a bunch of punch list items including actually punching something. To make the glazing for the portholes, I sharpened the tail end of an F drill which perfectly matched the i.d. of the porthole opening. I punched out 0.010" clear styrene. The first grind was a V-shaped which distorted the plastic discs too much. I re-ground it to a simple flat, slanted end and punched out acceptable discs. After inserting them, I used Pledge floor wax with Future (clear acrylic) which served to clear up the pieces and glue them into the opening.

After taking the pic I painted the inside frames brass.

My design, not having the Splinter Deck covering the entire surface of the 3rd Deck, was chosen to simply reduce the amount of printing of unseen parts. However, it created a rather flimsy cantilevered structure. To inprove structural integrity I cut and epoxied supports across the under-supported back. This stiffened the whole structure nicely. It won’t be noticeable. The model will be backed against a wall so to see the rear will take some doing.

I first used plastic cement to hold the supports to the styrene parts, but they were failing and redid them with J-B Epoxy blened for plastics.

Here’s how it looks with the gravity clamps.

I glued the superstructure wall in place in readiness to add the gun house/UHR tomorrow.

I flame polished the exposed edges of the case and installed the name plaque and the graphic. The plaque already had adhesive strips. For the graphic I used 3M Transfer Tape.

I was unhappy with the misaligned front hoist trunk. I added a thin styrene apliqué to clean up the contours. It’s just a thin piece of styrene sheet, but you can’t see around it.

I chemically darkened the conduit tube that serves double duty: providing a path for the GH light circuits, and added support for the overhanging area. I added CA to the top and bottom to make sure it stays put.

What’s left is making the case locks, gluing the GH/UHR to the deck, adding the stair, building and painting the railing and tieing in all the wiring to the circuit board…. and it will be DONE! Could be tomorrow. The glue I’m using (J-B Structural Adhesive) takes a few hours to set up so maybe it will be Monday.

6 Likes

On Monday the model will be done! Today was a mishmash of tasks to finalize the build. And there was the usual passal of complications that seem to crop up at the last minute. Alls well that ends well" sums up the day.

I started by fabricating the brass clips that would secure the case. I was halfway through when I realized that I should glue the GH/UHR assembly since it would need a good hour of setup time before I could handle the model. To do the wiring it had to be in place and be able to let me lay the case on its side to access the bottom.

I marked its location on the deck and applied the J-B Structural Cement so it did not ooze out of the edges.

The assembly sits just a bit proud of the superstructure bulkhead due to the screw heads protruding. Believe it or not, this little bit almost caused a problem.

While drying I got back to making the locks.

Before drilling I did a bit more flame polishing. In the lighting where I was doing this showed that it wasn’t done enough. I also overdid it in one spot. Yes… you can overdo flame polishing.

Drilling acrylic can be tricky due to fracturing upon exit at the hole’s bottom. To counteract I used masking tape on both sides. It also provided a place to mark the locations.

The bracket is screwed in from the back side and passes under the end acrylic sheet. The 1/16" gap came in handy for this and I used it.

I fit the case over the base with the model in it and found that I only had a fraction of an inch clearance between the open access GH hatches and the plexiglass. Luckily, I built in some play and was able to scooch the case forward a bit to gain just a bit more room. I was very, very lucky. I was concerned about the protrusions on the gun house as I drew it and the base, those open doors were not in the drawing. If it didn’t fit, frankly, I have no idea what I would do.

With the case positioned properly, I drilled the pilot holes for the flat-head brass screws with dress washers. Came out nice and neat.

And with the case on.

.

With the case fastened, I was able to tip the model backwards and terminate the light leads. I had passed the GH/UHR leads done the conduit tube before gluing in place.

I bought some very small gauge ferrules from Ferrules Direct for the 32 gauge wire I use with LEDs. These protect the delicate conductors and make connections into Euro-style terminal strips must more secure.

Making the connections only took a few minutes. Then I tried the lights and they ALL WORKED! Excapt for one thing… the lights in the magazine were very yellow, like high pressure sodium lights. Oh darn! I never took off the tiny pieces of Tamiya masking tape I applied to protect the LEDs from painting. The magazine is very difficut to reach now, being set way back.

Using this long machinist’s scribe, I was able to reach them even in the powder room and remove the tape from the lights.

That was today’s panic moment. With the tape off, the lighting was excellent.

Looking from the side you can see the front faces of the those complicated hoists which I spent so much time designing, printing and painting.

I took some more pictures with the room lights dimmed and bright to see how it looks. I’m not all that happy with the light leakage at the UHR’s roof joint. With the bright lights inside I can see that it’s caused by the vertical beam still being a little too long and keeping the roof from nestling down. Nothing I can do about this now. I kept shortening them, but apparently not enough.

All that was left was the railings. I didn’t have much time before my 5:00 quitting time, but I got them strung. I only have to trim the excess E-Z Line and paint. The stanchion holes are sized perfectly and I didn’t have use any cement. They were all a nice push fit. I broke one turnbuckle, but I had already strung the first line and it was all CA’d so removal could be a problem. I am going to live with it. Actually, you probably would only need turnbuckles on one end of the run.

I took this image looking through the cutaway at the GH front and took a picture of the telephone dial. I sent the image to Ryan and he wondered why I didn’t paint in the numbers. He’s a kidder…

On Monday, I finish the railing and go around one more time doing a any cleanup/touchup and the model will be finished!

The AV program is done too. I have to purchase the digital picture frame to run it. Since I now have some time, I can order it, install the program and debug it before delivering it to Ryan.

I will take some beauty shots next week that will resprent the As-Built Builder’s Photos.

I will do a final wrap up and “Lessons Learned” discussion when it’s finished.

9 Likes

Fantastic model! I am sure Ryan and the staff on the New Jersey will love it, as will all the visitors who see it.

1 Like

Well done. Much respect for your skills in creating a model like this. :+1:

Looks gorgeous so far to my eyes! I like the wooden decking…how did you get that effect?

In terms of adhesives, something that has helped me gluing plastic in the past (especially separated or broken parts) has been using CA glue and a smidge of baking soda as a bonding/bulking agent. Graphite from a pencil dragged on sandpaper also works for a darker color.

I often prefer the thicker CA glues, and usually use accelerator spray.

Maybe you know this technique, but if not you should try experimenting with it! Also, wearing the gloves ca glue doesn’t stick to is a big help. Adam Savage of Mythbusters has talked about how much he uses it in model-making.

Looking forward to seeing more photos!

Reid

Thanks Guys! Today’s a big day. I’m declaring it DONE! While I’m saying that, I’m printing out one last part. There are curved transition pieces from the ship’s bulkheads to the UHR corners. I may not use them because putting them in risks making mistakes and mess when the model is really done and clean. I’ll how well they fit and then decide.

Regarding gluing the deck. For something like this where I may have to move things a bit to get them to align, CA just cures too fast and it’s mess to clean up. I used Aleen’s Tacky Glue, which is nice and sticky so you don’t have to clamp. I then added black India Ink which turned the glue jet black. I let it ooze out over the joints, and after drying sanded and scraped to get to bare wood. I used thinned acrylic paint to stain the planks, but it would have been better to use a penetrating oil stain, but didn’t have anything represent teak. The planks were cut to a scale 8’, but that could be too short. I didn’t have any good reference on the planks.

Having spare printed railing parts, I removed all the initial E-Z Line rails, and replaced that broken right end stanchion. I also reinforced the very delicate joint between the turnbuckle and the stanchion with Bondic on both ends giving some more heft to the part. Doing it the second time went much faster than the first. I harden the tip of the E-Z Line with thin CA and then slice the end to a sharp angle to facilitate getting it through the stanchion eyes. I painted the stanchions and the outer waterway trim Life Color Haze Gray and then went over the E-Z Line with a fat headed Molotow Chrome Pen. I’m now at ease about that rail. I didn’t like having it screwed up especially since I now had the time to fix it.


And now with the case on…


I have to set a date with Ryan for delivery after the ship is back at its home berth.

So… left me do an after-action report. Let’s say, a Plus, Minus, Interesting review.

Plus:

  1. 5"38 was a very complex structure which I really didn’t know if I could pull it off. The fact that I did AND that it follows so closely to my original drawings was a definite Plus.
  2. The challenge to display the layers in roughly the correct geometric relationship to the real ship came out well. The magaizine’s offset from the gun is very close to prototype distance.
  3. Creating the AV program to show details of the model that aren’t readily seen was a good solution to the problem. Thanks to Bryant for the idea, and the acceptance of it by Ryan.
  4. When the Takom kit was out of stock, I really didn’t know if I could proceed. The gun house’s geometry, the shape and delicacy of the guns themselves had to be solved for the model to work. My skills had progressed to the point where I thought I could scratch-build all of it. Clearly, that was true.
  5. I am not patient, but I am very persistent. Making five versions of the complex front mechanism proved that point.
  6. My acrylic case-building skills continue to evolve. I’m not perfect yet, but I’ve come a long way.
  7. Managing LED light installations are getting easier and more predictable.
  8. Screwing the decks in place was a good idea and more positive than gluing them all.
  9. The wood deck came out terrific. I’m glad I chose to do it.
  10. Having two models now being displayed in the real ship is a life goal achieved. When I was offered a place in the captain’s cabin of my Missouri model, but couldn’t get it there on my own, I thought that was the first and last chance to have something displyed where it would exist after I’m gone. Through the effort I make to communicate all this stuff to folks all over the world is the reason that I was able to contact Ryan Syzmanski. The rest is history.

Minus:

  1. Unhappy with alignment of upper hoists. When I reglued the units after they had broken loose, I didn’t pay enough attention to this. Most (or all) of the viewers probably won’t notice, but I know
  2. I chose to not create the Splinter Deck Lattice so it stretched all the way across the Splinter Deck. This created a very squishy cantilever that I need to reinforce with plastic posts that ARE NOT on the ship.
  3. If I did it again, I would split the gun house down the middle and leave half off fully exposing the insides. It would have shown more to the viewers, although may have been less interesting where viewers have to pay close attention to see what’s going on inside.
  4. Still haven’t figured out the best way to make those snaky hoist trunks. Messing with them at the very end could have crashed the project.
  5. Some parts, like those tiny turnbuckles, were just too frail and I should have done something different.
  6. Even with my foresight of installing guns last and how to handle the sight telescopes, the telescopes did not work out well. If I did it again, havind half open would make that problem go away.
  7. More light is needed at the very front of the Magazine to show off the hoist side facing the viewers. I could have installed an LED aimed at the cutaway to do this.

Interesting:

  1. I know know enough about the main and secondary armament systems of the Iowas to be a docent. If we still lived in the Philly area, I would volunteer there.
  2. Watching my relationship with Ryan change from casual, arm’s length to full colleague was fun and rewarding.
  3. Because of my contribution to the Big J and being able to have that amazing private tour of the bottom was worth all the effort.
  4. It is franky, fun, building models that no one else, anywhere, has ever constructed. The icing on the cake is doing them well enough to be displayed to the public.
  5. Having been a model builder for 70 years, it is wonderful to be well-enough, have enough cognitive strength, and the creativity to do the best work I’ve ever done.
  6. It has been a great pleasure sharing all of this with you.
14 Likes

Bravo :clap: :clap: :clap:

Came out beautiful! I love the LED lights. I’ve heard good things about that tacky glue.

Doing quite a bit of woodworking, you may want to try some amber shellac next time you want to just darken/brown up some lighter species for a boat deck (or otherwise). Zinsser makes a decent pre-mixed version. I like shellac because it’s much less toxic than so many finishes and dries fast. I also like tung and linseed oils in certain applications for their low-toxicity.

I am blown away by your attention to detail and the project as a whole.

Fantastic model, Myles! Really fantastic. Adding the surrounding multiple decks and mechanical systems to the part of the gun that is visible above deck makes the model even more impressive. Thank you for all the effort to create this extensive built log.

1 Like

Thanks all!

I will probably deliver the model to the ship at the end of July for those who have the opportunity to visit the ship. The visit is worthwhile regardless of what I’m displaying there.

Spectacular, it’s been a real privelage to watch this unfold.