Hi,
Is there an extension for this or is there a way to do this? Like making a ruler model, how does one place the measurements on the model?
Hi,
Is there an extension for this or is there a way to do this? Like making a ruler model, how does one place the measurements on the model?
What version of SketchUp are you using? Please complete your profile.
You can model a ruler to use in SketchUp but creating scaled views for output is easier in LayOut.
Not quite clear what you mean.
Normal practice in SU is to draw models full size (or x100 or x1000 if you are modelling small objects, e.g., for 3D printing, to avoid SU’s ‘small edges’ problems).
You could draw your model full size, then scale it up or down using either the Tape Measure tool, or the Scale tool, then use the Dimension tool to draw the dimensions.
Or if you want 2D drawings, use Layout to create the 2D drawings ‘to scale’ and use the Layout dimension tools to add the dimensions.
Please complete your profile - you don’t say what version of SU you are using. If it is a web version, or SU Make, you won’t have access to Layout.

Like in the image-the measurement markings on the models.
Ok. Do u have a quick guide on that? It’ll be of so much help. I’d like it to be of same precision as say a measuring tape.
No guide. It’s just a matter of laying out the marks correctly and then placing 3D text components. Might be helpful if youset the 3D text to align to center. That puts the insertion point at the bottom center of the component. Since you should be working in real world dimensions it should be straightforward. Use linear arrays created with Move/Copy to make the tick marks along the scale. It’ll make quick work of that.
Ok, Thanks.
Good luck. It should go easily enough once you get started.
FWIW, here’s another example.
In this case because I wanted white marks and text on black, I laid out the scales as above but then I exported an image and inverted the colors in an image editor. I cropped the image to the shape of the rule and then used it as a texture image in the SketchUp model.
or I could just get those adhesive tapes like used on workbenches and be done with it! ![]()
I figured more like that. Make sure it doesn’t look like the one I posted. You’ll have problems.
Sure. Thanks.
Hi, I saw your comments on this post. I’m not clear on how the ruler lines are made. Did you use the line tool? Are they raised or recessed. I want to model an object that will be 3d printed. In my case would prefer the lines be recessed. I can’t get it to work. Is there a video you can point me to? I searched and can’t find one.
In the case of the scale I showed, the divisions were made with the Line tool and I used 3D text to add the numbers. I exported an image and reversed the black and white in an image editor. Then I imported the image as a texture to add to the component.
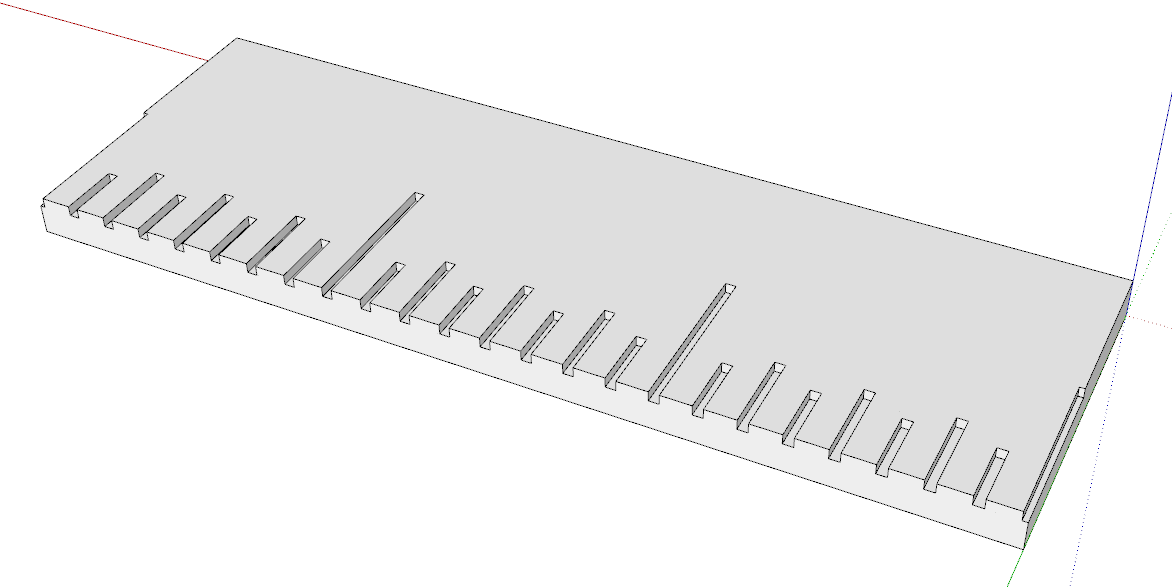
If you want to 3D print a scale you’ll need to use more than single edges. You’ll need to create actually grooves in the surface. Something like this.
Here’s the .stl in the slicer for that model. This one will be 3 inches long.
Thanks for the reply. For the option with grooves, that is best done with the rectangle tool?
If no grooves, best to use the line tool? For the line tool, I can make those lines raised?
I’m not clear on why/how an image was exported and reversed. Don’t think I need that in this model, but I’ll keep it in mind.
I used the rectangle tool but you could use the the Line tool to draw the edges instead.
If you’re going to 3D print this you need to have a difference in face height to show the index marks.
You could raise the index marks if you’d rather have them that way. They still have to be drawn as rectangles so you can create 3D shapes for them. Edges by themselves have no thickness so you have to use a rectangle.
In the model where I needed to show the scale I was able to use a texture image for that scale. I didn’t need 3D geometry for it. I did a second scale along the back in the same way.