First and foremost I am a total noob in Sketchup, although I did learn a lot the past few weeks.
I am designing some taillight inserts to add extra lighting to them. I’ve made a sketch that resembles the outer shape of the blinker portion of the taillight.
The thing is, I want it to be one solid piece that I can draw onto to delete sections (It needs to have a hole in the middle and some inserts into the model)
I have no clue on how to do this, especially with the shape being the way it is.
Could someone explain to me how to do this? I already tried placing a cube into it and intersecting faces, but that didn’t do anything.
If someone could help me that would be great!
If I made any dumb mistakes, please do let me know. I really wanna learn to use this to the best of my abilities.
It wasn’t a trick, it that’s how it was supposed to work.
The model in the image of your third post differs from the previous one and from how I showed you that it can be done.
What is the actual shape you want to achieve in the end? Did you watch the video carefully?
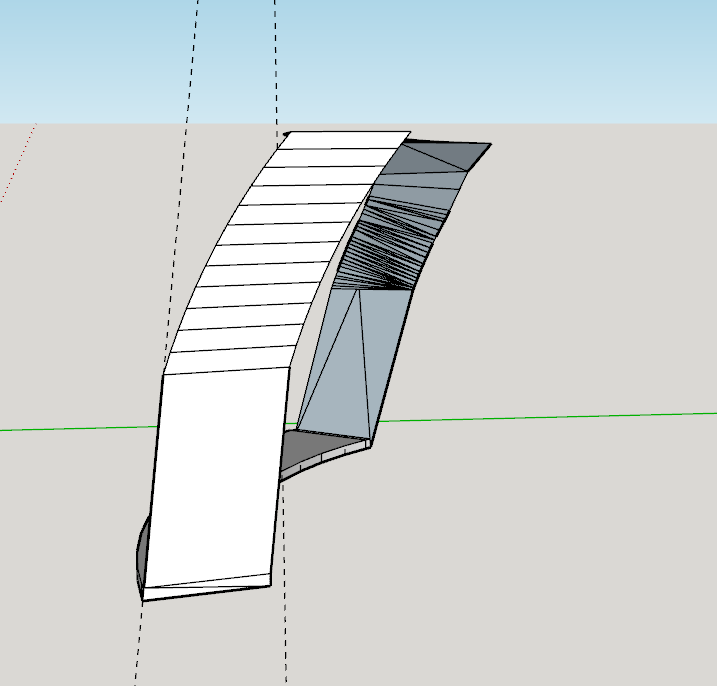
Its the same model. On my 1st post it was a first version. After your reply I made the 2nd version.
Thats when the odd deformity happened when trying to push/pull.
Then after your method of using Curviloft I got stuck with the rear side of the model. I do the exact same thing as with the front part (selecting all the lines and then using Curviloft) but the Curviloft interface does not give me any options anymore.
I did not use the Tools On Surface part just yet. I want to do that once the rear part is filled in.
It is necessary to take exactly the same steps that I showed you, otherwise you risk ending up in the situation you wrote about.
Is there a particular reason why you want to create the two faces with Curviloft and use Tools on surface at the end?
Because by trying this way, you will then need other steps to join the two inner perimeters.
The object that you made in the video seems to be symmetrical, which mine is not by a long long shot. And its on purpouse because that is how the taillight section is made on the car
Again. I might be missing something blatantly obvious as to why it wont work in this way.
What is the actual shape you want to achieve in the end?
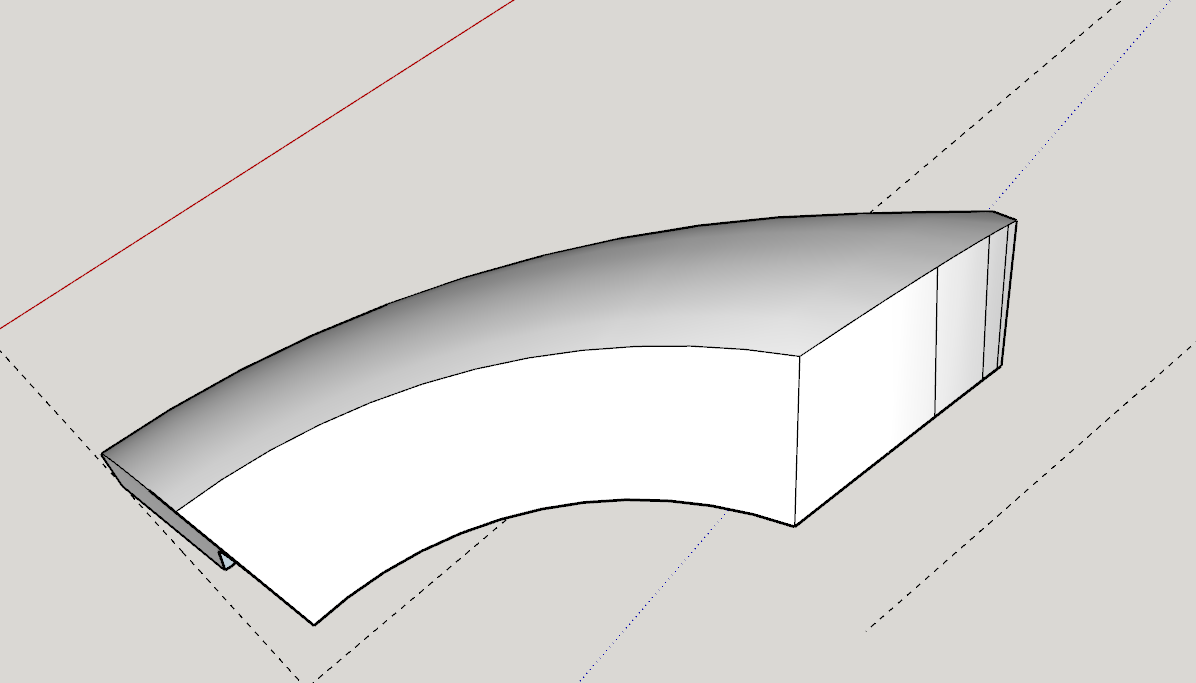
This was the first version that I wanted to “cut” to fit. But its not close enough. But this is what it should look like. So basically 2 thin 2mm walls with a 13mm low part to put LED’s in
All this information would have been useful in the first post, you would have gotten rid of so many questions.
That’s right, because I showed you what and how to do, seeing only a picture, without a 3D model or exact and complete dimensions to recreate what you drew. And all the other information that I found out after several questions.
Yeah I can see how those pictures did not give a complete representation of the model, sorry about that.
I managed to close the rear side by filling it in manually (Definitely not a best practice)
Now to make the hole and connect all the edges from the back to the front of the model to make the walls. This is probably the wrong way to do it but that seemed to work for the other 2 models that I made.