I’ve updated my database and shopping cart programming so now you should be able to renew your plugin (license) for the $20.00 renewal fee. You always have the option of purchasing multiple licenses at the full price, and the renewal form allows one to pick which serial number they would like to renew if they have multiple licenses.
It took me about 4 hours to make this work, unfortunately the paypal integration complicated things, that was not anticipated. Now my arm is on fire, good thing I’m going into surgery Thursday, I really need it at this point.
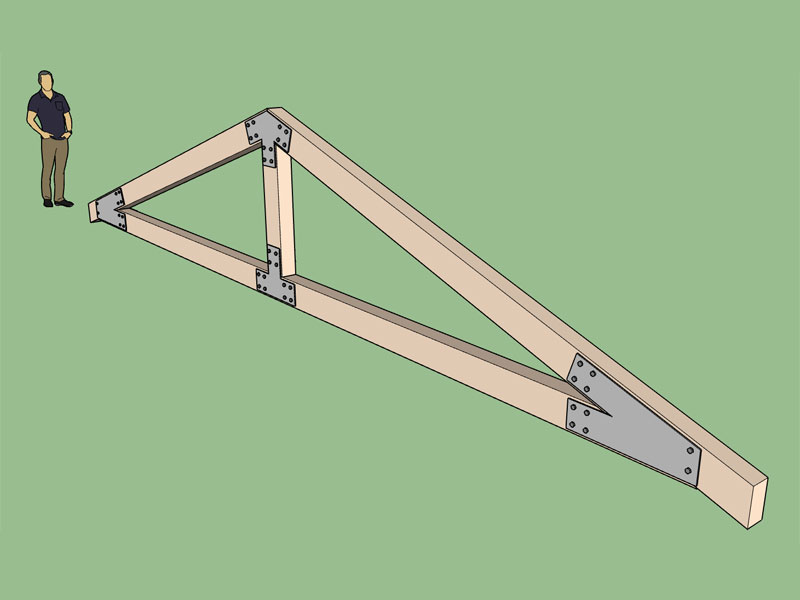
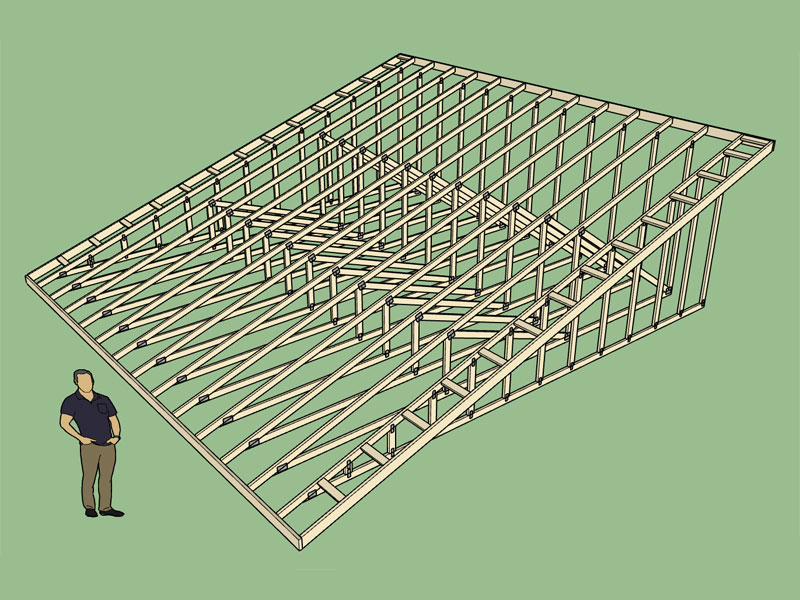
I need to review some of my old files (local residential designs) to get a better idea of timber truss designs but out of curiosity I attempted to manually create a sample timber truss to see how long it took me create one. About an hour into it I had come up with this:
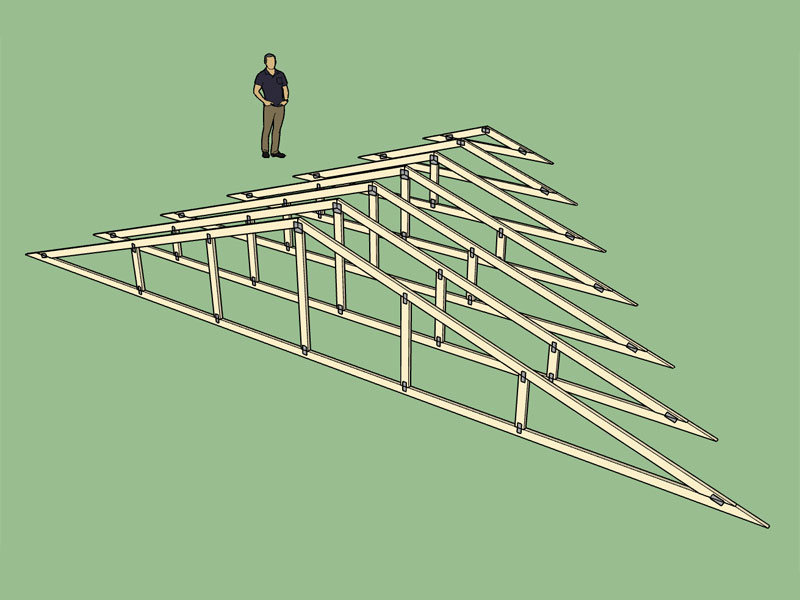
I like the new addition of the layers, it helps being able to hide certain aspects of the model. This has led me to think it might be useful to somehow implement materials (colors, textures), either at the layer level or based on the geometry (ie. specific color or texture for the I-joist web → OSB wood).
I’ve tried using the name “Wood OSB” to assign this material to a specific face(s) in my plugin. I must be missing something though since I can’t get it to work. My code is:
new_face1.material = "Wood OSB"
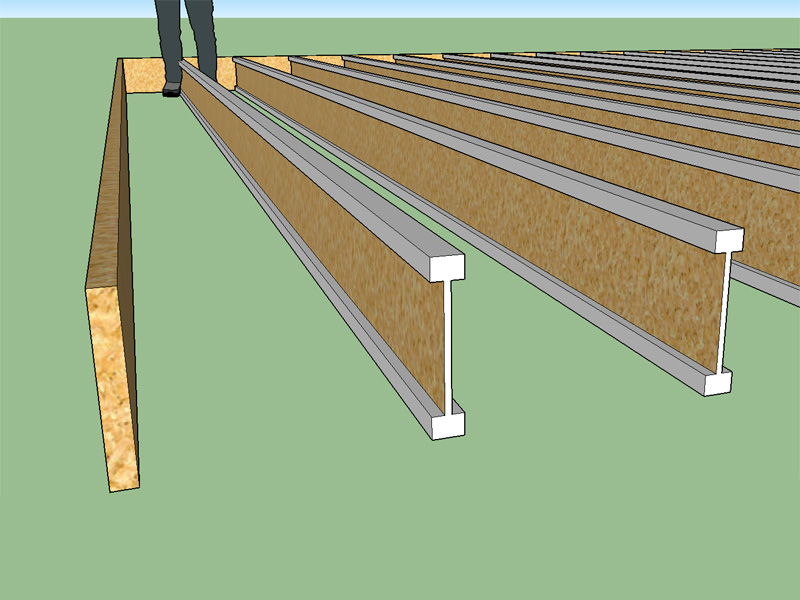
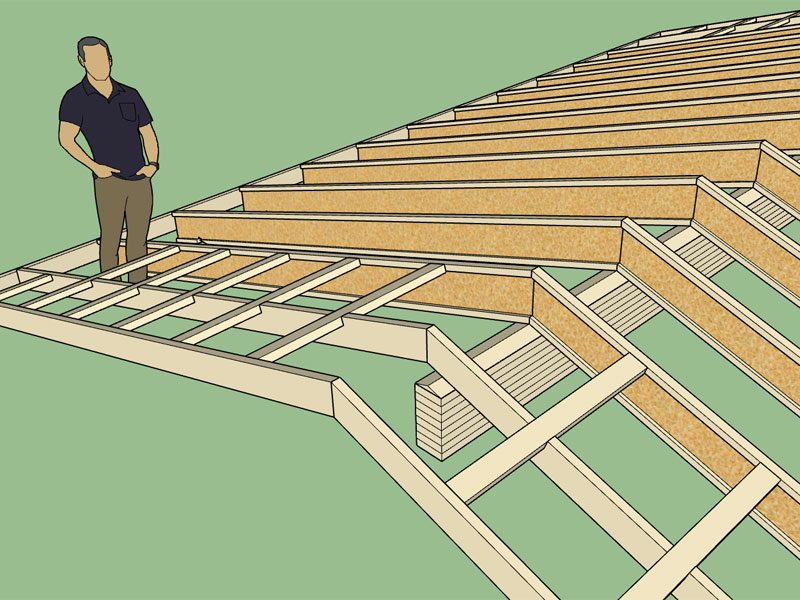
I am trying to achieve this effect:
My other issue is how to select the correct face to apply the material to. The plugin first creates the profile of the I-Joist as a face and then pushpull to create the solid group. Somehow I’ve got to figure out how to select the two web faces as shown above and then apply the material only to those two faces (exterior).
If you are going to use textures with wood grain then consider creating your joists vertical and then rotate and position the part into place. This way the grain will always be correct. Another benefit is the bounding box will always show the correct length, width and thickness. Simplifies things when you get to BIM.
Why are you making the I beams a single extrusion? If you made them as top chord, bottom chord, and web, it should be easy to apply a texture to just the web.
here’s a working example if you change the path to the image file…
# first you add a texture to the model
mod = Sketchup.active_model
mats = mod.materials

# add a material name you can use later
osb = mats.add('osb_tex')

# add a texture for the named material it could be in your plugins Resources/Materials Folder
# I downloaded one from  http://www.wildtextures.com/wp-content/uploads/wildtextures_OSB-board-seamless-texture.jpg

osb.texture = "/Users/johns_iMac/Documents/forum/wildtextures_OSB-board-seamless-texture.jpg"

# to test I just drew a profile with a 9" web height that I then 'pushpull', so then I need to find it...
ents = mod.entities
egdges = ents.grep(Sketchup::Edge)
edges.each do |e|
  next unless e.length == '9"'.to_l
  # due to the pushpull the last face will the new length face...
  # so add the material to it
  e.faces[-1].material = 'osb_tex'
end; nil
A big thanks to those on the SketchUcation and SU board who helped me with the custom materials part of the API, the SketchUp community is a great asset.
By default the metal plate connectors, custom layers and auto materials is turned off in the global settings.
Looking through some old plans I’ve managed to dig up I came upon a couple of designs by another engineering firm.
Typically when I’ve dealt with truss designs I always seen a scarf cut on the bottom chord with the top chord remaining un-notched. In this other example the bottom chord is kept intact and the top chord is scarf cut or notched, while still allowing a continuous section to extend for the overhang with a depth equal to at least 1/2 the top chord depth. I think the picture below explains this far better than I can with words:
Luckily I have a few samples to use as guides. Given my web configurations at this joint this seems to be the most reasonable method to plate this joint. Note that the plate should touch the interior corner and the exterior of the lower top chord but at the same time not project past the lumber into the spaces. Also the plate is rotated so that it is parallel to the upper top chords pitch.
The algorithm I devised to do this is quite clever I think but can be boiled down to a few concise lines of code: