Most of my models on FormFonts are fairly self-explanatory, but I thought I’d start a thread here with a few that have something of a back-story or have attributes or construction techniques that are more generally relevant.
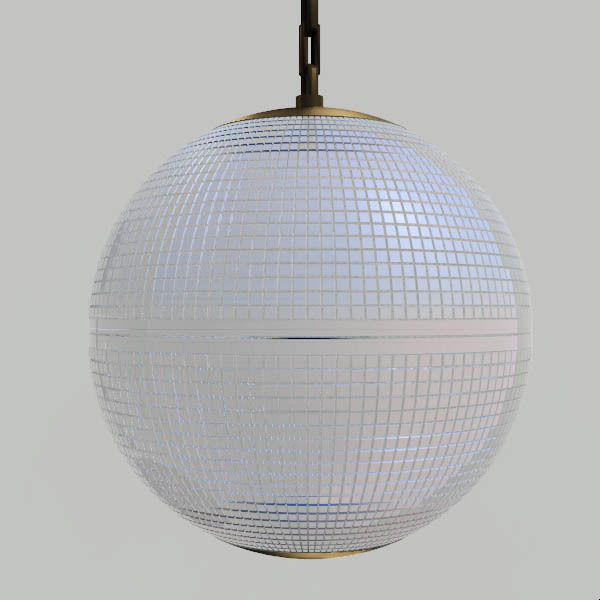
I recently had to model a prismatic pendant lamp (from Restoration Hardware.) It’s deceptively simple, but has a horrendous number of faces (25,900). It was clear from the start that image-mapping a simple sphere was not going to work, in terms of catching the light convincingly. So I had to make it in actual geometry.
This would be a really good argument for bump and normal maps in SU as a feature request…not for in the actual default display, obviously, but simply assigned, so they could be picked-up by all the various renderers.
Construction-wise, I drew a reasonably hi-res sphere, then reduced it to a single vertical half-segment. I then applied JPP before resizing all the top surfaces slightly smaller and arraying the segment back to a hemisphere.
This is rendered in Brighter3D
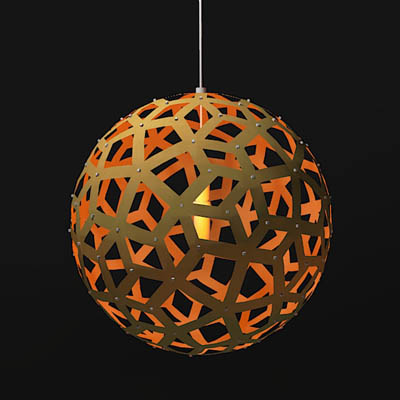
This was an absolute “bleep” to model. (I see the auto-censor is working) It’s the Coral Lamp by David Trubridge. The actual lamp is constructed from flat-pack thin ply sections that are assembled into a kind of geodesic sphere.
The hardest part was actually working out the pattern and the tesselations. If you look carefully you can see a largish pentagon with spokes and a smaller shape like an isometric cube. http://formfonts.com/files/1/15657/the-coral-lamp-david-trubrige-this-natureinspired-lamp_FF_Model_ID15657_1_corallight.jpg
Once I’d figured out the repeat, I constructed a sphere with the appropriate number of segments and “simply” drew it onto the surface.
I really dislike having to make tufted furniture. I find it very finicky and limiting. I especially don’t like having to do this kind of tufting that curves both vertically and horizontally. Still, the end result can look pretty good.
Of course you could just do a fairly blocky massing model then throw something like Artisan’s subdivide and smoothe at it, but the poly count would end up being pretty high…so I generally hand-build stuff like this.
The poly count on this is surprisingly low…about 6,400 faces…and that includes the piping and the cushions.
I decided that the way to go on this was to make a single vertical segment of the back, then array it in a curve. Looking at the number of buttons, it seemed that if I created a simple curved back with a segment vertex corresponding to each button (including the offsets in the middle row) then that would give me enough segments to create a decently curved unit.
So I constructed a simple, unstudded model of the back as well as a component of a single dimple.
Then placed copies of the dimple just behind the surface of the back…one for each of the rows. I then physically stitched these together to form a repeatable unit with the bulging, cushioned bits in between…paying special attention to getting that distinctive, diamond shaped pattern of creases running from button to button
I made a component of this and arrayed it in a curve, then manually tweaked any slight mismatching of vertices. Being a component, the tweaks obviously updated right along the whole curve.
The rest of the sofa was a breeze, in comparison.


